WishList LMS Courses turns your membership site into a full learning system. It helps you create courses and manage student learning.
This document explains the basics of WishList LMS Courses and demonstrates how to create and manage educational content.
Mise en place des cours
Before creating WishList LMS courses, configure the Global Course Settings for all courses on your site.
Select a course template for your website. The default template is the LaunchPad™ Courses template, which provides a full-screen, distraction-free layout with additional customization options.
Alternatively, disable the LaunchPad™ Courses template and use the Classic Courses template.
The Classic template displays as a standard WordPress post with your site’s post styling.
Course Listing Page
All public and protected courses display on the Courses Listing page of your website. By default, this page uses the /courses slug (for example, https://yourdomain.com/courses/). Modify the Course Listing page slug in the Global Courses Settings.
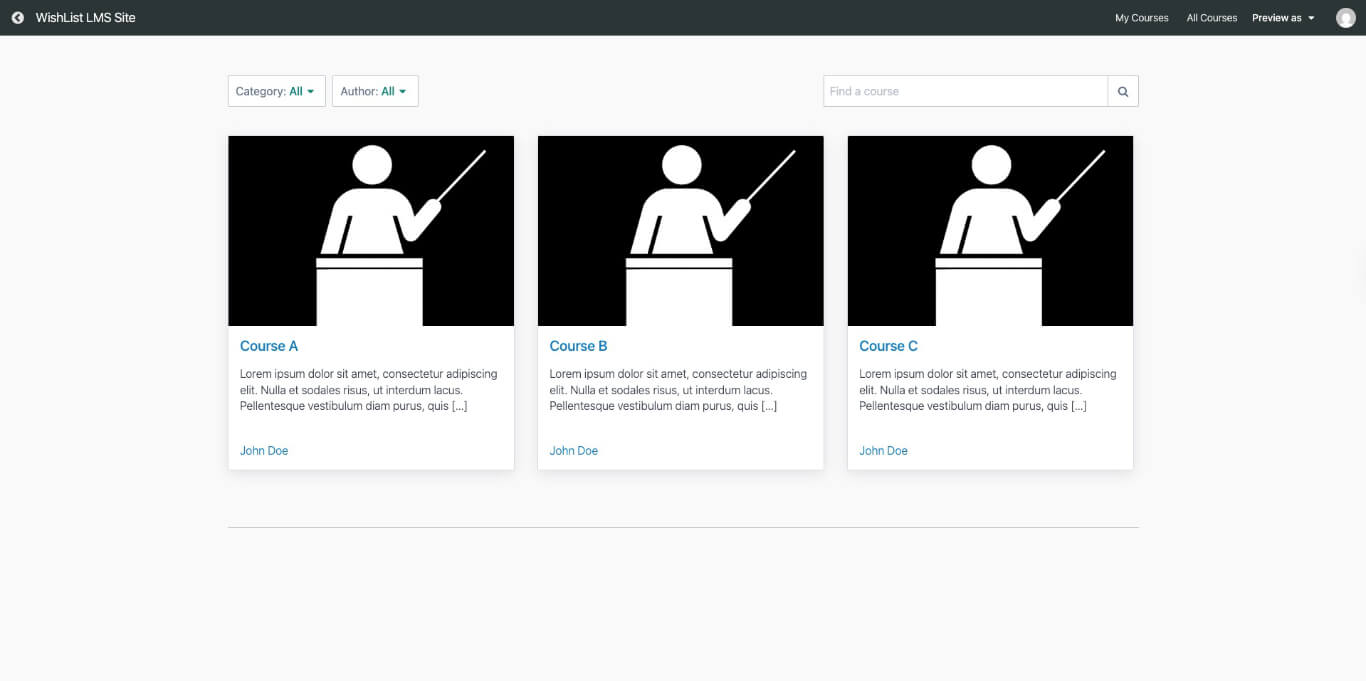
The Course Listing page shows your courses in a grid. Users can filter by category or author and search for courses. Visitors can browse and start any course they want.
Anyone can access the public courses. Users need to sign up for a membership to access protected courses.
Protected courses display with a padlock icon. Enable the Show Protected Courses option in the Global Course Settings to display protected courses.
WishList LMS Courses Elements
Adding courses to your website can help your business. You can offer free or paid courses to make money. It also lets you expand your services, try new business ideas, or run an online school.
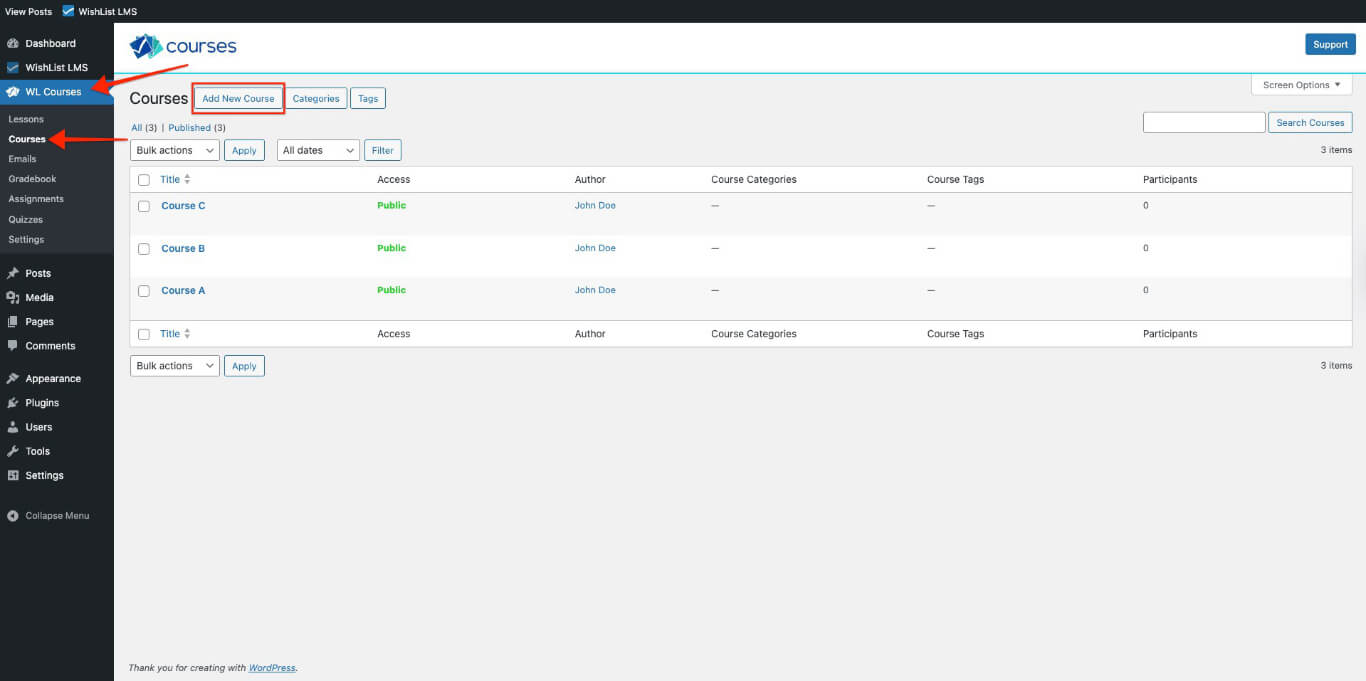
To access the courses section, follow these steps:
- Go to the Tableau de bord.
- Select on WL Courses > Course menu item.
- Cliquez sur le bouton Add New Course bouton.
When making WishList LMS Courses, it’s important to know what they include and how they work. Each course has the following elements:
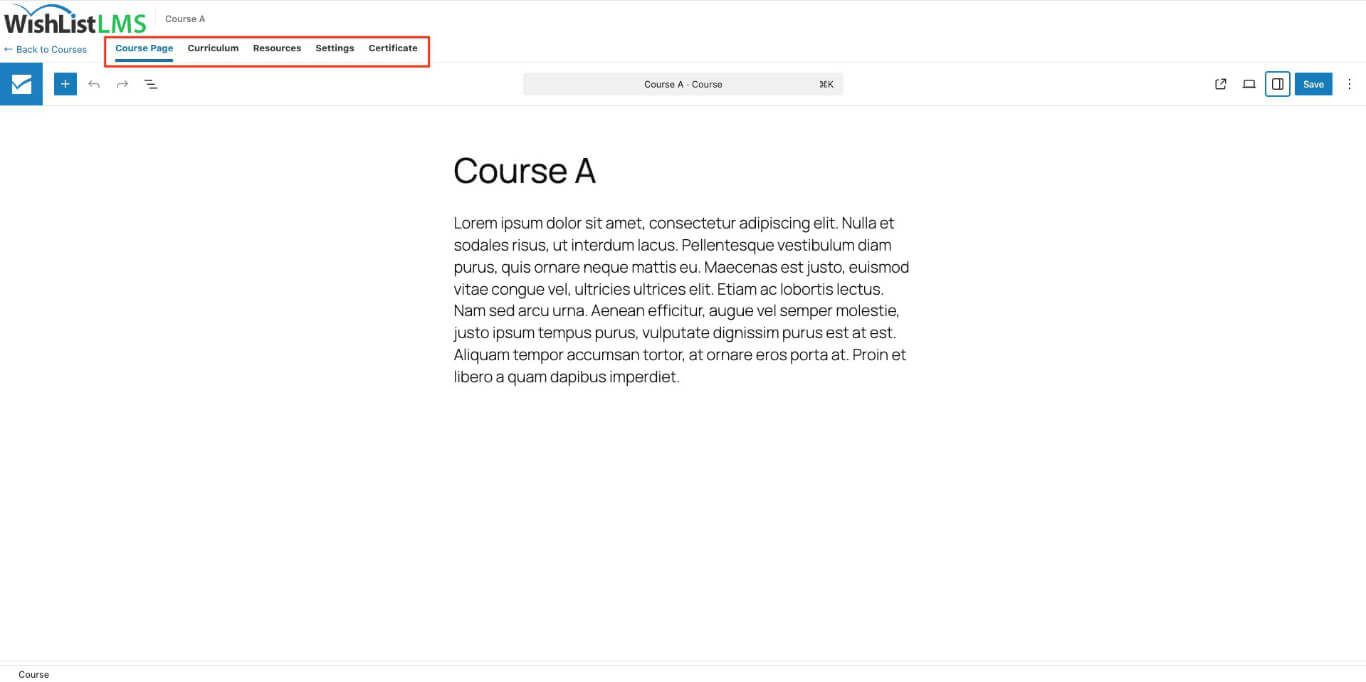
- Course Page: This is your course homepage. It shows the course details and any data you’ve added;
- Curriculum: The curriculum is made up of different sections and courses. On the backend, it is an editor to add, delete, or change sections and courses, and organize their order. On the front end, it shows students an overview of the course and lets them navigate through it;
- Sections: Sections are parts of your courses, like chapters or modules. They help organize your course items;
- Lessons: These are individual posts with information and materials, usually about one lesson;
- Quiz: Quiz items let you test student knowledge using multiple question types within a course;
- Missions: Assignment items let students submit work that instructors grade;
- Resources: You can add extra resources to your courses, like files, links, or custom items;
- Settings: The settings tab offers options to customize additional configurations for the courses.
- Include in Course Listing: If this course is enabled, it will appear on your main courses page. Turn off this setting to hide the course from the main course listing page;
- Lesson Title: When enabled, students see the lesson title above content while viewing a lesson. This applies only when using LaunchPad™ templates;
- Sales Page: If the course has a Sales page URL, the course URL will automatically redirect to that Sales page;
- Show Accordion on Course Page: Choose this option if you have many lessons and want to show them on the course page in an accordion format;
- Show Accordion on Sidebar: Choose this option if you have many lessons and want to display them in a collapsible format in the sidebar of lesson pages;
- Enable Dripping: You can set up your course so that Lessons are released on a fixed schedule after a user starts the course;
- Certificates: You can turn on certificates for any course. When it’s on, students will automatically get a certificate as proof.
Course Add-Ons
Additional add-ons extend WishList LMS Courses with features for testing, submissions, and grading. Install these from Dashboard > WL Courses > Add-ons.
- Courses Quizzes: Adds quiz items with multiple question formats for testing student knowledge;
- Course Assignments: Adds assignment items that students submit for instructor review;
- Gradebook: Tracks grades across quizzes and assignments in one consolidated view.
Protecting Courses and Enrolling Students
Restrict course access to paying members by linking courses to memberships. WishList LMS offers two methods: the Access Protection panel on each course, and centralized Rules for broader control.
Open a course, then configure the Access Protection panel to assign one or more memberships required for access. Alternatively, navigate to Dashboard > WishList LMS > Rules to create an access rule that targets multiple courses at once.