WishList LMS has Stripe built in, so you can accept debit and credit cards, Apple Pay, and Google Wallet. It also supports over 26 other payment methods, depending on your country and currency settings.
This document shows how to add more payment options in Stripe and WishList LMS.
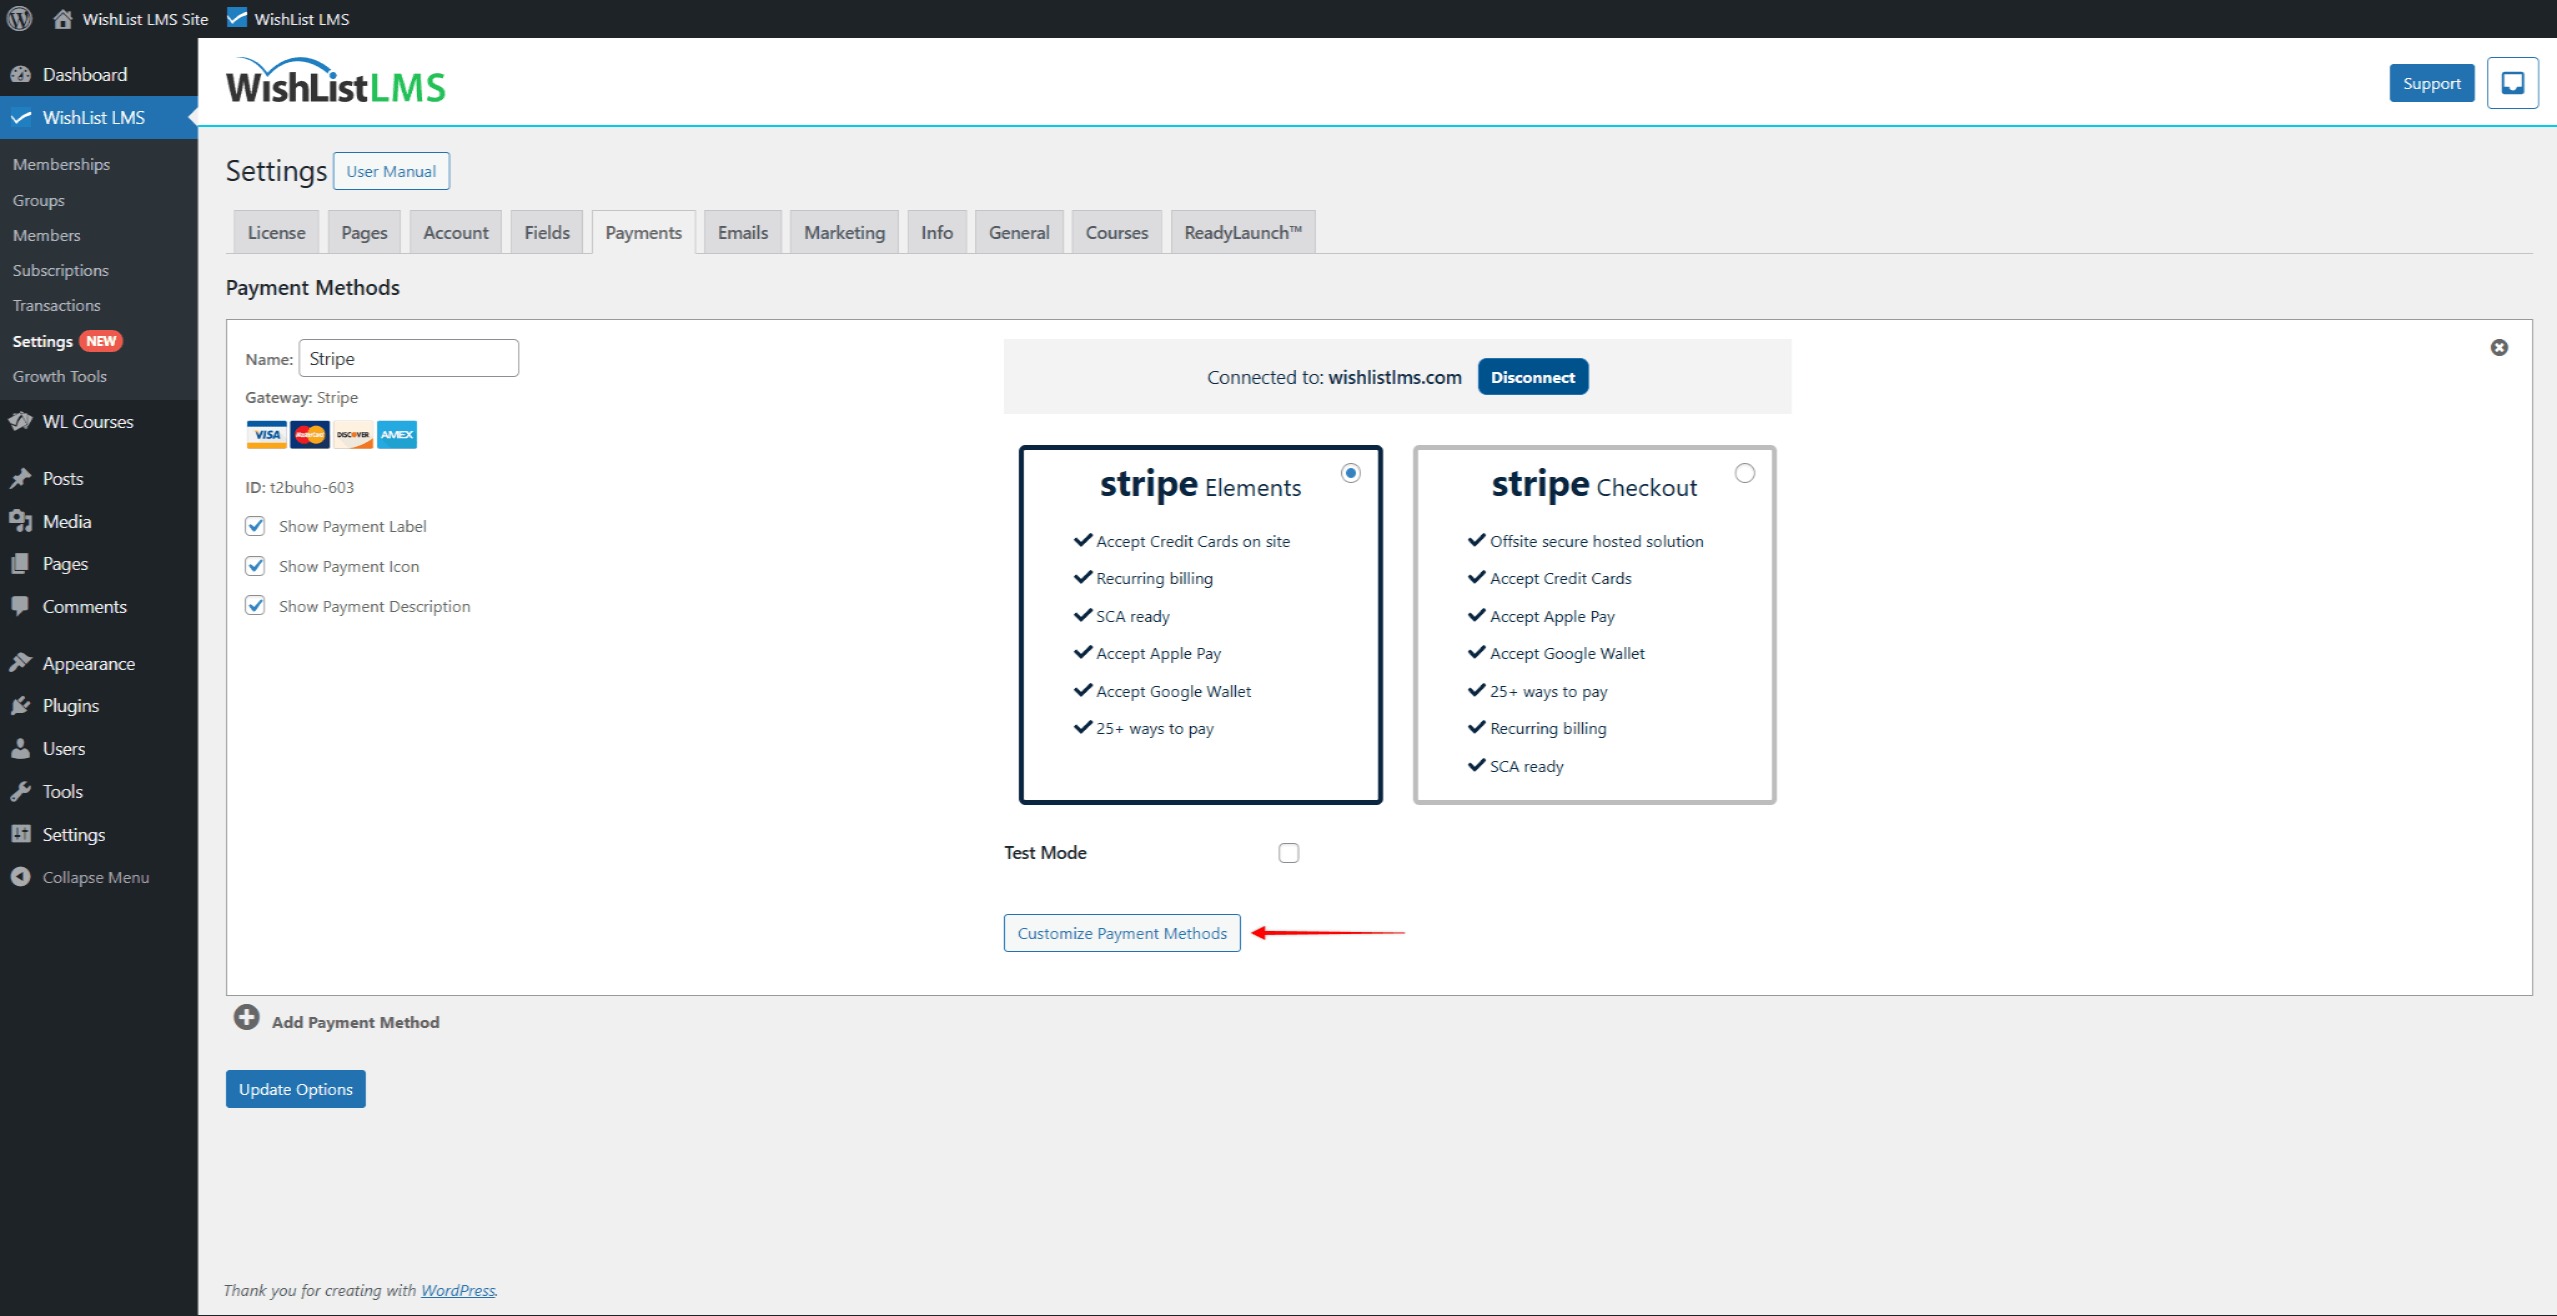
Connecting Stripe To WishList LMS
To use other payment methods, connect WishList LMS to your Stripe account.
If not connected, set it up on your website under Panel de control > Lista de deseos LMS > Configuración > Pagos.
Once you’ve connected your Stripe account to WishList LMS, turn on the payment methods you want.
Enable Payment Methods In Your Stripe Dashboard
Before activating any payment method in WishList LMS, turn it on in your Stripe Dashboard:
- Log in to your Stripe Dashboard.
- Ir a Settings > Payment Methods.
- Locate the payment method you want to offer and click Encender.
- Complete any verification steps Stripe requires for that method.
Enable Payment Methods In WishList LMS
You can set up Stripe payment methods in WishList LMS and activate these options on your registration forms by turning on payment options:
- Access your website’s Dashboard (Backend) again.
- Vaya a Panel de control > Lista de deseos LMS > Configuración > Pagos tab and scroll down to your Stripe gateway settings.
- Haga clic en el botón Customize Payment Methods button to open a pop-up.
- Enable the payment methods needed and click the Actualización botón.
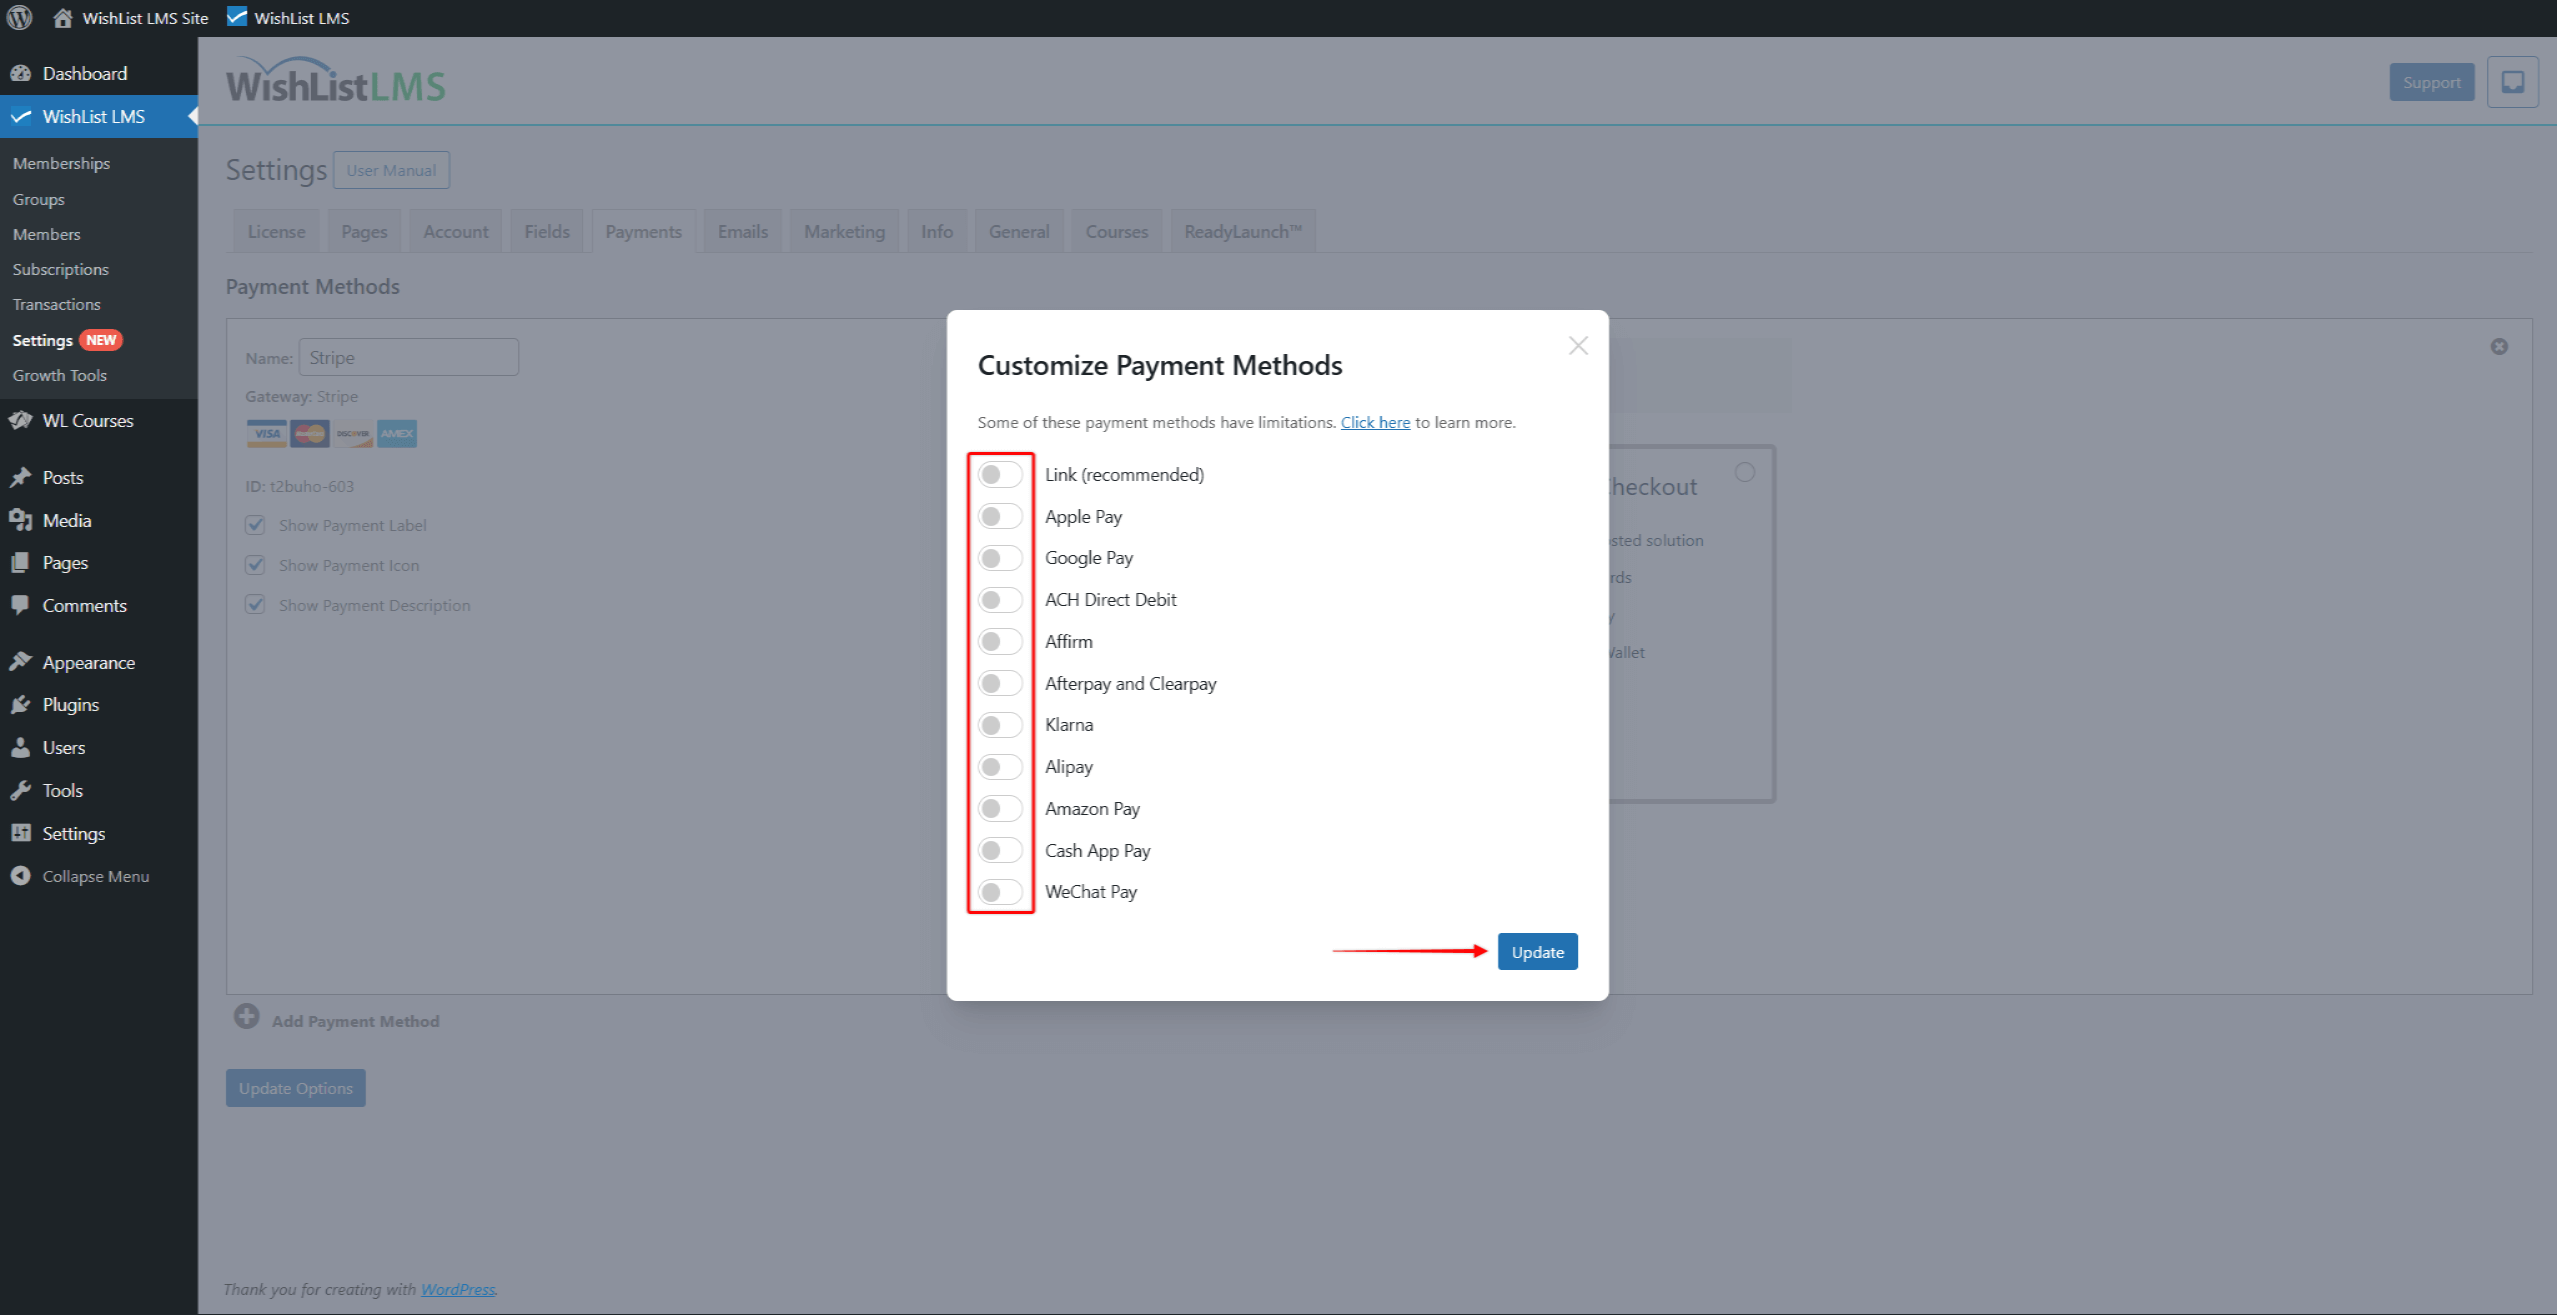
- Haga clic en el botón Opciones de actualización button at the bottom of the Payments page to save changes.
When users choose Stripe on your registration page, they’ll see the payment options available. The methods enabled will be visible within Stripe Elements or the Stripe Checkout forms.
Available Payment Methods And Limitations
Each payment method has limitations on currency, supported payment types (like recurring or one-time payments), and availability in different countries.