Boleto is a payment method in Brazil controlled by the Central Bank. This method allows customers to purchase memberships using vouchers and supports payment by cash or bank transfer.
This guide explains how to set up Boleto payments in the WishList LMS with Stripe.
Requisitos previos
Before using Boleto, make sure everything is ready.
- First, your website needs an SSL certificate to process payments securely;
- Verify your Stripe account and connect it to your bank. New accounts may require several days for approval. Complete this process before launching your membership site;
- Set the country in your Stripe account and WishList LMS settings to Brazil;
- Fije el currency to BRL in WishList LMS settings;
- Finally, connect Stripe to WishList LMS on your website.
Enabling Boleto in Your Stripe Dashboard
Before activating Boleto in WishList LMS, enable it in your Stripe Dashboard:
- Log in to your Stripe Dashboard.
- Ir a Settings > Payment Methods.
- Under Vouchers, locate Boleto and click Encender.
- Complete any verification steps Stripe requires.
Enable Boleto in WishList LMS
Wishlist LMS uses Stripe for Boleto payments. To use Boleto with WishList LMS, first connect it to your Stripe account. Once you have set up your Stripe account, you can then enable Boleto as a payment option in WishList LMS. Finally, follow these steps to enable Boleto on registration forms.
- Vaya a Dashboard > WishList LMS > Settings > Payments tab.
- Locate your connected Stripe gateway.
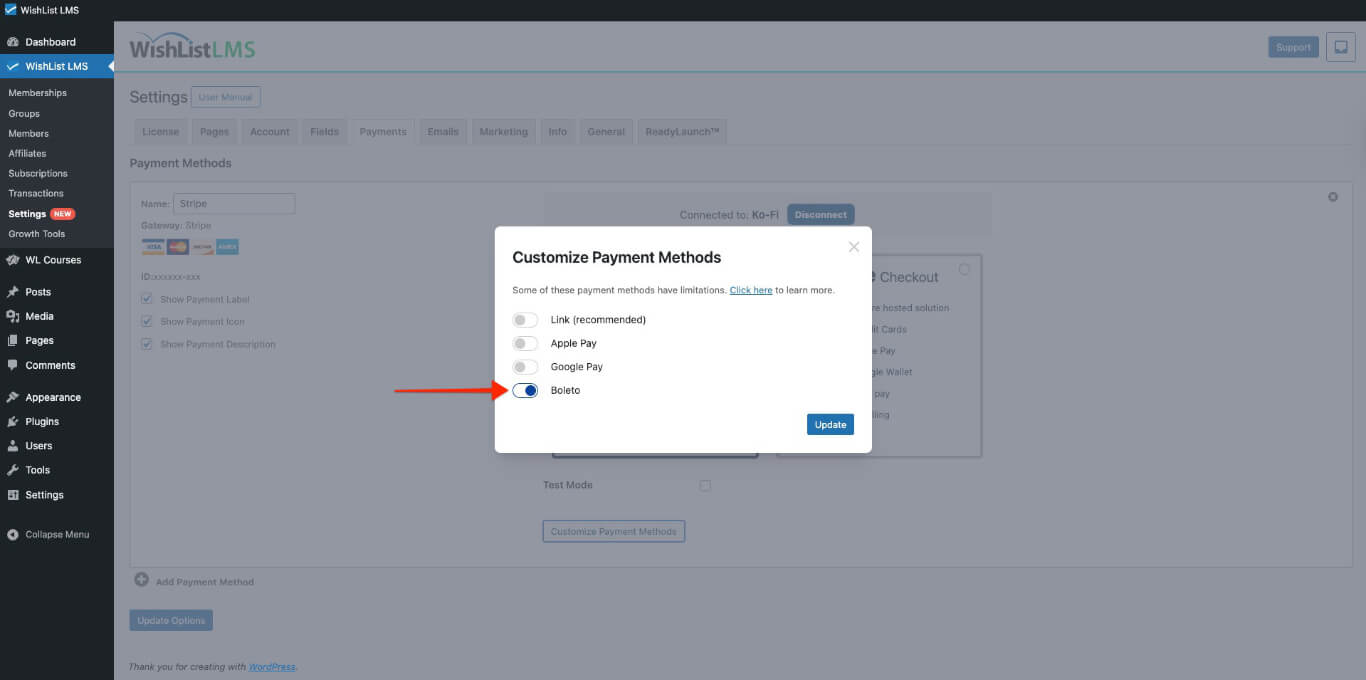
- Haga clic en el botón Customize Payment Methods botón.
- Alternar en Boleto opción.
- Haga clic en el botón Actualización button in the pop-up to save the settings.
For more details on setting this up, see the How To Enable Payment Methods With Stripe and WishList LMS documento.
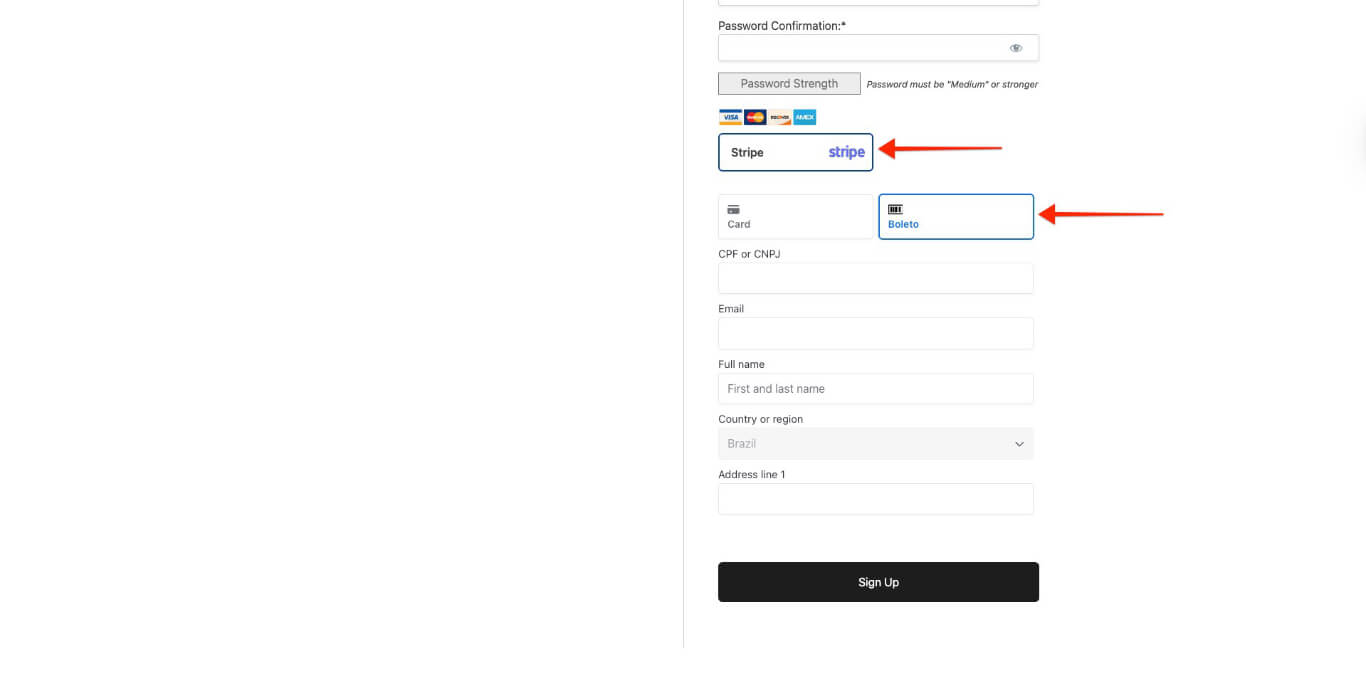
Membership registration forms will now show Boleto as a payment option. You can see this option on both Stripe Pago y Stripe Elements forms.
How Boleto Payments Work
When users register, they get a voucher with payment codes and a confirmation number. They must then go to a store or bank that accepts Boleto, pay in cash, and complete the payment.
Stripe sends a payment success message to your site the next business day. If the voucher isn’t paid by the expiration date, Stripe sends a failed payment alert.
Key Information About Using Boleto
The system displays the Boleto payment option only when users meet certain requirements. Additionally, users must follow specific rules set by Boleto and Stripe.
Boleto is only used for one-time payments. It doesn’t show up on pages for regular memberships that happen repeatedly. Boleto also can’t handle payments that are delayed or split. So, it’s not an option for free memberships or payments that are planned for later.
Furthermore, the minimum amount per transaction is R$5.00, and the maximum is R$49,999.99.
Moreover, users can pay vouchers only in cash in Brazilian Real at approved places that accept Boleto.This option is only for customers in Brazil.
Finally, customers pay in cash, which causes delays in payment notifications. It takes an extra business day for Boleto to process the payment and send a notification to WishList LMS whether the payment was successful or not.
Grace Period Considerations
WishList LMS usually gives users a 1-day period to complete their payment. During this time, they can access protected content instantly. After 24 hours, their access is removed unless the grace period is extended to match the payment confirmation time.
To do this, you would need to add the following code snippet to your site:
add_filter('wlms_grace_init_days', function() {
   return 14;
});
This code sets a 14-day grace period. You can change the number of days by editing the line below.
return 14;
If you use the mentioned payment methods for your renewals, the same issue might happen; therefore, you need to add a second code snippet to extend the grace period on renewals.
add_filter('wlms_grace_expire_days',  function($days) {
   return 1;
});
Change the grace period duration for this code, as you did before for the first code.
After updating the grace period in both code snippets, you should then add them to your website’s functions.php file or, alternatively, use the WPCode plugin.
For more information about Boleto payments, see Stripe’s documentation.