OXXO is a convenience store chain in Mexico where customers can buy vouchers to pay for memberships on your website.
The WishList LMS integrates with Stripe to accept OXXO payments. This guide explains how to set up OXXO payments and the key requirements and limits.
Prerequisites
Before enabling OXXO payments on your website, verify the following requirements are met.
- First, your website needs an SSL certificate for secure payments;
- Verify your Stripe account and connect it to your bank. New accounts may require several days for approval. Complete this before launching your membership site. Set your Stripe account country to Mexico to accept OXXO payments;
- Set the currency to MXN (Mexican Peso) in WishList LMS > Settings > General tab;
- Finally, connect Stripe to WishList LMS on your website.
Enabling OXXO in Your Stripe Dashboard
Before activating OXXO in WishList LMS, enable it in your Stripe Dashboard:
- Log in to your Stripe Dashboard.
- Go to Settings > Payment Methods.
- Under Vouchers, locate OXXO and click Turn on.
- Complete any verification steps Stripe requires.
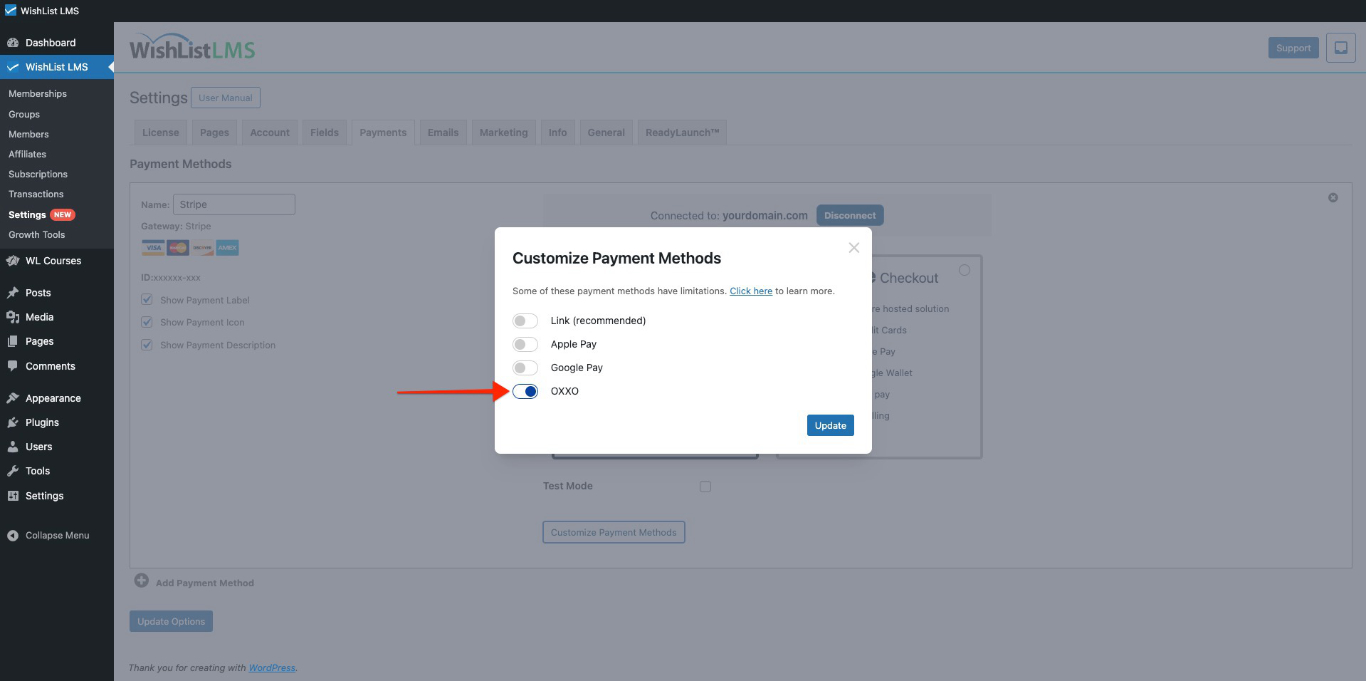
Setting Up OXXO Payments
- Navigate to Dashboard > WishList LMS > Settings > Payments tab.
- Locate your connected Stripe gateway configuration.
- Click the Customize Payment Methods button.
- Enable the OXXO option within the pop-up.
- Click the Update button to save the changes.
How OXXO Payments Work
Once you enable OXXO, it will appear as a payment option on your membership forms, whether you use Stripe Checkout or Stripe Elements.
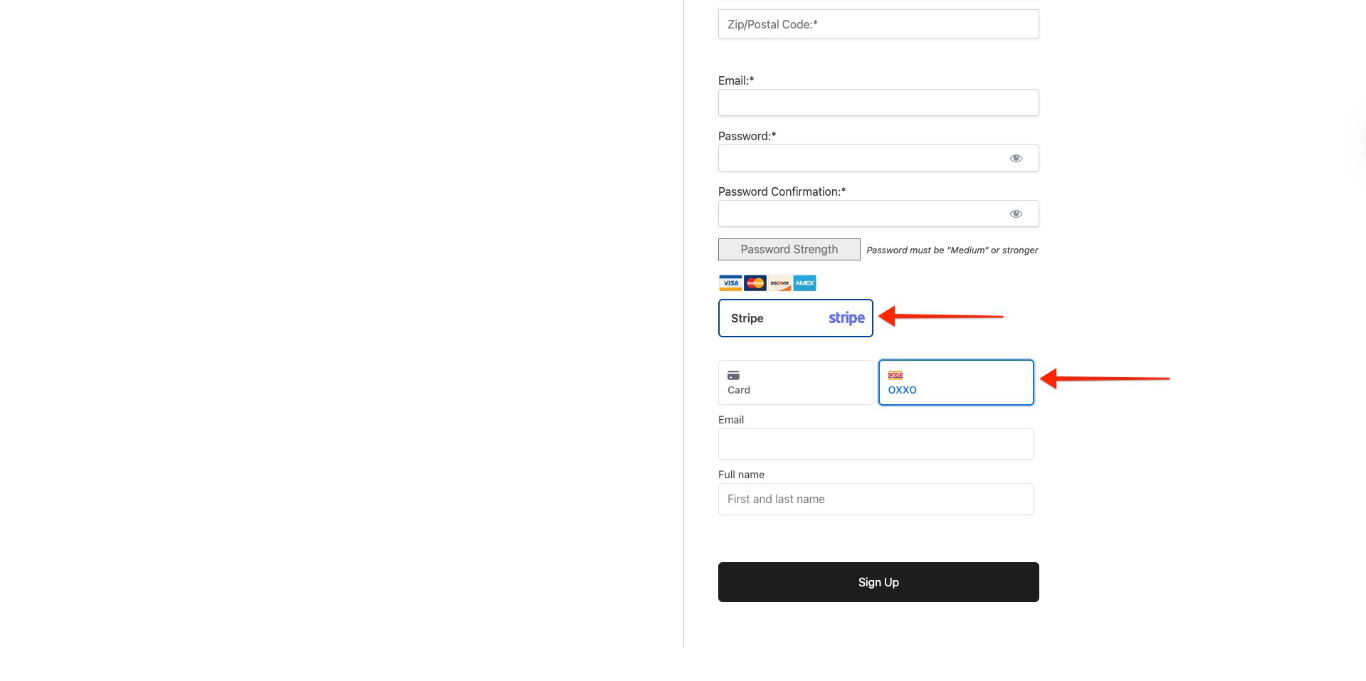
When users choose OXXO on the registration form, they receive a voucher with a reference number. Next, they need to take the voucher to any OXXO store. Finally, by paying with cash, they complete the process.
Stripe notifies your site about successful payments the next business day. Additionally, if the voucher isn’t paid by the expiration date, Stripe sends a failed payment notification.
Payment Type Restrictions
The OXXO payment option has some limitations that determine when customers can see it.
Subscription Type Limitations: You can use OXXO only for one-time payments. It doesn’t show up on registration pages for memberships that renew automatically. Moreover, OXXO does not allow delayed payments. So, you can’t use this payment method if you have a free or premium trial.
Transaction Amount Requirements: Each transaction must be at least 10 MXN and can be up to 10,000 MXN.
Geographic Restrictions: Users must pay OXXO vouchers in cash with Mexican Pesos at OXXO stores. Only customers in Mexico can use this payment method.
Payment Processing Timeline
OXXO payments involve delayed processing due to the physical payment requirement at stores.
By default, WishList LMS gives users 1 day of free access after subscribing. Consequently, they can see protected content right away for 24 hours; however, their access will stop until payment is confirmed.
You can extend the default grace period to accommodate additional time for payment completion and confirmation.
To do this, you would need to add the following code snippet to your site:
add_filter('wlms_grace_init_days', function() {
   return 14;
});
This code sets a 14-day grace period. You can change the number of days by editing the line below.
return 14;
If you use the mentioned payment methods for your renewals, the same issue might happen; therefore, you need to add a second code snippet to extend the grace period on renewals.
add_filter('wlms_grace_expire_days',  function($days) {
   return 1;
});
Change the grace period duration for this code, as you did before for the first code.
After updating the grace period in both code snippets, you should then add them to your website’s functions.php file or, alternatively, use the WPCode plugin.