Giropay is a bank redirect payment method for the German market. It allows customers to pay online directly from their bank account through real-time bank-to-bank transfers.
WishList LMS works with Stripe to accept Giropay payments. This guide shows you how to set it up and what you need to use this payment method.
Prerequisites
Before using Giropay, make sure everything is set up correctly.
- First, connect Stripe to your WishList LMS on your website. Next, test the payment to make sure it works before setting up Giropay;
- Set your WishList LMS currency to EUR to use Giropay.
Furthermore, configure your Stripe account to one of these supported countries:
Australia, Austria, Belgium, Bulgaria, Canada, Croatia, Cyprus, Czech Republic, Denmark, Estonia, Finland, France, Germany, Gibraltar, Greece, Hong Kong, Hungary, Ireland, Italy, Japan, Latvia, Liechtenstein, Lithuania, Luxembourg, Malta, Mexico, Netherlands, New Zealand, Norway, Poland, Portugal, Romania, Singapore, Slovakia, Slovenia, Spain, Sweden, Switzerland, United Kingdom, or United States.
Configuring Giropay Payment Method
First, enable Giropay in your Stripe Dashboard before activating it in WishList LMS:
- Log in to your Stripe Dashboard.
- Go to Settings > Payment Methods.
- Locate Giropay and click Turn on.
- Complete any verification steps Stripe requires.
Next, activate the option in WishList LMS by following the steps below:
- Navigate to Dashboard > WishList LMS > Settings > Payments tab.
- Locate your connected Stripe gateway.
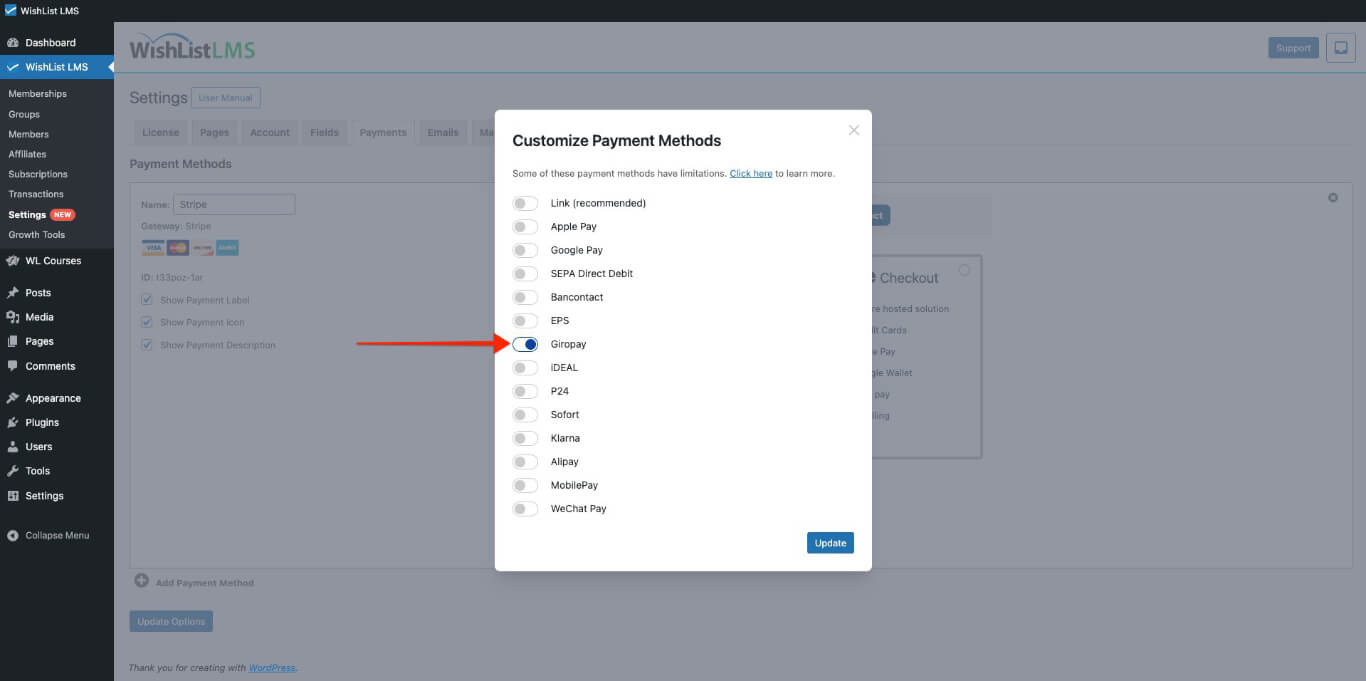
- Click the Customize Payment Methods button.
- Toggle on the Giropay option in the pop-up.
- Click the Update button in the pop-up to save changes.
Please check more details on setting this up in the “How To Enable Payment Methods With Stripe and WishList LMS” document.
Payment Process
Once you activate Giropay, it will appear as a payment option on your registration forms, whether you are using Stripe Checkout or Stripe Element.
When users register, they first visit the Giropay website to make their payment. Subsequently, after completing the payment, the system automatically redirects them back to your website.
Giropay Limitations and Restrictions
The system displays the Giropay payment option only when it meets certain rules. Giropay and Stripe set some limits.
- Giropay is only for one-time payments; therefore, it is not shown on registration pages for ongoing subscriptions;
- Giropay doesn’t support delayed payments; therefore, it’s not available for membership levels with free or trial options;
- Giropay payments are only available for customers in Germany.
For additional information, consult the Giropay payments documentation provided by Stripe.