Bancontact is a popular way to pay online in Belgium. It lets customers pay directly from their bank accounts in real time.
The WishList LMS works with Stripe to accept payments via Bancontact. This guide shows how to set it up and use Bancontact on your membership site.
Prerequisites
Before enabling Bancontact, ensure these requirements are met:
- Your website has a valid SSL certificate for safe payments;
- A verified Stripe account with a linked bank account;
- Connect Stripe with WishList LMS for payments;
- Currency set to EUR in Dashboard > WishList LMS > Settings > General tab;
- The Stripe account is configured for one of the supported countries listed below.
Receiving Payments With Bancontact
WishList LMS only accepts Bancontact through Stripe. First, connect Stripe to your website. Then, test the payment to make sure it works.
Enable Bancontact in WishList LMS
First, enable Bancontact in your Stripe Dashboard before activating it in WishList LMS:
- Log in to your Stripe Dashboard.
- Go to Settings > Payment Methods.
- Locate Bancontact and click Turn on.
- Complete any verification steps Stripe requires.
Next, activate the option in WishList LMS:
You can turn on Bancontact in WishList LMS by following the steps below:
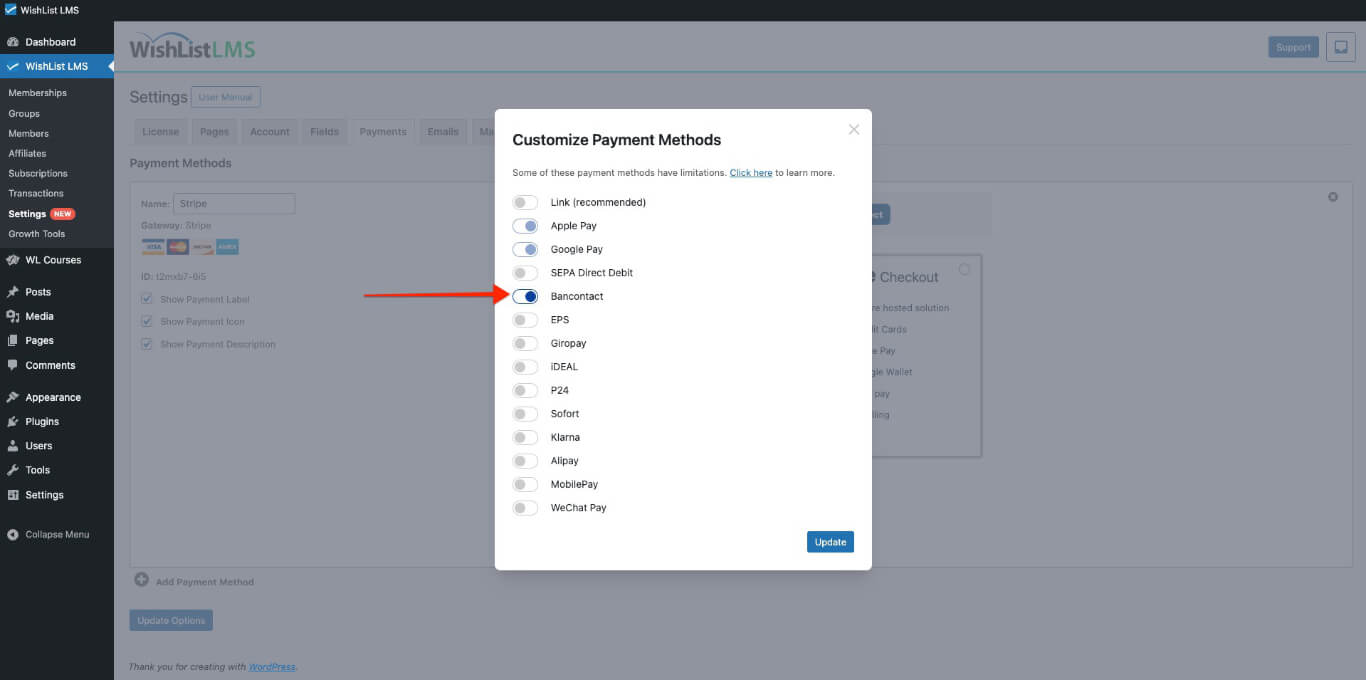
- Navigate to Dashboard > WishList LMS > Settings > Payments tab.
- Locate your connected Stripe gateway.
- Click the Customize Payment Methods button.
- Enable the Bancontact option under additional payment methods.
- Click the Update button in the pop-up to apply the configuration.
Please check more details on setting this up in the “How To Enable Payment Methods With Stripe and WishList LMS” document.
How Bancontact Payments Work
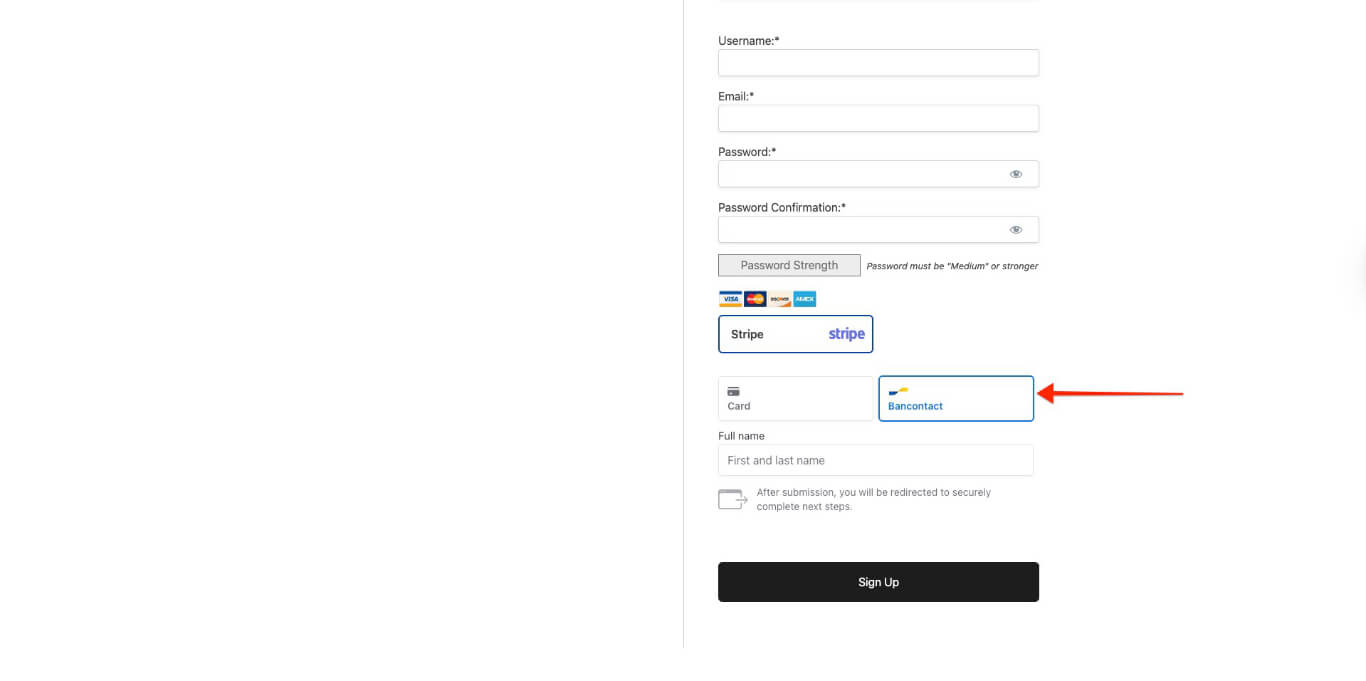
Once set up, users will see Bancontact as a payment option on the registration forms, both in Stripe Checkout and Stripe Elements.
The Bancontact payment process follows these steps:
- Customer chooses Bancontact as the payment method.
- Customer completes the membership registration details and submits the registration form.
- The system takes the customer to Bancontact’s Authorization page.
- The customer authorizes the payment arrangement with Bancontact.
- After payment, the system takes the customer back to your website.
- WishList LMS activates memberships.
Important Limitations of Bancontact
The Bancontact payment option only shows up when certain conditions are met. There are also some rules set by Bancontact and Stripe that need to be followed.
- Transaction Types: Bancontact is only for single payments. It won’t appear on registration pages for ongoing memberships.
- Trial Periods: Bancontact doesn’t support paying later. Because of this, it can’t be used for memberships with free or trial periods.
- Currency Requirements: Bancontact allows direct transfers from Belgian banks to your business account. To use it with WishList LMS, set the currency to EUR in the settings.
Supported Countries
Your Stripe account needs to be set up for certain countries to accept Bancontact payments from Belgian customers:
Australia; Austria; Belgium; Bulgaria; Canada; Croatia; Cyprus; Czech Republic; Denmark; Estonia; Finland; France; Germany; Gibraltar; Greece; Hong Kong; Hungary; Ireland; Italy; Japan; Latvia; Liechtenstein; Lithuania; Luxembourg; Malta; Mexico; Netherlands; New Zealand; Norway; Poland; Portugal; Romania; Singapore; Slovakia; Slovenia; Spain; Sweden; Switzerland; United Kingdom; United States.
For more details on Bancontact payments, see the Stripe guide.