This document explains how to configure the Conta guia em WishList LMS Settings. The Account tab is essential for managing member activities and registration processes. Specifically, it controls user login and logout experiences. Additionally, it allows for a customized welcome message on the Account Page.
The Account Page, typically found at https://yourdomain.com/account, serves an important purpose. Specifically, it enables users to view their profiles, manage payments, and handle subscriptions. Moreover, it’s vital for controlling member access, ensuring a seamless experience for all users.
It also manages their overall experience on your site. You can configure the Account Page from the Pages tab in WishList LMS Settings.
Accessing and Understanding the Account Tab Settings
This section outlines, firstly, the location of the account tab. Additionally, it details the various settings available within this tab.
To reach the Account tab:
- Navigate to your WordPress Dashboard > WishList LMS > Settings.
- Click on the Conta tab.
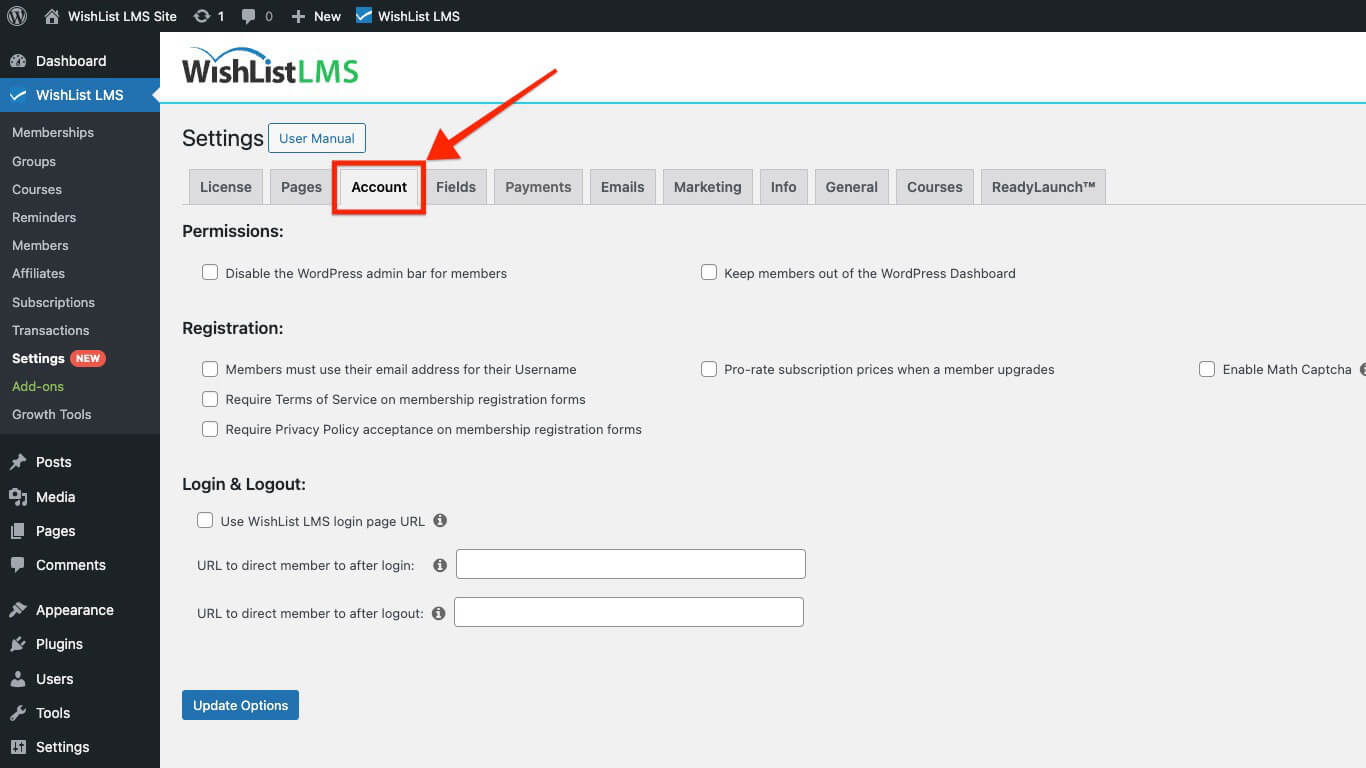
Within the Account tab, you’ll find three sections for configuration:
Setting Up Permissions
Permissions in WishList LMS control what users can do and see. This also helps prevent unauthorized access to important areas, like the admin dashboard. As a result, members can only see content that is meant for them.
- Disable the WordPress Admin Bar for Members: WordPress shows a black bar at the top when users log in. This setting hides the bar from regular members and only shows it to users with higher roles than “subscriber.”
- Keep Members Out of the WordPress Dashboard: Turn on this feature to prevent members from accessing the wp-admin. After logging in, it will send members to the URL you set in “URL to direct users to after Login“.
- Allow Members to Cancel Their Own Subscriptions: Enable this option to let members cancel active subscriptions from their Account page without administrator assistance.
- Allow Members to Pause and Resume Their Subscriptions: Enable this option to allow members to temporarily pause a recurring subscription and resume it later from their Account page.
Registration Options
This section covers member sign-up through email, prorate subscription upon upgrading, and Math captcha. It also explains options like using email as a username, and settings for Terms of Service e Política de privacidade.
- Members Must Use Their Email Address for Their Username: This setting removes the username field from registration forms. As a result, users can sign up and log in using only their email.
- Pro-rate Subscription Prices When a Member Upgrades: This feature only works after configuring membership groups as upgrade paths. When turned on, upgrade costs are adjusted based on the remaining time on the current subscription.
The WishList LMS gives credits when members downgrade. For example, a member paying $10 monthly switches to a $5 plan. They immediately receive two months of access at the reduced price. After that, the member is charged $5 each month.
- Enable Math Captcha: This option displays a simple math challenge on the registration form to prevent spam registrations.
- Enable Password Strength Meter: Displays a password strength indicator next to password fields on registration forms, encouraging stronger passwords.
- Show Coupon Field on Membership Registration Forms: Adds a coupon code input to registration pages so members can apply discount codes at checkout.
- Disable the Standard WordPress Registration Form: Prevents signups through the default WordPress registration page, requiring members to register through WishList LMS memberships instead.
- Disable the 1 Day Grace Period After Signup: Removes the default grace period that allows access immediately after registration. Members gain access only after the transaction status turns Complete.
- Disable Password Fields on Membership Registration Forms: Removes password fields from registration. WishList LMS auto-generates a password and sends it to the member by email.
- Enable Single Page Checkout: Combines account creation and payment into a single streamlined step for faster registration.
- Enable Single Page Checkout Invoice: Displays an order summary alongside the Single Page Checkout form for clear pricing visibility.
Enable Terms of Service and Privacy Policy
Require Terms of Service on Membership Registration Forms: This option adds a checkbox with a link to your Terms of Service page. Members need to check it to register.
When enabled, two additional options appear:
- URL to your Terms of Service page: Add a page link where your Terms of Service document is located;
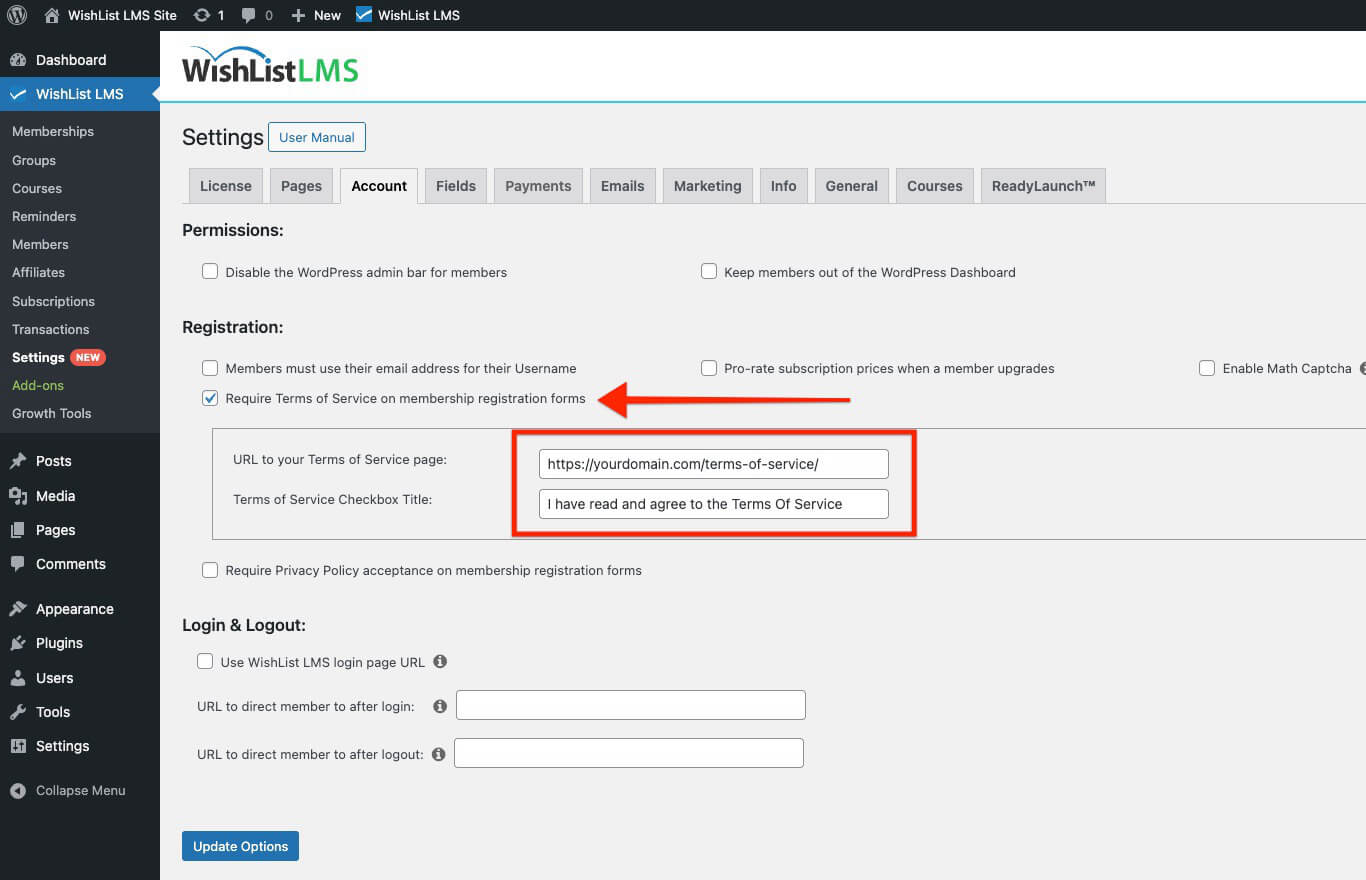
- Terms of Service Checkbox Title: The text shown next to the checkbox. It can be customized to say “Signup Agreement” or your preferred wording.

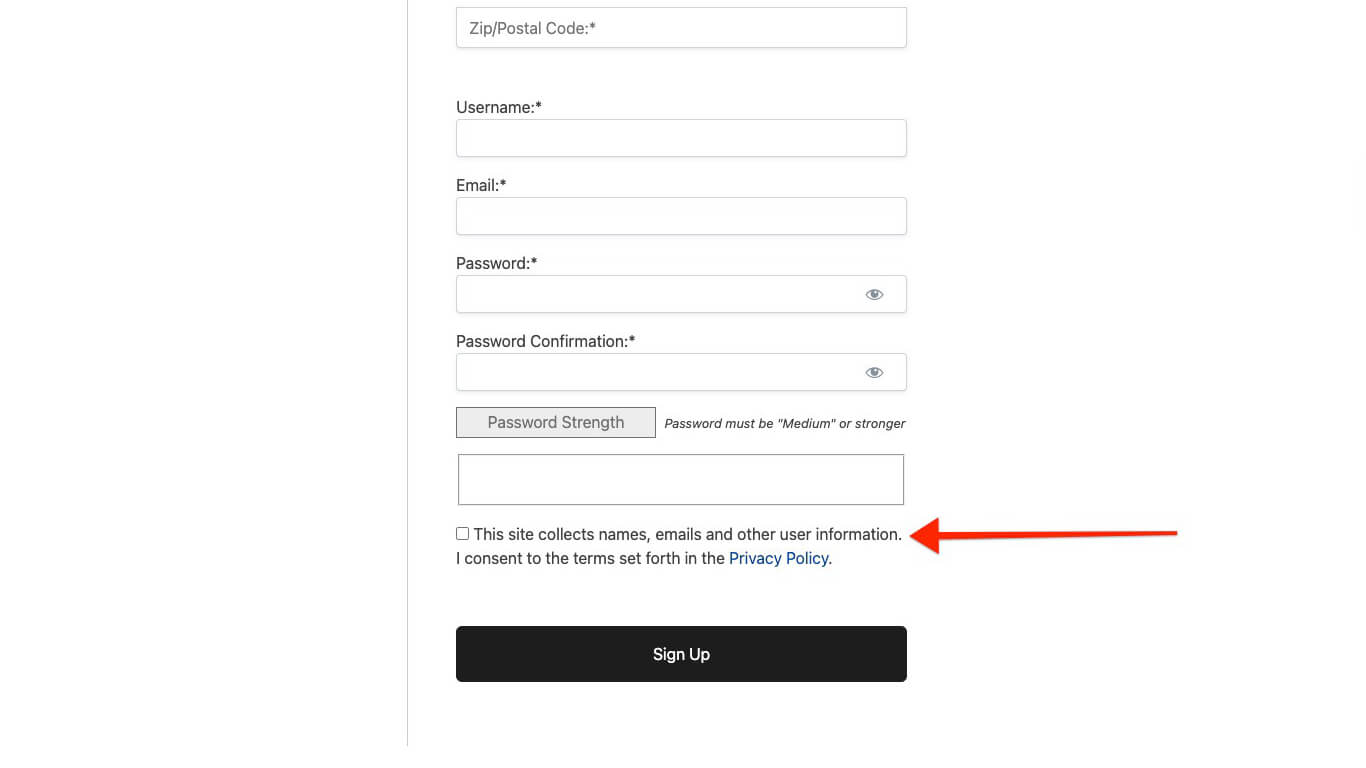
Require Privacy Policy Acceptance on Membership Registration Forms: This option adds a checkbox that links to your Política de privacidade. Members must check it to register, which is important for laws like GDPR.
Enabling this feature reveals two elements:
- Your Privacy Policy: The Privacy Policy page URL, configured in Dashboard > Settings > Privacy;

- Privacy Policy Checkbox Title: This customizable text field uses % (percent sign) symbols to create the link. For example, “I agree to the %Privacy Policy%.”
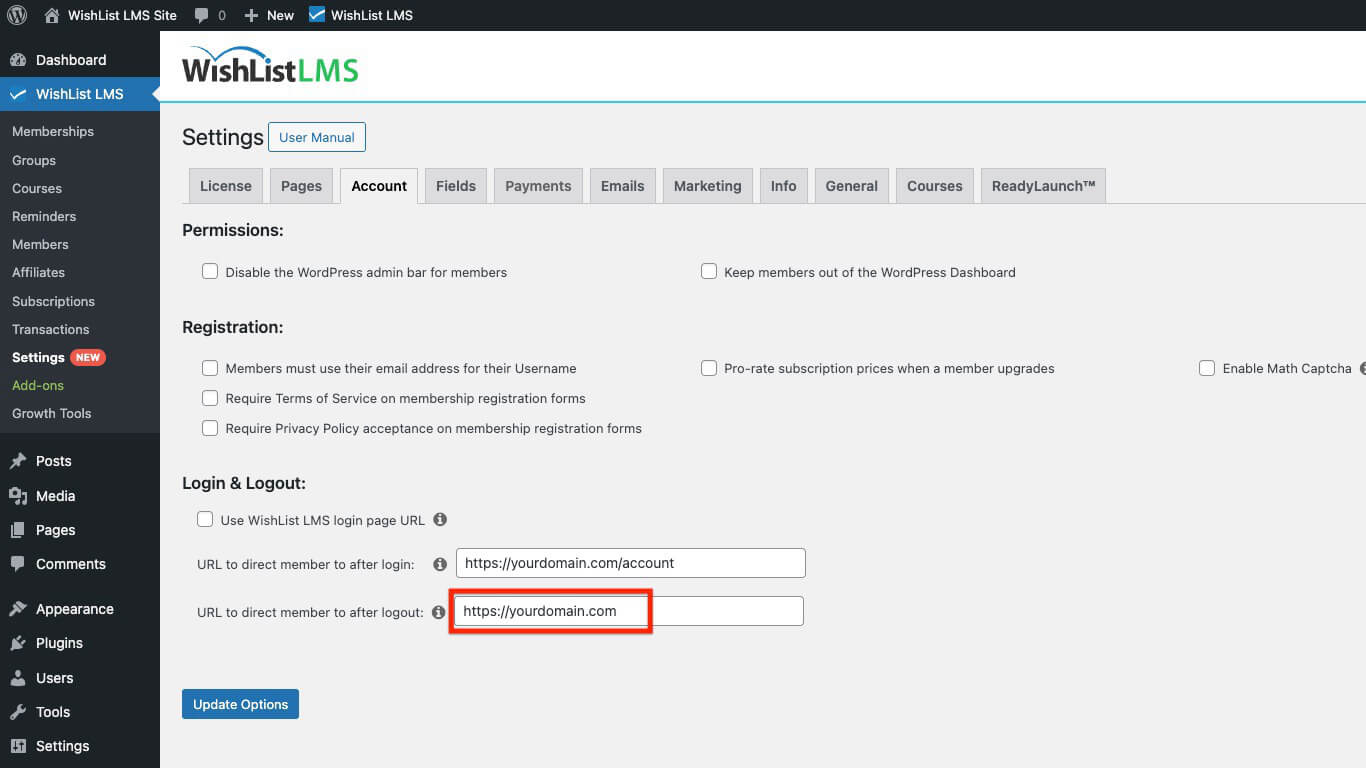
Login and Logout Options
This section shows how to handle user login and logout in WishList LMS. It explains where users go after logging in or out.
- Use WishList LMS login page URL: Turning on this feature changes the WordPress login link to your WishList LMS login page. It includes the /wp-login.php part; for example, www.yourdomain.com/login.
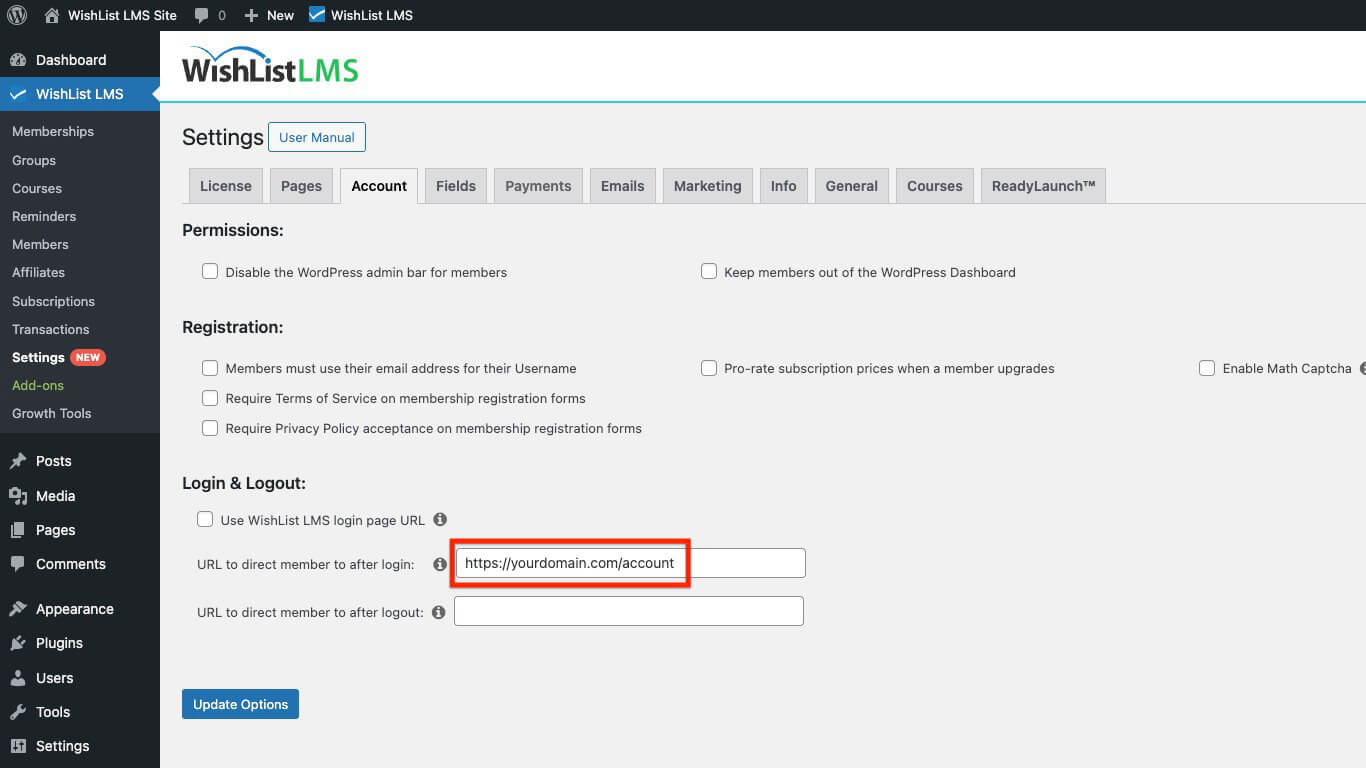
- URL to Direct Users to After Login: This feature lets you choose where members go after they log in. Normally, websites send users to the “Account” page, but you can choose any page. Just make sure to include the full URL, like “https://yourdomain.com/account“.
- URL to Direct Users to After Log-Out: This feature lets you set a URL for users after they log out. It works for both members and admins.
Common logout destinations are:
- A page that shows products to encourage more shopping;
- A thank you message page;
- Redirecting back to the login page.
Account Page Welcome Message
O Account Page Welcome Message setting lets you display a custom greeting on the member Account page. Use this field to welcome members, provide quick links, or highlight important information.
The welcome message appears at the top of the Account page for all logged-in members. The field supports HTML formatting for links and emphasis.