WishList LMS lets admins manually add existing subscriptions. Additionally, you can connect active subscriptions from supported payment gateways to effectively manage your membership site.
This document explains how to add subscriptions manually and shows different ways to do it in different situations.
When to Manually Add Subscriptions
You need to add subscriptions manually when they are active in payment gateways; however, they don’t show up in WishList LMS. Common reasons include:
- Adding subscriptions from outside the WishList LMS;
- Subscriptions are not included in the main import files;
- Individual subscriptions are not needed when a bulk import is done.
For many subscriptions, use bulk import instead of adding each one manually.
Prerequisites
To ensure a smooth process, make sure these requirements are met before adding subscriptions manually:
- Active SSL certificate for secure data;
- Connected the payment gateway in WishList LMS settings;
- Existing user or the ability to create a new user;
- Published membership levels in WishList LMS.
How to Manually Add Subscriptions
The manual subscription process has three easy steps:
Step-1: Add or Verify User Account
For Existing Users
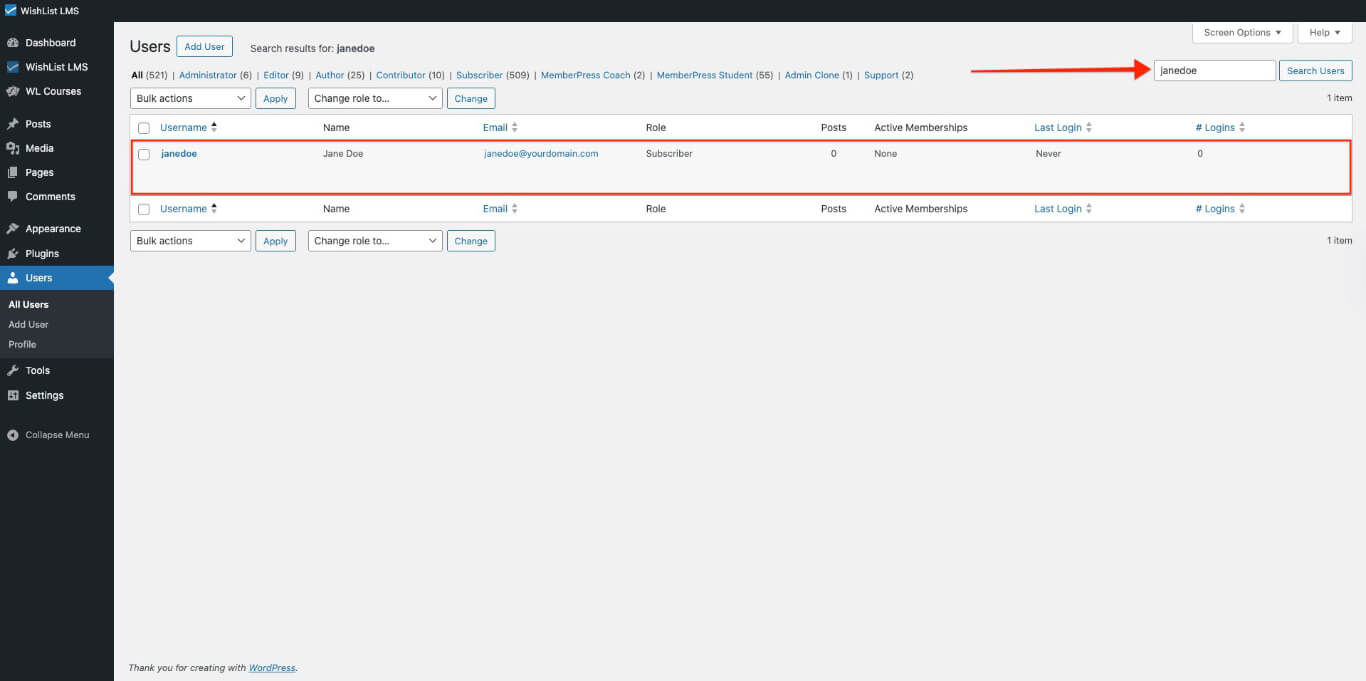
- Navegue até Painel de controle > Usuários in WordPress.
- Find the customer by their username ou email.
- Use the username to create a subscription.
For New Users
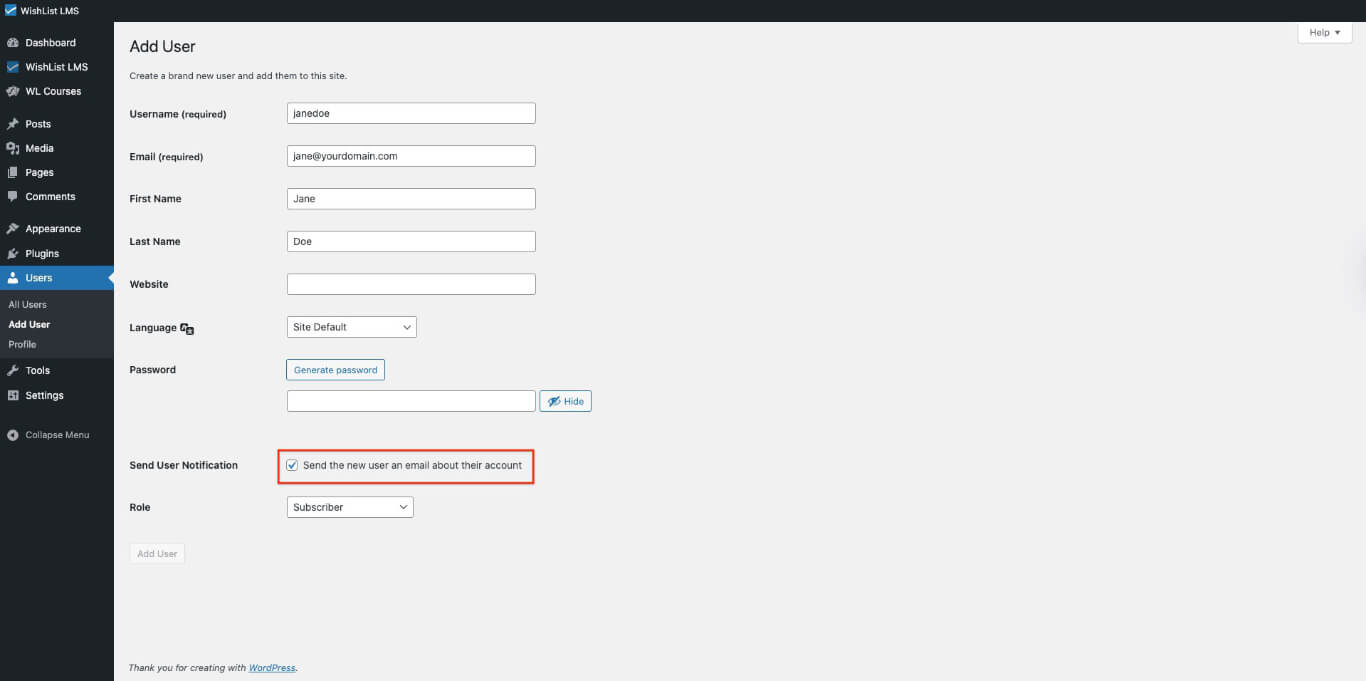
- Navegue até Dashboard > Users > Add User.
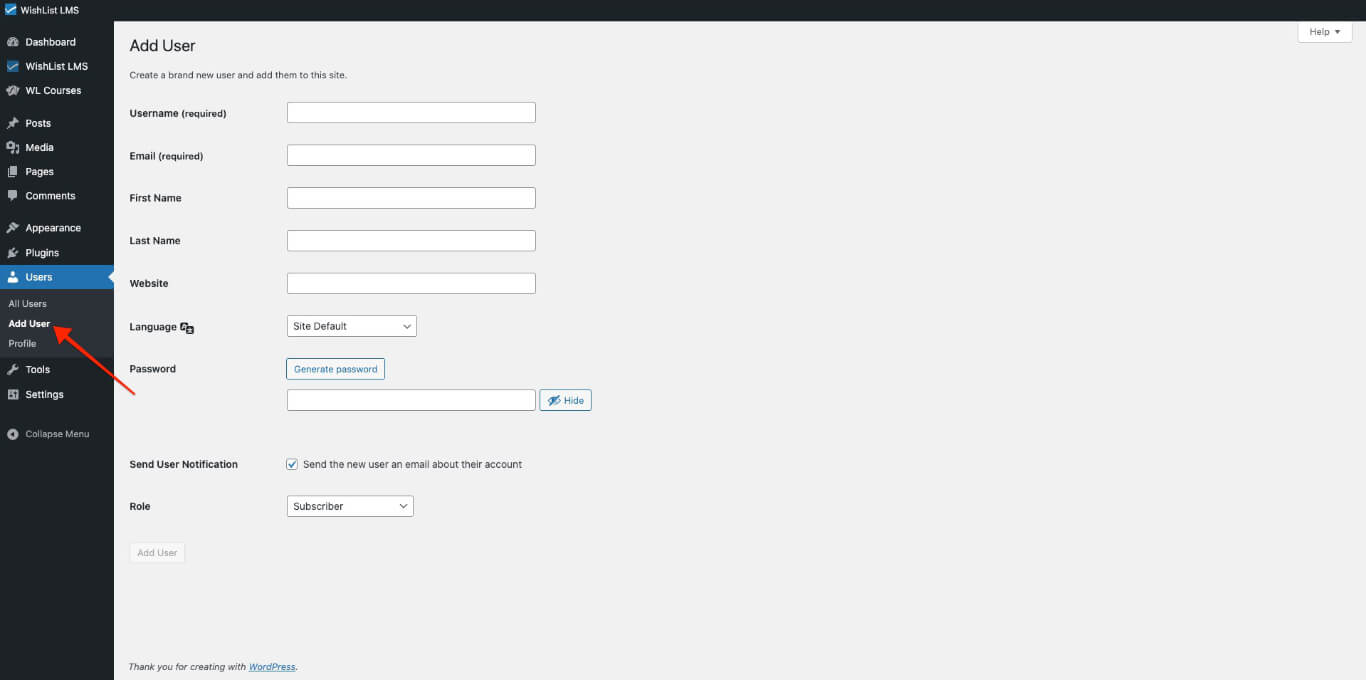
- Fill in the username, email, and password.
- Keep the “Send the new user an email about their account” option checked.
- Select a Role for the user.
- Clique no botão Add New User botão.
Step-2: Create Subscriptions Record
- Navegue até Painel de controle > Lista de desejos LMS > Assinaturas.
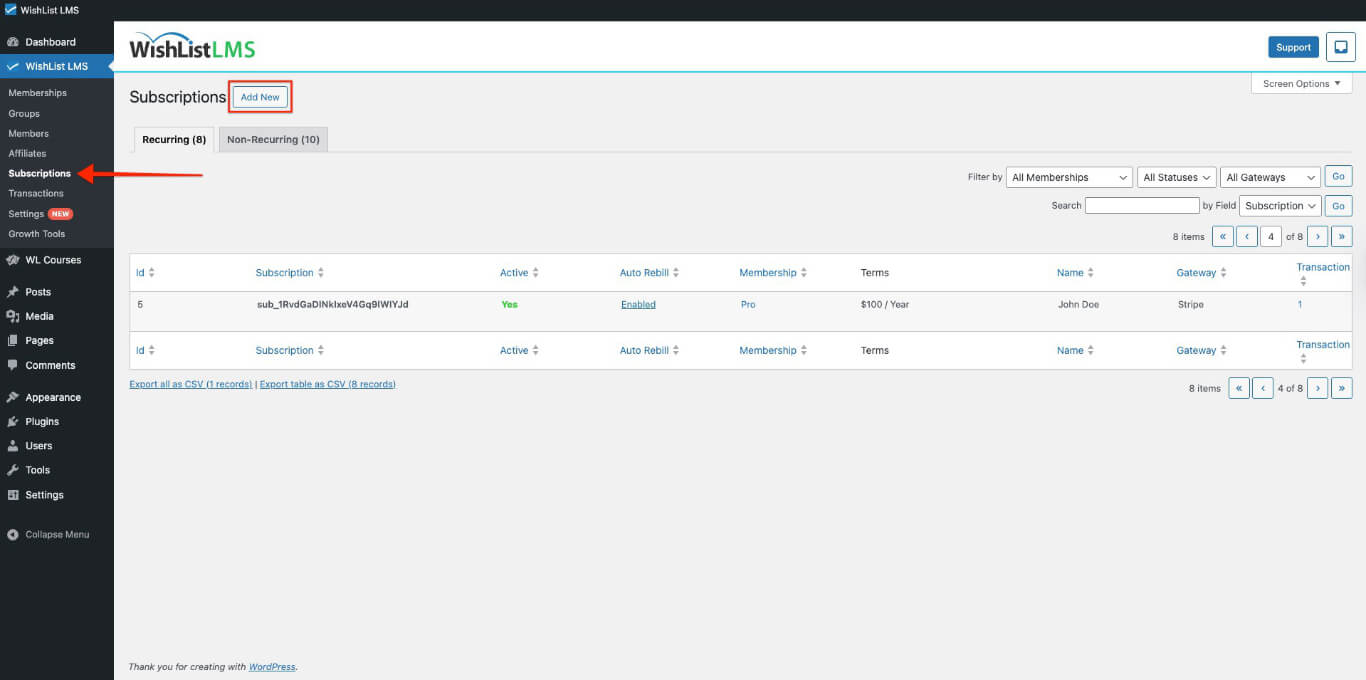
- Clique no botão Adicionar novo button at the top of the page.
- Enter your subscription details from the payment gateway.
- Make sure the ID da assinatura is exactly the same as the gateway record.
- Clique no botão Create button to save the subscription.
Step-3: Add Transaction Record
- Return to Painel de controle > Lista de desejos LMS > Assinaturas.
- Find the new subscription in the list.
- Hover on the subscription ID to see options.
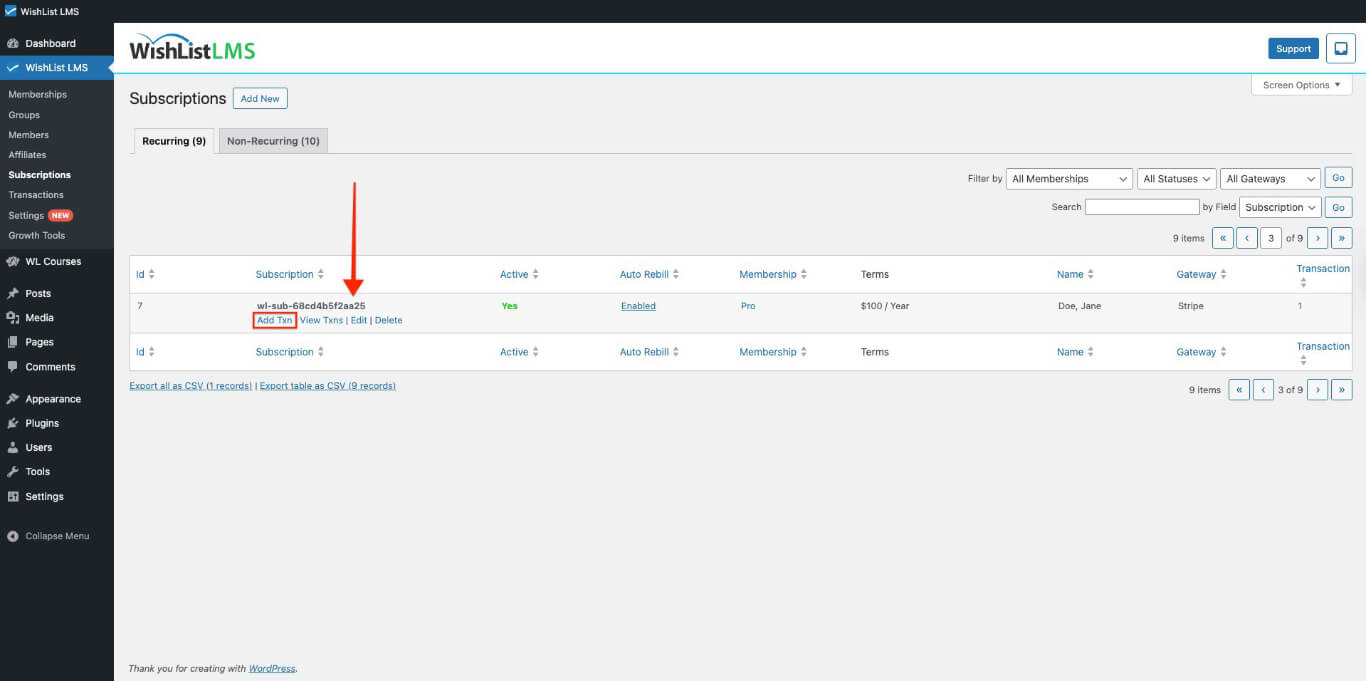
- Clique no botão “Add Txn” link.
- Fill out the form with accurate payment details.
- Clique em Create to finalize the transaction. See Criação de transações manuais no WishList LMS for more information.
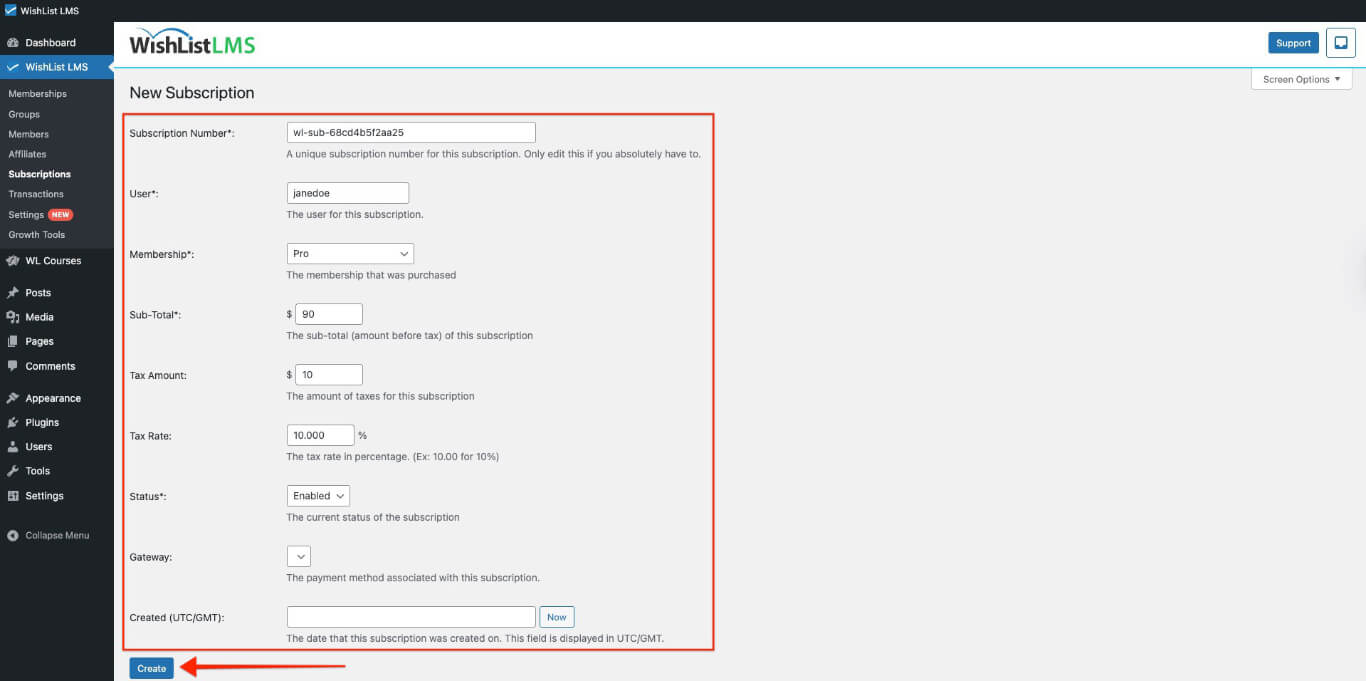
New Subscription Configuration
The subscription form has important fields that need to be filled out correctly; therefore, it is essential to ensure all information is accurate.
Required Fields
- Subscription Number: Enter the unique subscription ID from your payment gateway;
- User: Choose a WordPress username for this subscription;
- Associação: Pick a membership.;
- Sub-Total: Enter subscription amount before taxes.;
- Status: Set to “Enabled” for active subscriptions.
Optional Fields
- Tax Amount: Include applicable tax charges;
- Tax Rate: Enter percentage rate (example: 10.000 for 10%);
- Portal: Choose a payment method;
- Created (UTC/GMT): Match the creation date from the gateway;
- Trial: Check if the subscription includes a trial period;
- Trial Days: Specify trial period duration;
- Fee for Trial: Enter the trial fee, if any.
Granting Access to Protected Content
Subscriptions alone don’t give access to content; therefore, you need to make a full, valid purchase to see protected membership content.
First, create a subscription. Then, add a transaction for the latest payment. This, in turn, gives the customer access to the members-only areas.
Alternative Subscriptions Addition Methods
WishList LMS has different ways to add subscriptions for different needs; additionally, each option is designed to cater to specific user requirements.
Using the Members Page
- Ir para Painel de controle > WishList LMS.
- Selecione Members.
- Clique em Adicionar novo.
- Fill in the member’s details.
- Clique no botão Create botão.
This method is best for:
- Adding users without an existing WordPress account;
- Giving temporary or free membership access.
Creating Manual Transactions: You can create one-time memberships for existing WordPress users who need temporary access; however, this setup should not include automatic renewals.
Bulk Import Process: You can add multiple subscriptions at once using the bulk import feature; however, make sure to check the requirements, as the steps differ for recurring and one-time payments.