The WishList LMS Courses add special areas on your website where you can put widgets. These widgets can make your courses and lessons more interesting with extra content.
This document describes where you can add widgets in WishList LMS courses and shows how to use them.
WishList LMS Courses Widgets Areas
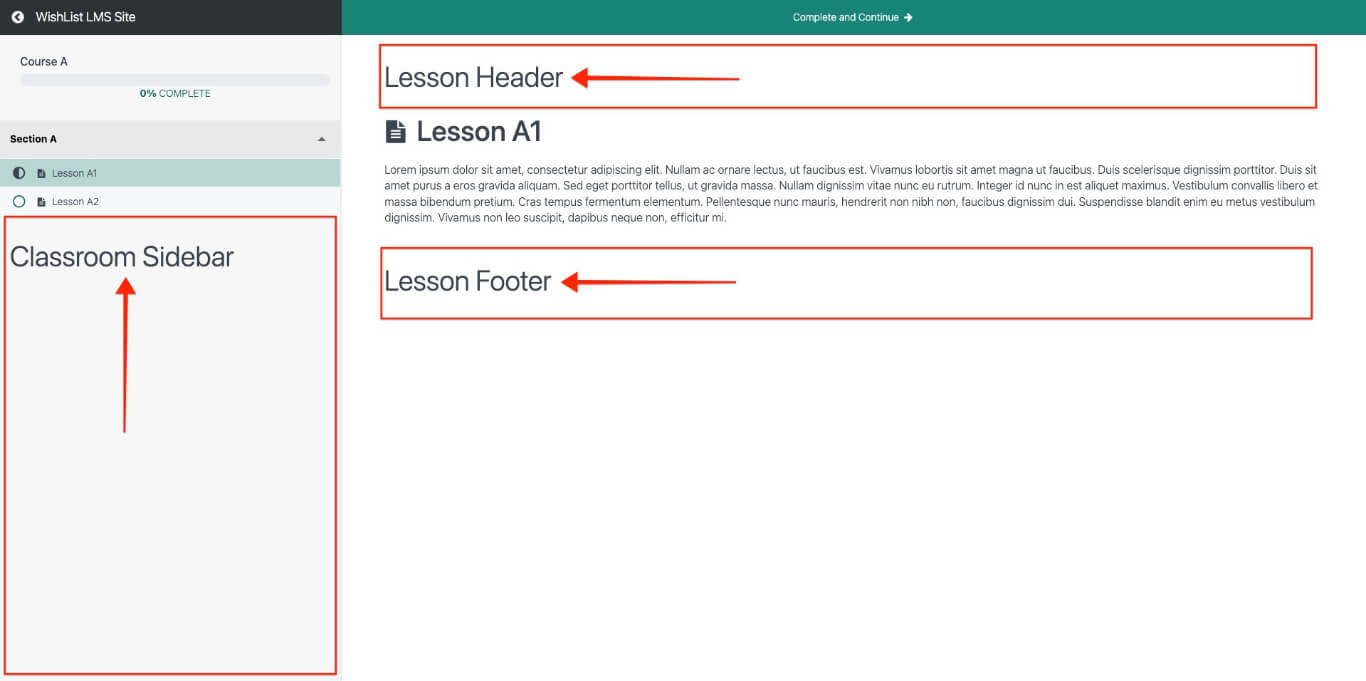
These widget areas appear when you activate the WishList LMS LaunchPad™ Courses template. You will also have access to the following widget areas.
- Classroom Sidebar – displayed on all courses and lessons;
- Lessons Header – displayed on all lessons;
- Lessons Footer – displayed on all lessons.
Block Widgets and WishList LMS Courses
WishList LMS courses work with WishList LMS widgets, WordPress widgets, and widgets from third-party developers.
You can add blocks to widget areas and mix them to make your own designs. To do this, go to Dashboard > Appearance > Widgets.
Example: Add a Personalized Greeting and a Login Form to Your Course Sidebar
This example shows how to use WishList LMS block widgets with courses. It creates a personalized greeting for logged-in members in the sidebar of all WishList LMS courses (if the LaunchPad™ template is enabled). A login form is also added for users who are not logged in.
This setup uses three WishList LMS block widgets:
- Protected Content block;
- Account Info block;
- Login block.
The Classroom Sidebar shows on all courses and lessons, so it’s a good place for these blocks.
Setting Up Widget Blocks
Follow these steps to create this configuration:
- Ir para Dashboard > Appearance > Widgets.
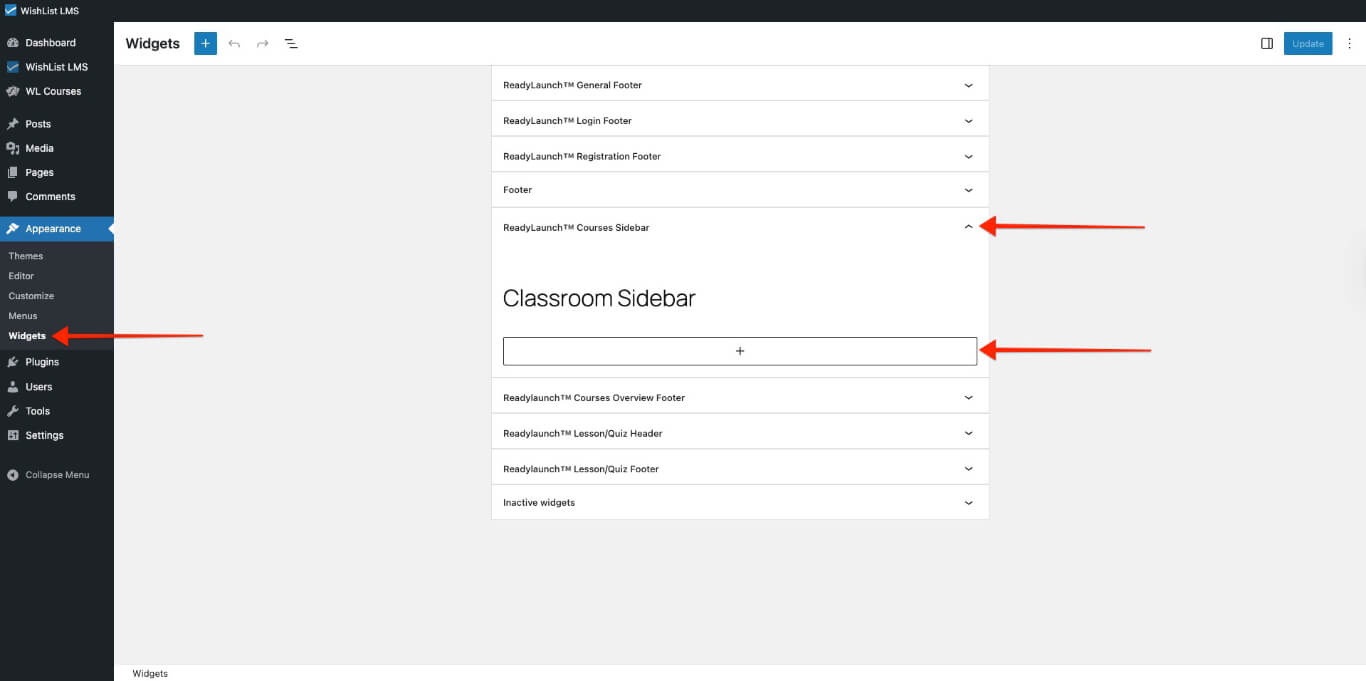
- Open the sidebar by clicking the caret. Then click the plus sign to add a block.
- Add the WishList LMS Protected Content block as a wrapper. Select the appropriate rule and choose Show under the If Allowed setting so the content inside displays only to eligible users.
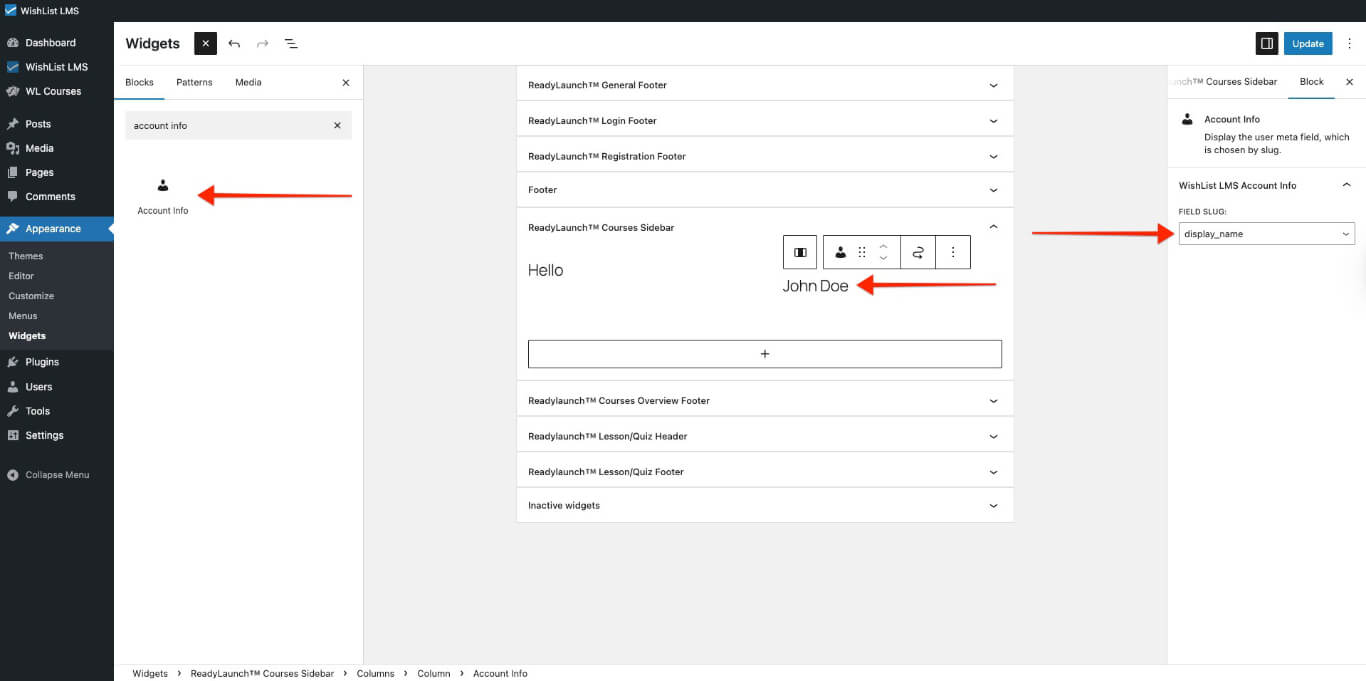
- Add a 2-column default block. Put a greeting paragraph on the left. This example uses the word “Hello.”
- In the right column, add the WishList LMS Account Informações block. Then, select display_name from the Field Slug dropdown. This will show the logged-in user’s display name on the frontend. You can also use the first or last name if needed.
- Add the WishList LMS Login block to show the login form to users who are not members.
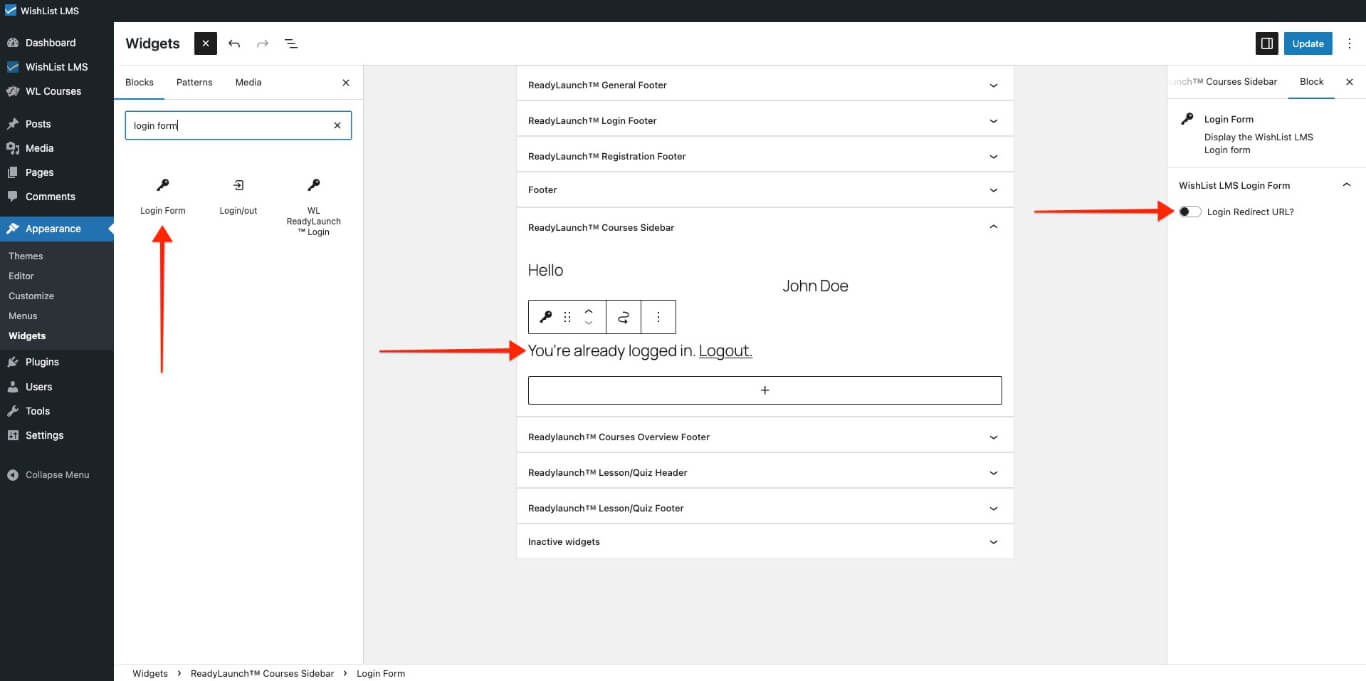
- In the Login block settings, keep the Login Redirect URL? option off. This stops users from going to another page after logging in.
- Clique no botão Atualização button to save changes.
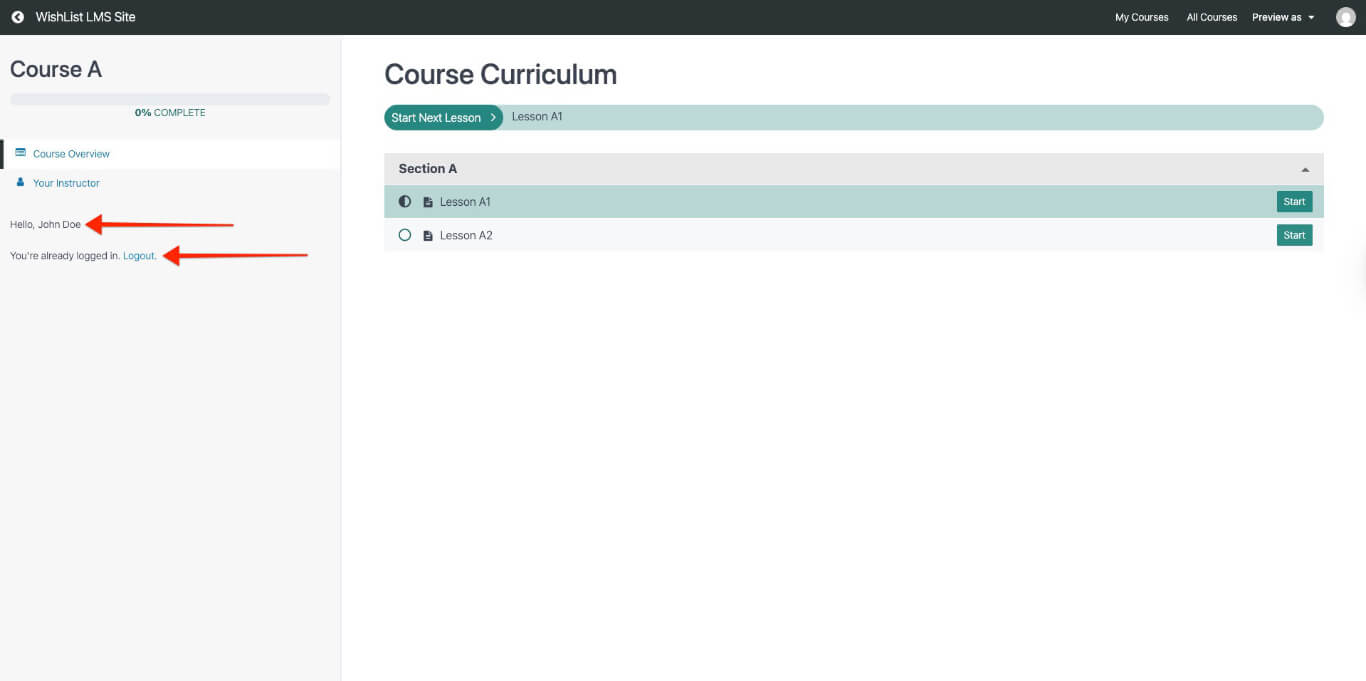
The Result
Users who are not logged in will see only the login form for protected courses and lessons.

When they log in, they’ll see a greeting and a message saying they’re logged in with a logout option.