The Unauthorized Redirect feature helps keep your sites safe. Whenever users try to access content they aren’t allowed to see, this feature sends them directly to a specific page. As a result, it avoids displaying the message, “You are unauthorized to view this page. Login.“
This document explains how to set up the WishList LMS to redirect unauthorized users. This process helps users find the right pages and reduces errors, which improves the overall experience.
Understanding Unauthorized Redirect
The WishList LMS protects the content displayed using the the_content() WordPress function. However, some themes and plugins in WordPress show content in different ways, which can leave parts of the page unprotected. To address this issue, the Unauthorized Redirect feature helps by sending users away from the entire page, thus keeping it secure.
The redirect happens right away when unauthorized users try to access protected content. This stops any protected information from showing up before the redirect occurs.
Prerequisites
Ensure the following requirements are met before turning on the Unauthorized Redirect feature.
- A destination page created for unauthorized users;
- Therefore, it should not be protected by WishList LMS rules. This prevents any redirect loops from occurring.
Setting Up Unauthorized Redirect
The Redirect setting is in the WishList LMS Settings. Follow these steps to turn it on and set it up.
- First, go to your site’s Dashboard.
- Next, select Lista de desejos LMS, and then click on Settings.
- After that, open the Páginas tab from settings.
- Scroll down to find the Unauthorized Access section.
- Then, check the box Redirect unauthorized visitors to a specific URL. This enables the redirect functionality.
- Enter the destination URL in the URL to direct unauthorized visitors to field.
- Clique no botão Opções de atualização button to save the configuration.
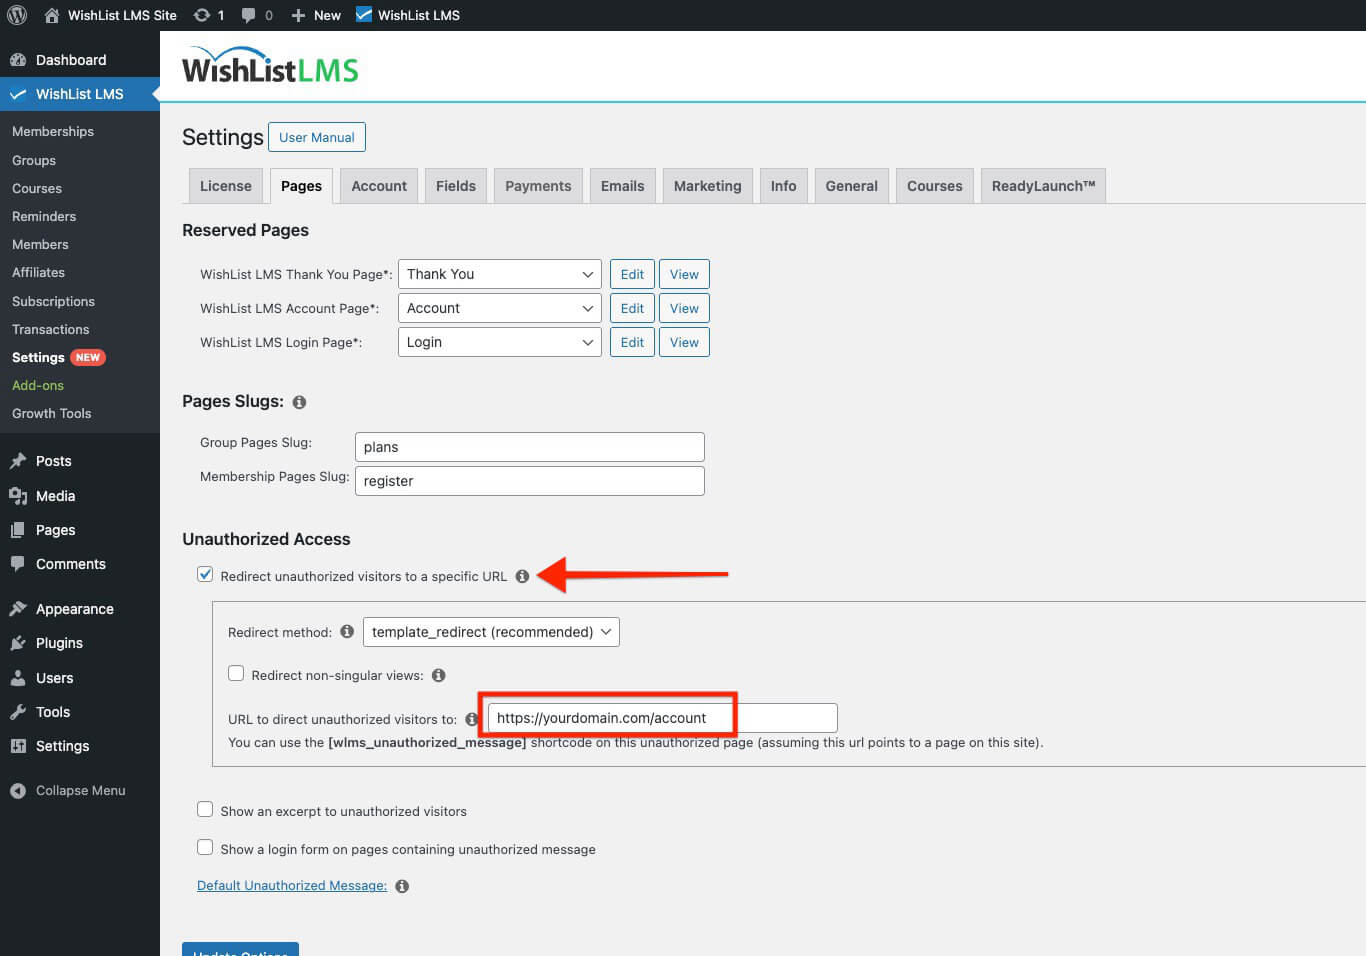
The URL field can accept complete URLs or page slugs (for example, /unauthorized), depending on your destination. You can use the slug for pages on the same WordPress site, or the full URL. For external links, include the full URL starting with ‘https://’. For example, https://yourdomain.com/account.
Advanced Redirect Options
This section covers advanced redirect features in WishList LMS. First, these options help keep content private. Additionally, they ensure that users see the correct pages.
The Unauthorized Access section includes additional configuration options for specific use cases:
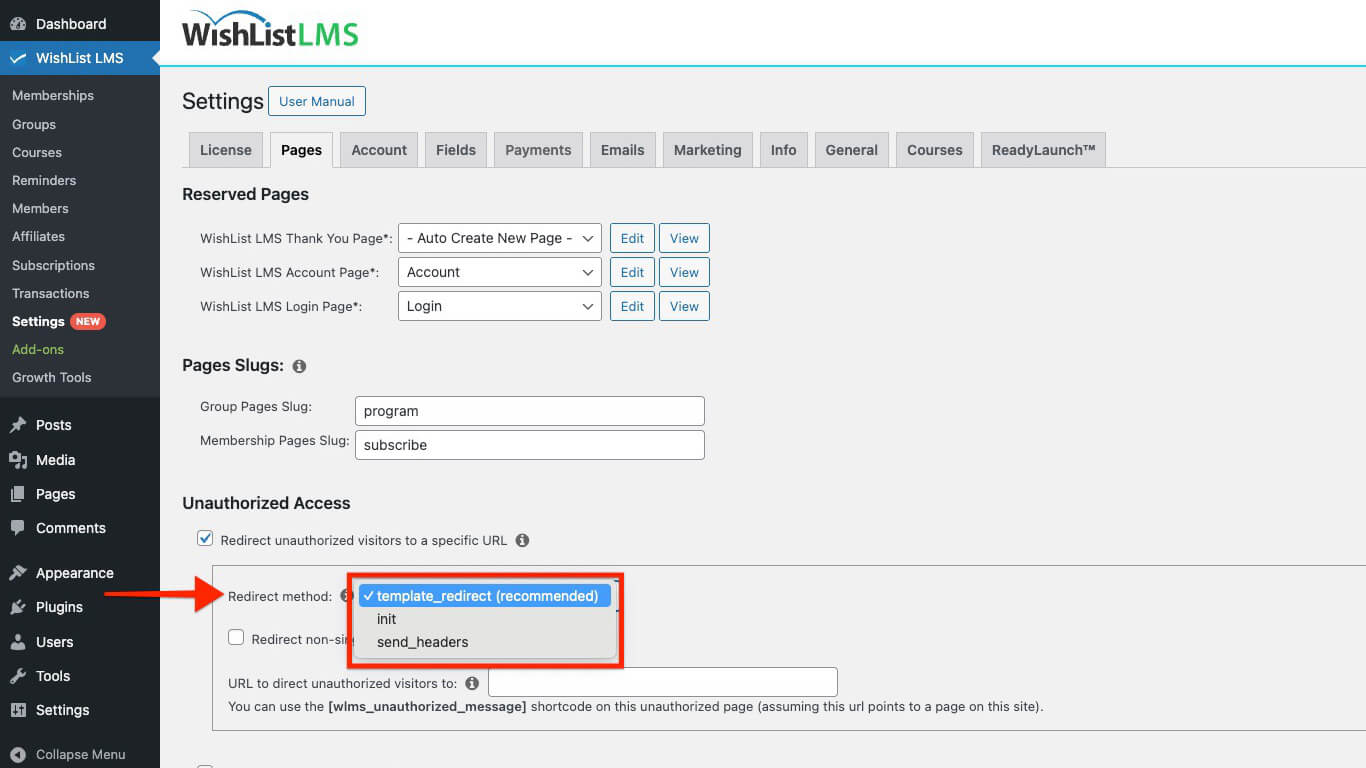
- Redirect Methods: O Redirect methods dropdown provides two options for handling redirects:
- template_redirect (default): Processes redirects during the template loading phase;
- init: Processes redirects earlier in the WordPress loading sequence.
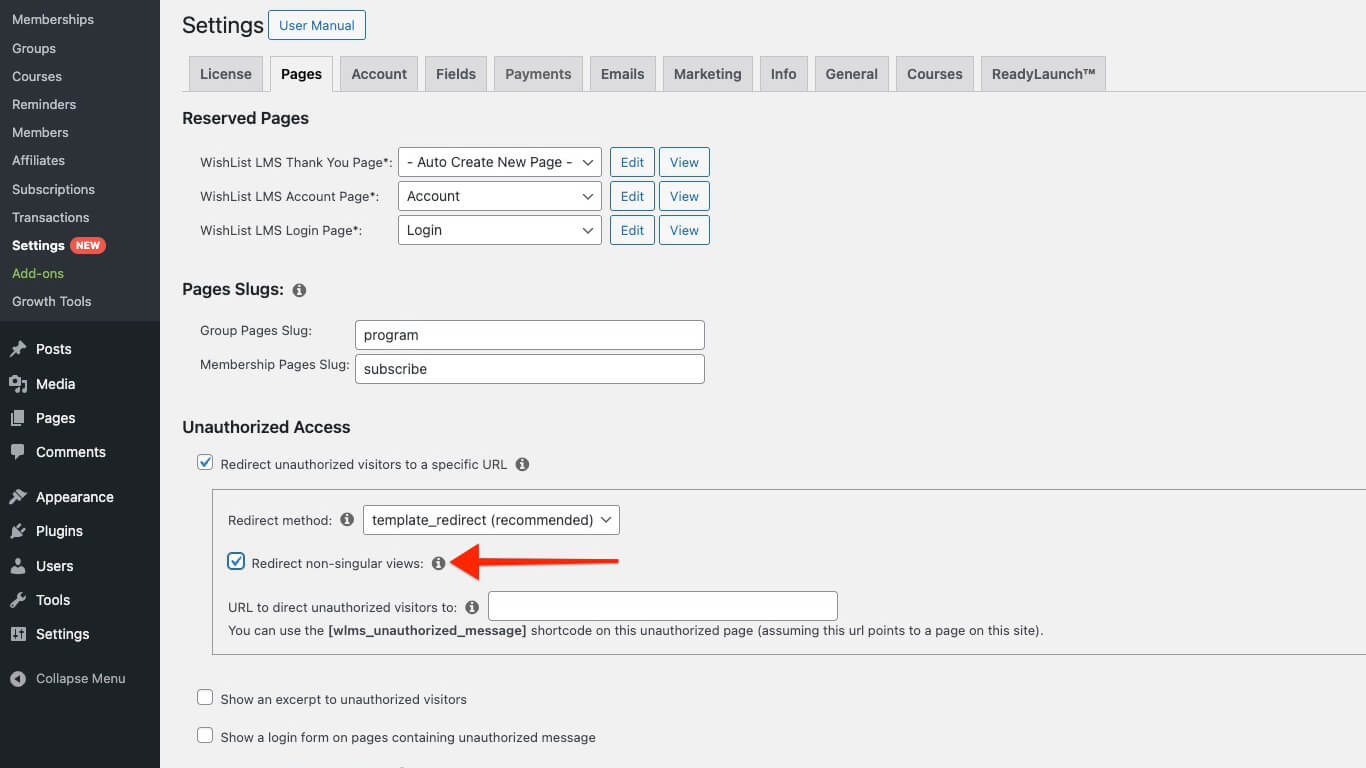
- Non-Singular Views: O Redirect non-singular views option controls how protected content appears in listing pages:
- Protected posts become hidden when enabled. This applies to blog pages, category pages, archive pages, and other listing views;
- When disabled, protected posts appear in listings but redirect users when clicked.
Create a Custom Unauthorized Redirection Page
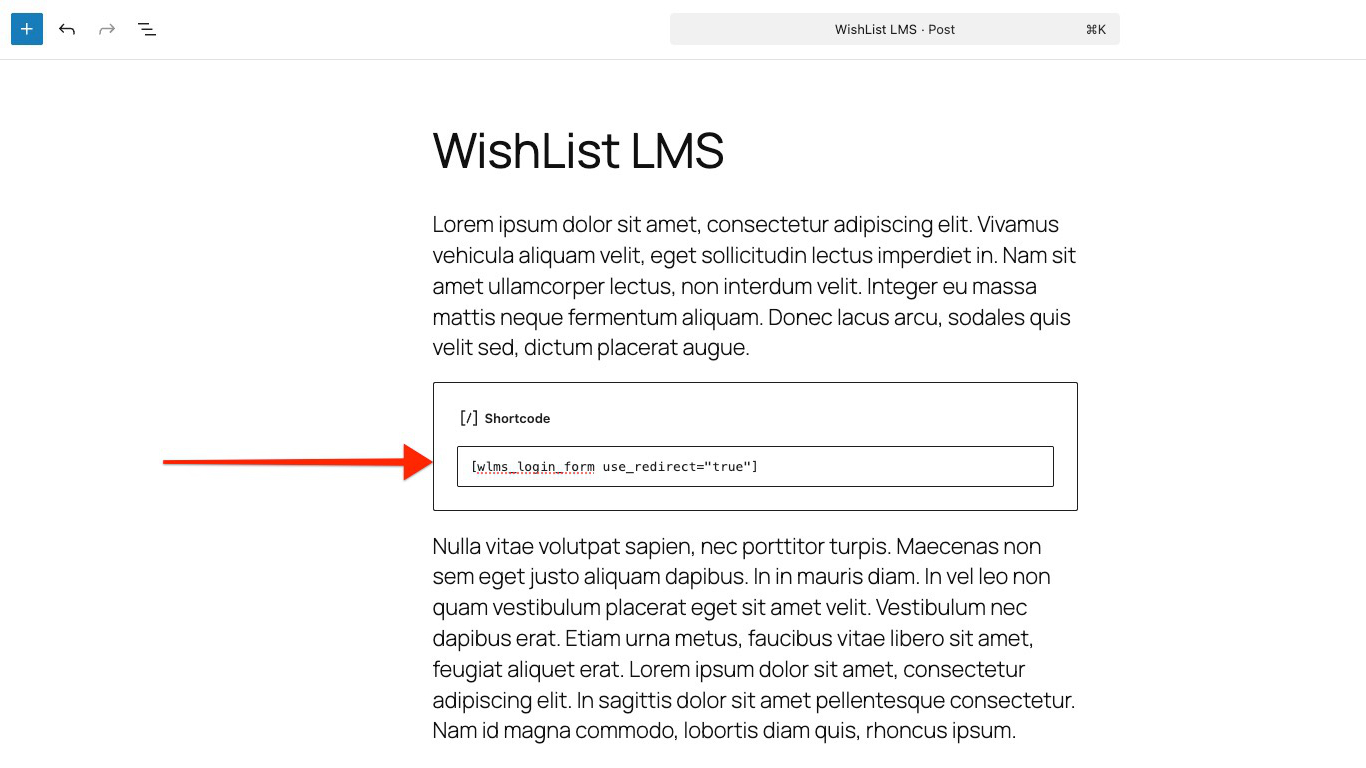
You can create a custom redirection page by adding the WishList LMS login form using the shortcode. This option ensures users are redirected after logging in.
Follow the steps below to add a shortcode on a post or page:
- Create a new page/post or edit the post or page where you want to display the login form.
- Add a new Shortcode block to the WordPress editor (Gutenberg editor).
- Add the following shortcode to the Shortcode block:
- Clique no botão Save button in the right sidebar.