The LaunchPad™ Pricing Page template in WishList LMS makes it easy to create professional pricing pages without coding.
This guide shows how to customize, disable, and add the template to your current pages. Using this template helps you manage your pricing quickly and keep your existing design, all without needing coding skills.
Understand the LaunchPad™ Pricing Page Template
The template header adheres to the LaunchPad™ Global Design Settings, using the brand color chosen in the global configuration as its background. It also features the logo configured in the LaunchPad™ templates.
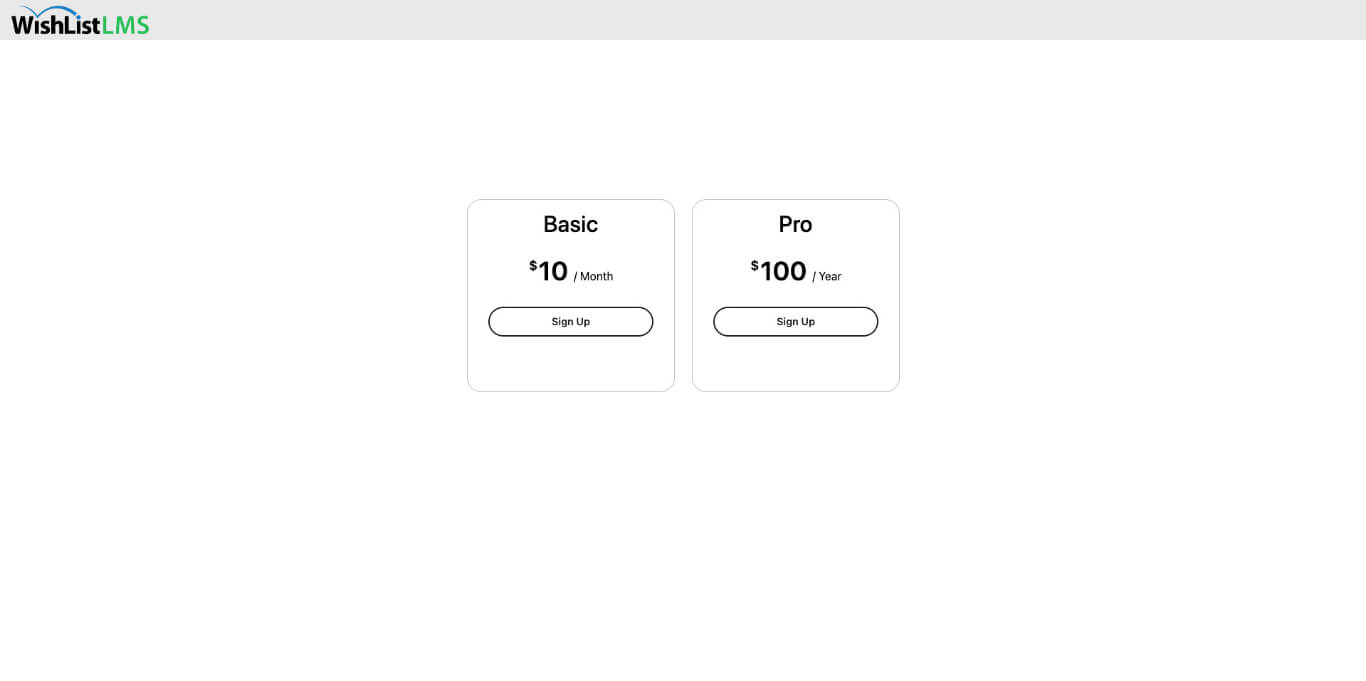
Additional LaunchPad™ Pricing Page template options include:
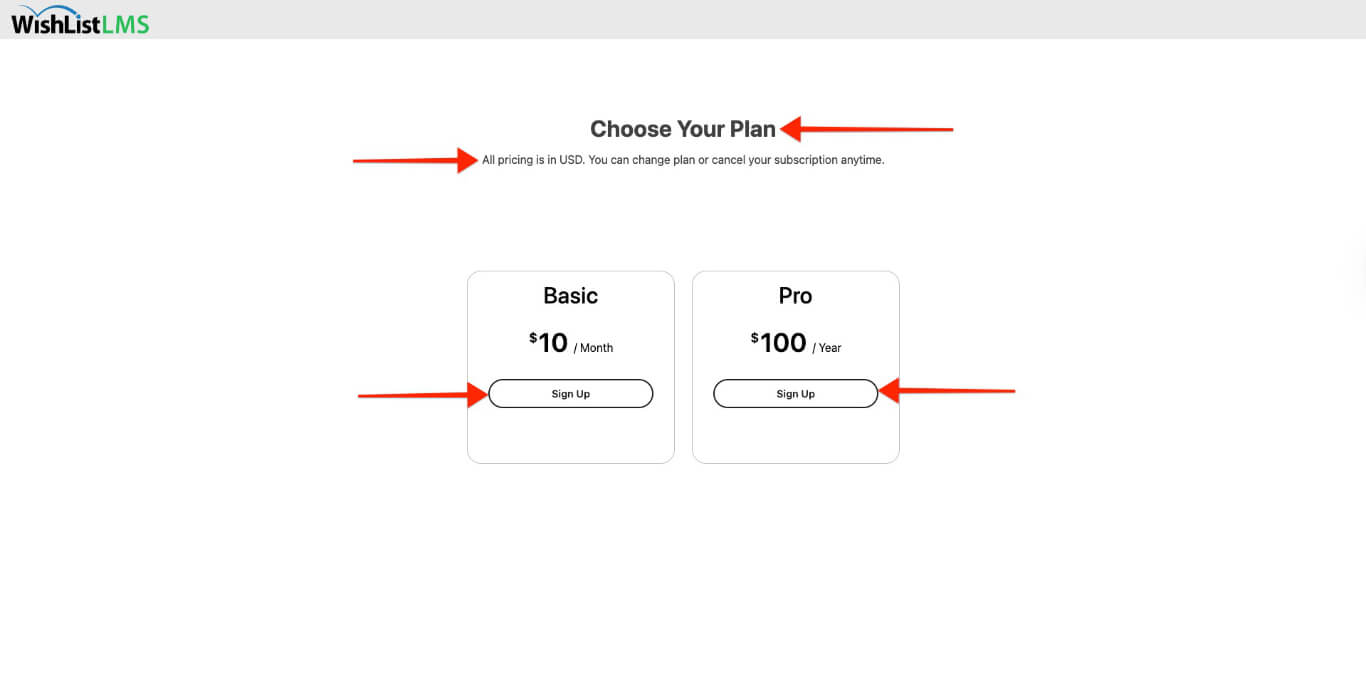
- Add a pricing page title;
- Choose a call-to-action (sign up) button color;
- Add a subheadline for additional information.
Unlike classic pricing pages, LaunchPad™ lets you add information without needing a custom page.
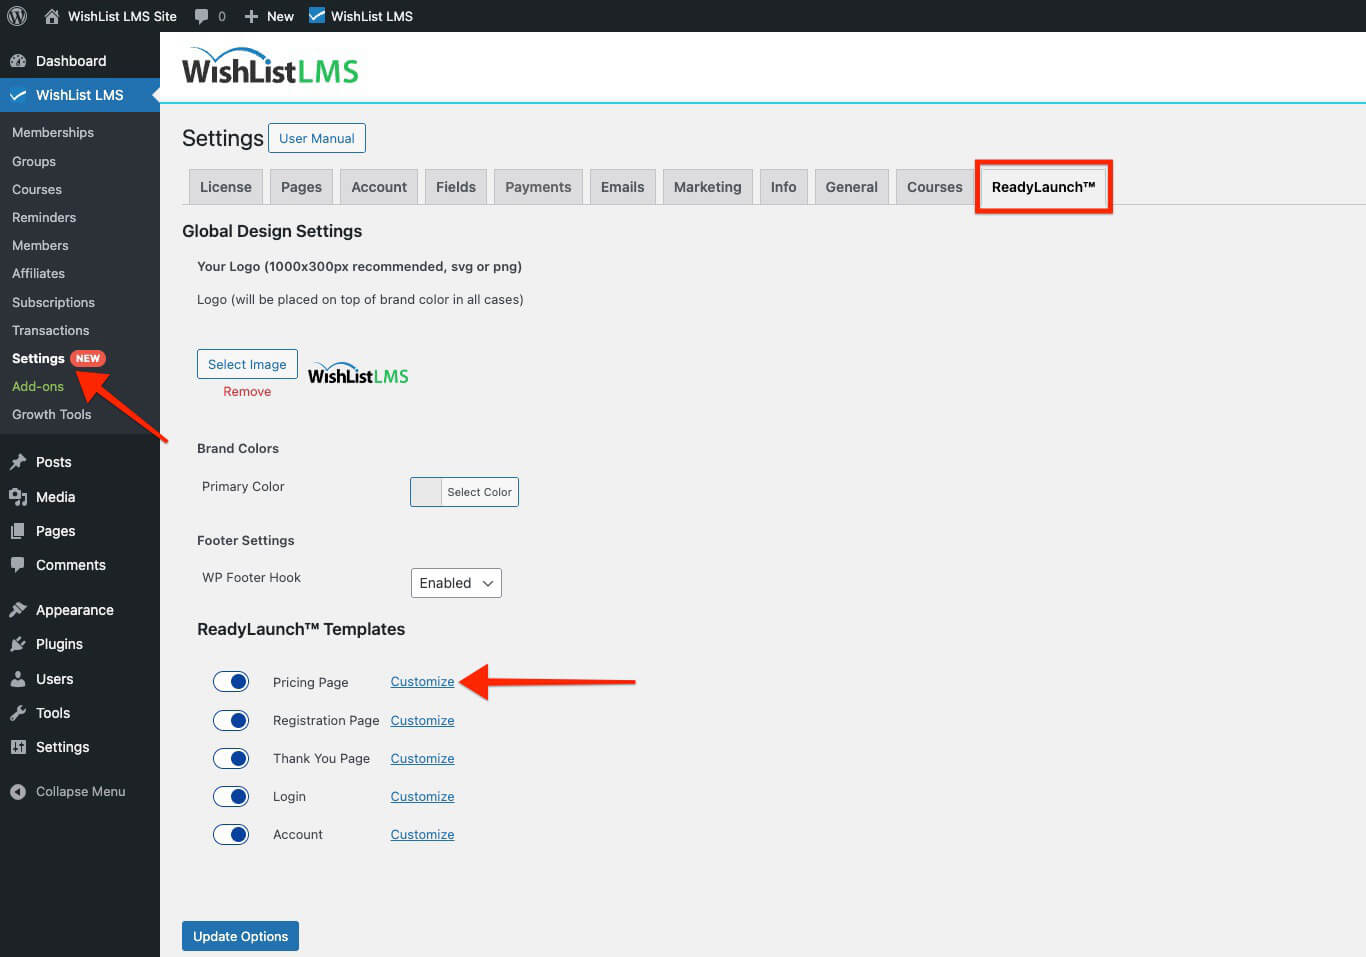
To customize the Pricing Page template, follow these steps:
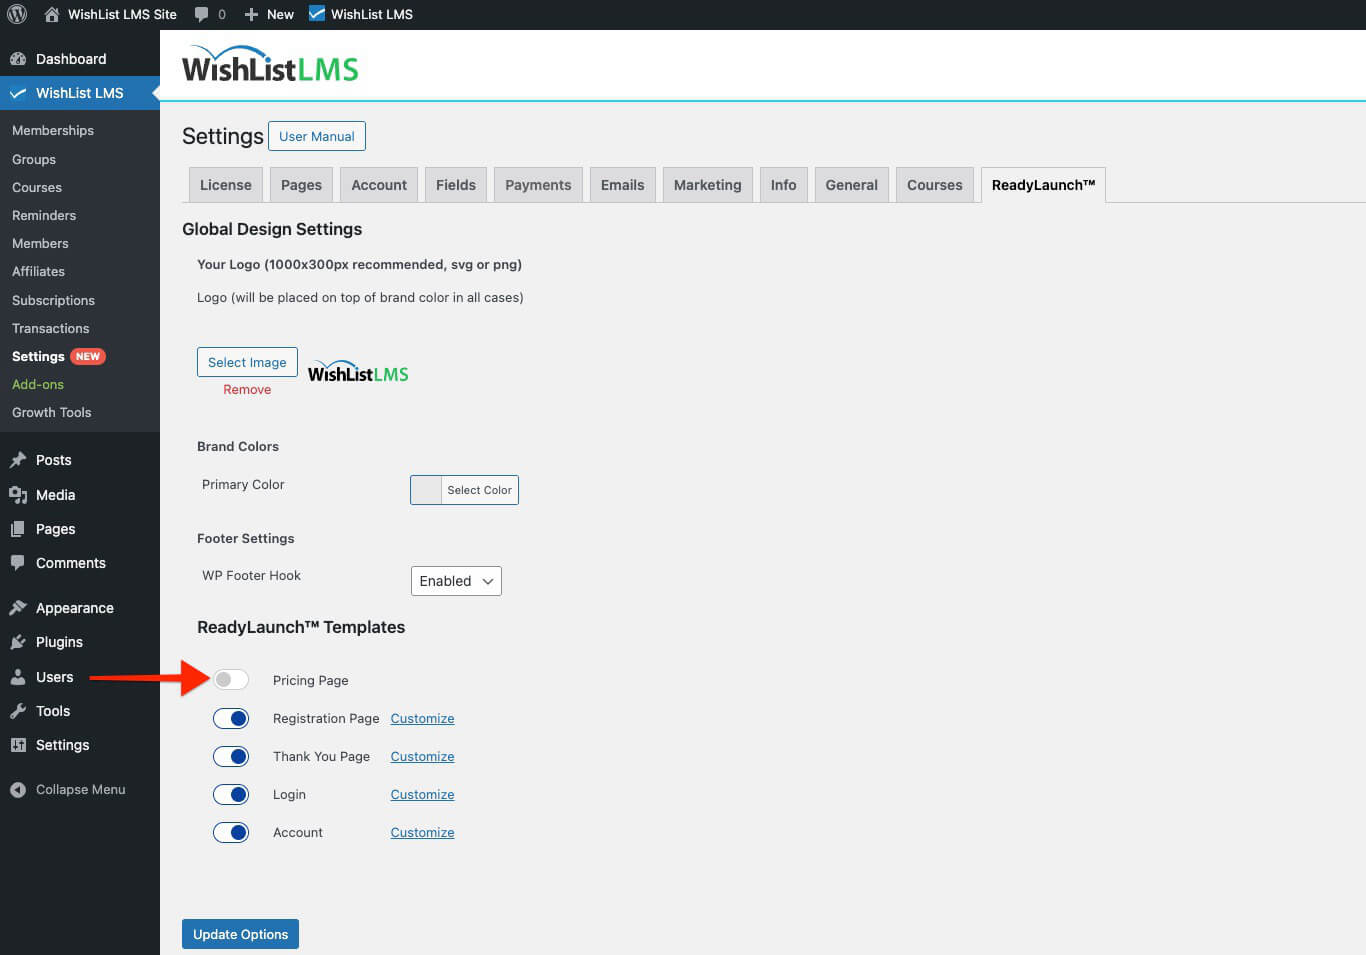
- Log in to the site admin area, and navigate to Dashboard > WishList LMS > Settings.
- Click on the LaunchPad™ tab.
- Next to the Pricing Page option, click on the Customize lien.
- This will open a popup where you can:
- Add a custom page title to the Page Title field.
- Add optional text and media to the Subheadline area.
- To set the CTA Button Color, use the color picker to choose a color or add a hex code.
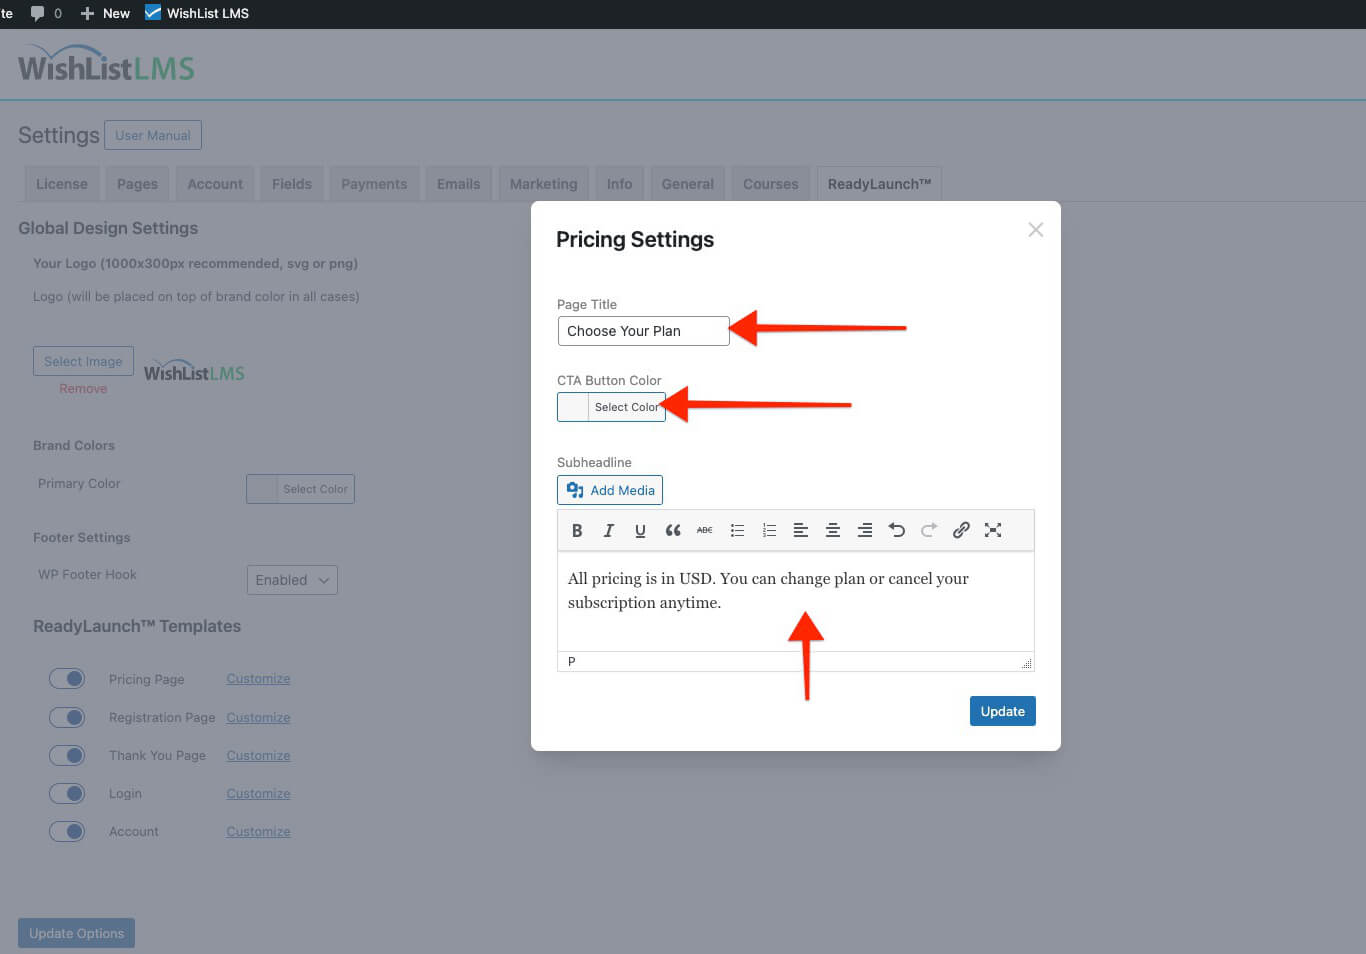
- Once finished, click the Update button to apply changes to the pricing page.
Deactivate the LaunchPad™ Pricing Page Template
To use the classic WishList LMS pricing page, turn off the LaunchPad™ template by following these steps:
- Naviguez jusqu'à Dashboard > WishList LMS > Settings.
- Click on the LaunchPad™ tab.
- Toggle the Pricing Page option off.
Adding the Pricing Page Template to Custom Pages
You can add the LaunchPad™ Pricing template to any page or post on your WordPress site. Use the default Block editor and insert the LaunchPad™ Pricing Table block.
- Start the Block editor on the post to edit.
- Cliquez sur le bouton “+” icon to open the block inserter.
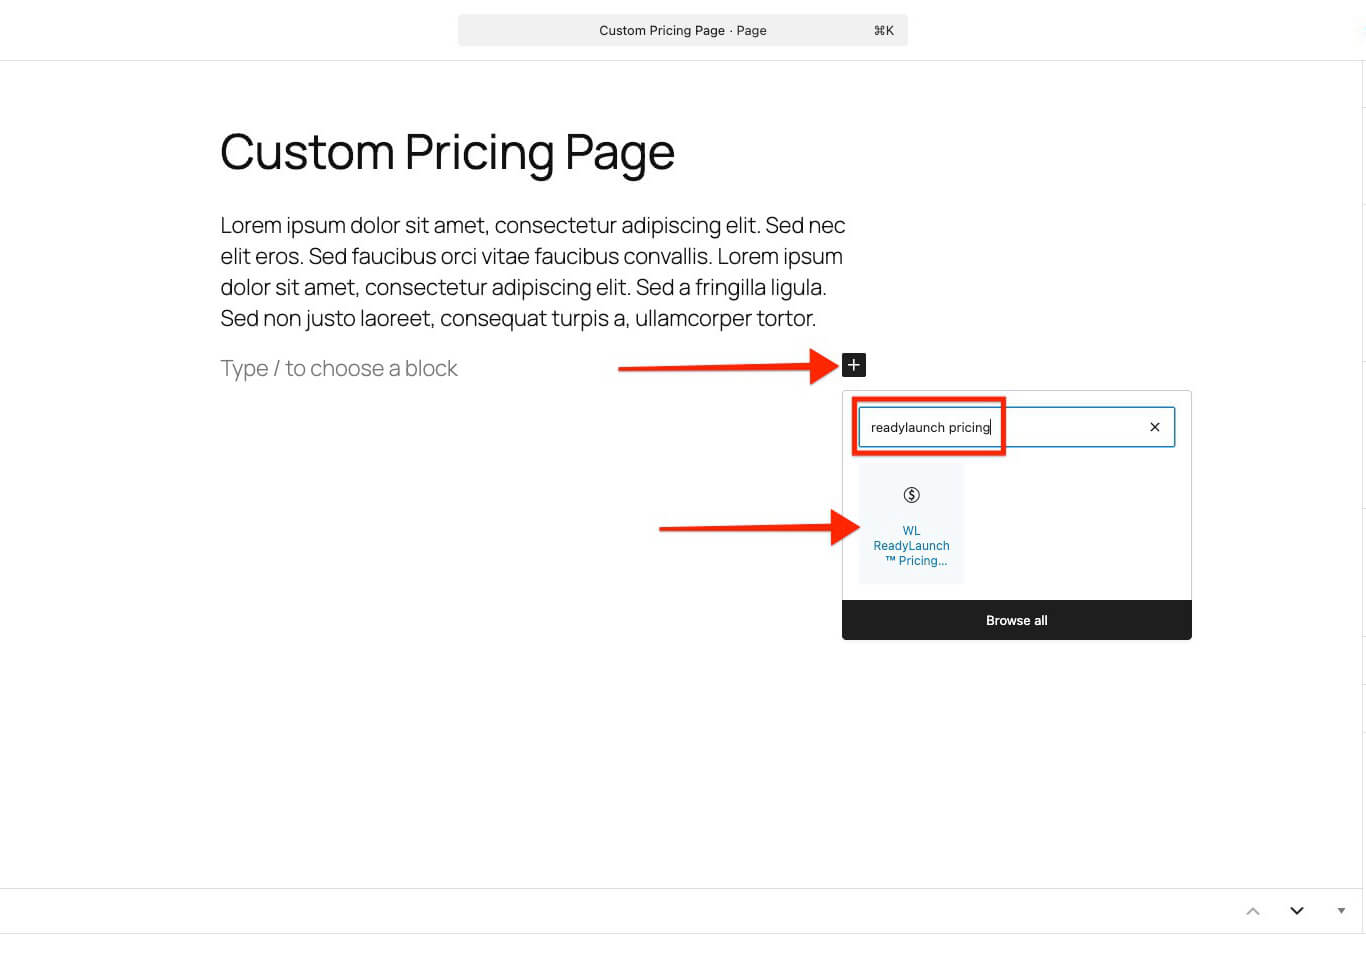
- Search or browse the block list to find the LaunchPad™ Pricing Table block.
- Click on the block to add it.
- Under the block settings, click on the Group dropdown, and select the WishList LMS group to use for this pricing table block.
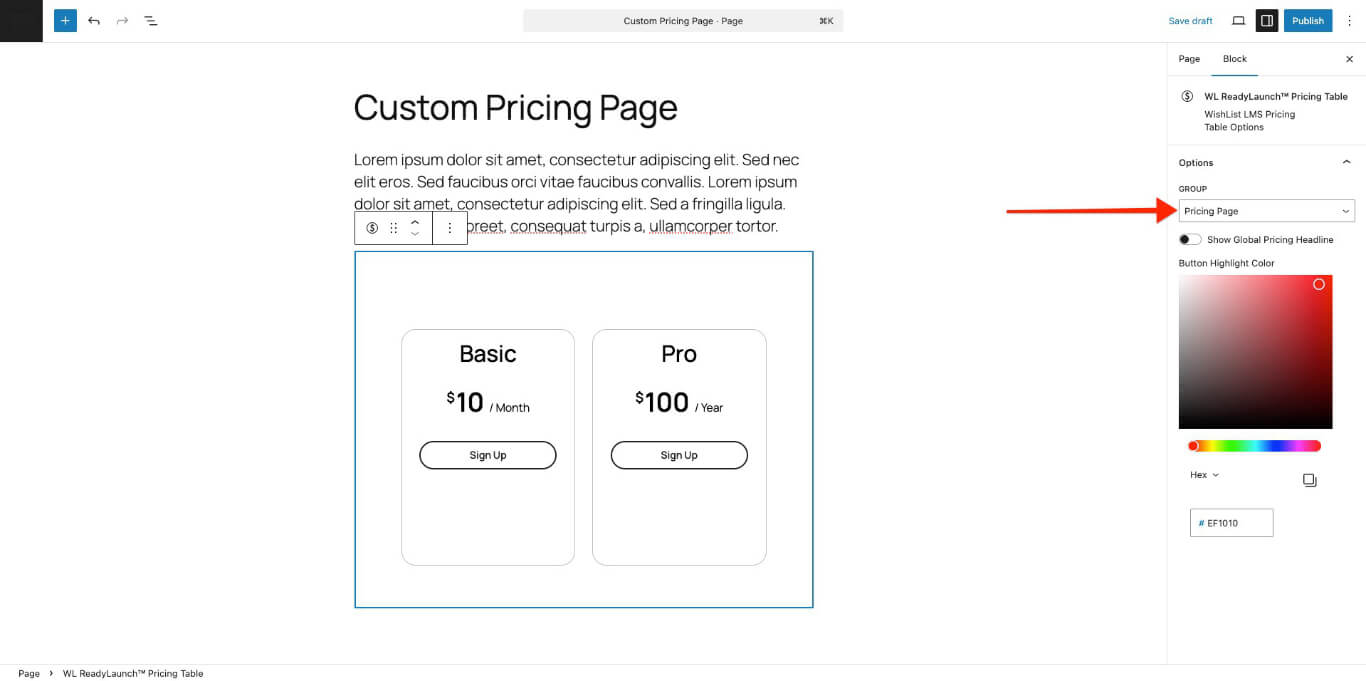
Le LaunchPad™ Pricing Table block includes additional options:
- Show Global Pricing Headline: Turning on this option shows the pricing title and subheading set in the Tableau de bord under WishList LMS > Settings > LaunchPad™ tab;
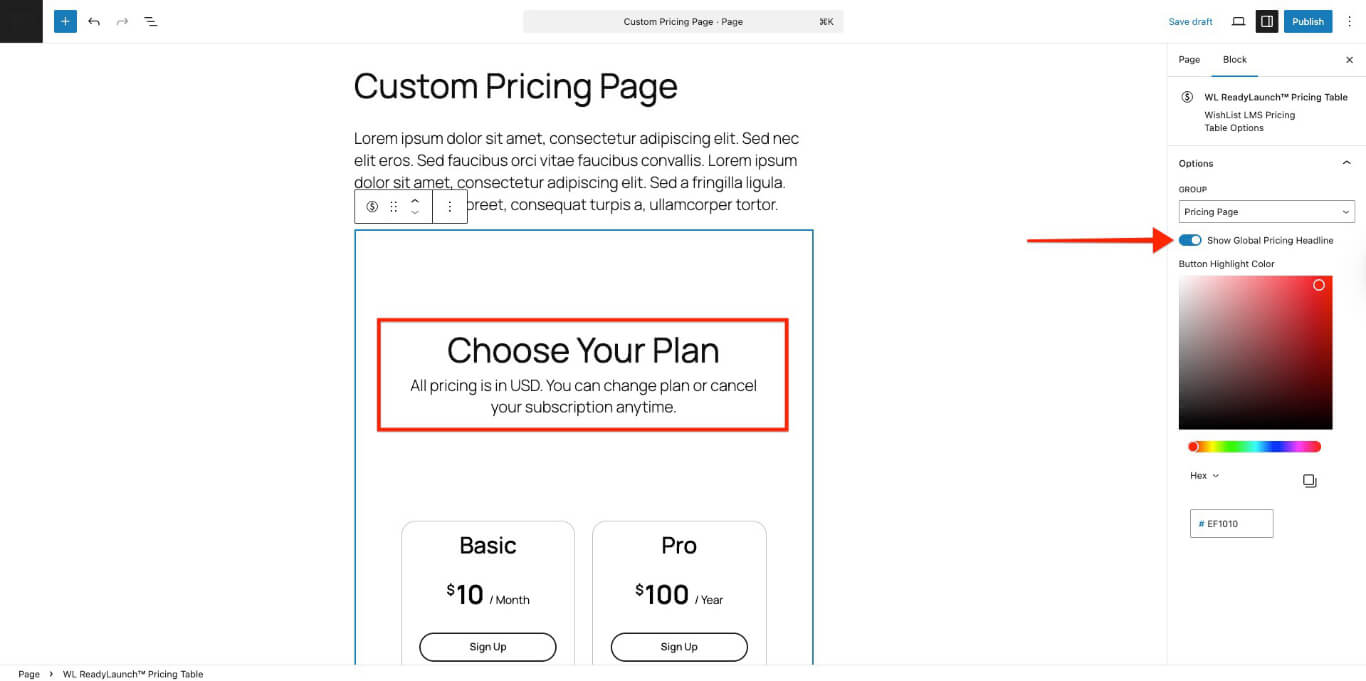
- Button Highlight Color: Choose the color for the call-to-action button using the color picker or by adding the color code.
This method lets you create custom pricing pages with any content you want. You can also use the site header and footer. The LaunchPad™ template is included in the content area.
Using Shortcodes
The LaunchPad™ Pricing Page cannot be embedded into custom pages with group pricing shortcodes. For custom pricing pages with WishList LMS, use the classic WishList LMS Group Price Boxes.