The Fields tab in WishList LMS is where you set up user registration and account fields. Specifically, these fields help to collect and display user information, thereby making the experience more personalized.
This guide shows you how to manage existing fields, such as making them visible or required. It also explains how to create new custom fields for different types of data.
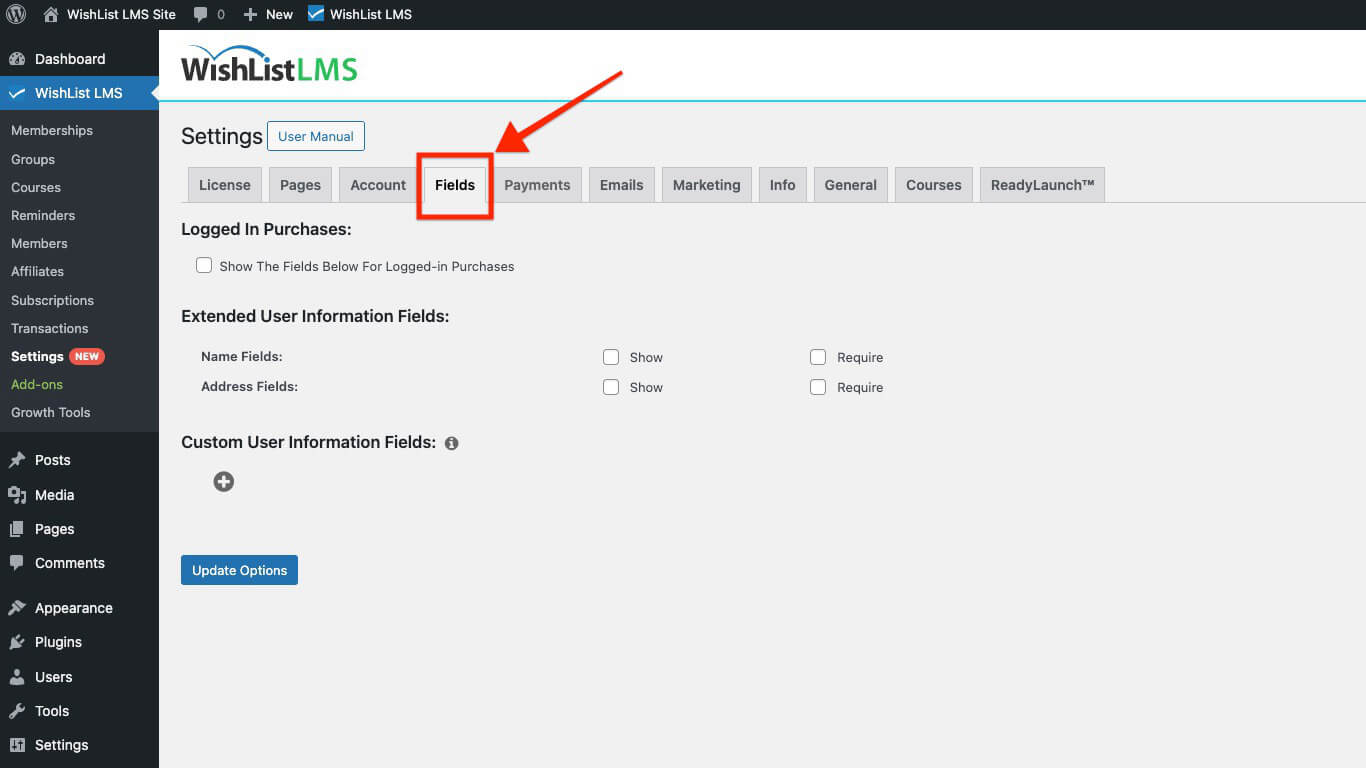
Accessing the Fields Tab
This section outlines the location of the Fields tab and the settings available in the tab.
To reach the Fields tab:
- Navigate to your WordPress Dashboard > WishList LMS > Settings.
- Click on the Fields tab.
Within the Fields tab, you’ll find three sections for configuration:
Logged In Purchases
Check if the field settings should apply to existing users’ purchases. Turning off “Show The Fields Below For Logged-in Purchases” means the settings only apply to new users.
Extended User Information Fields
This section explains how you can add these two fields to your registration form:
- Name Fields
- Address Fields
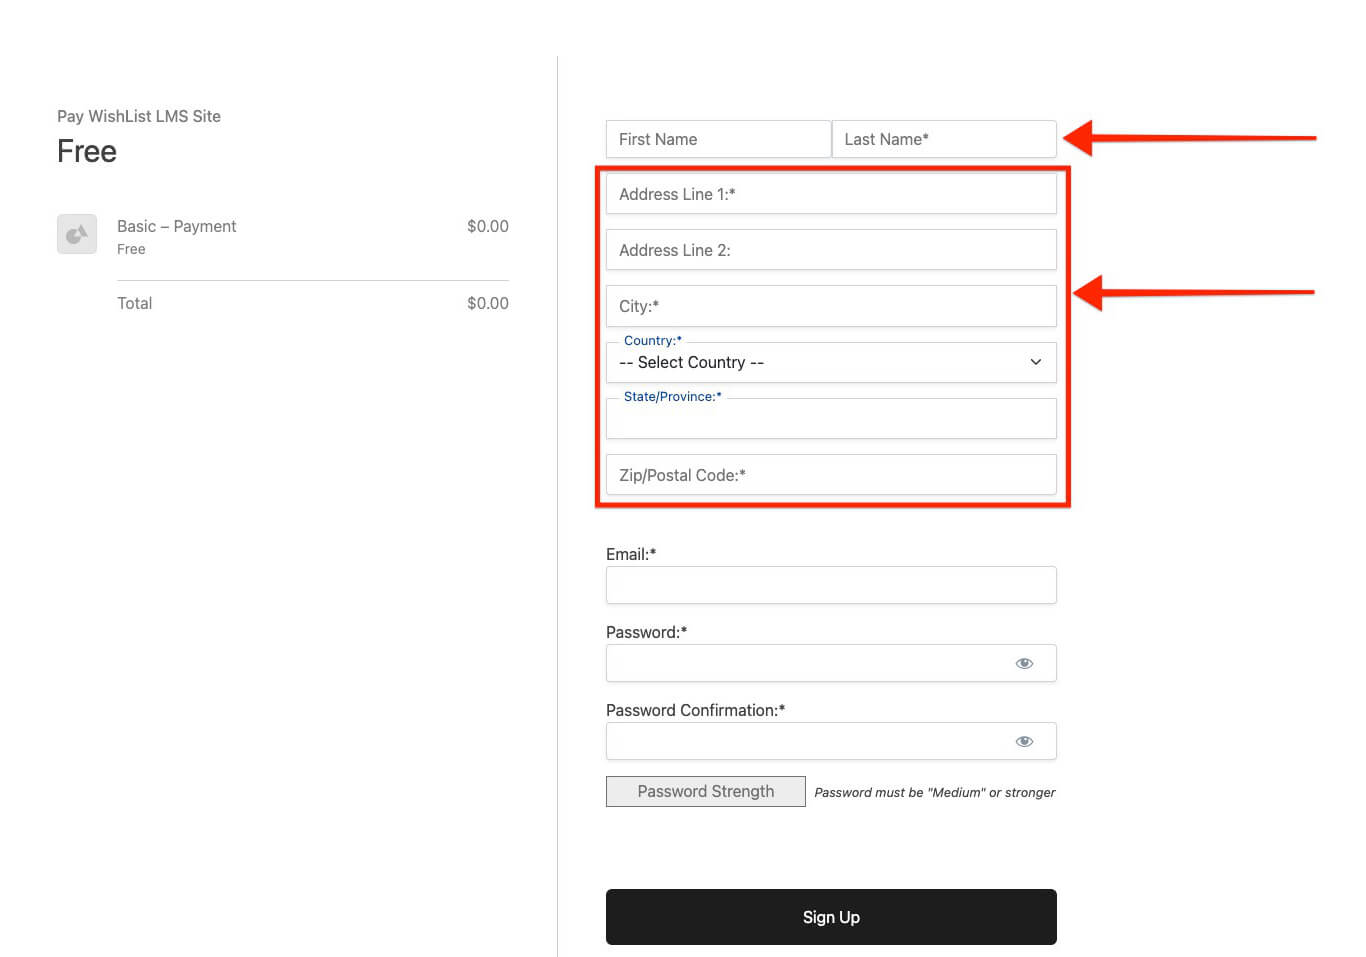
You can show the Name and Address fields during registration and set them to required if they are mandatory by following the steps below:
- Checking the Show checkbox for the Name Fields will add the First Name and Last Name fields to forms;
- Checking the same option for the Address Fields will add the Address, City, Country, State/Province, and Zip/Postal Code fields;
- Setting fields as Required will prevent users from submitting registration forms without filling them out.
Address Fields include separate visibility options for different contexts. The Show in Account option controls visibility on the member Account page, while Show on Signup controls visibility on registration forms. Each option has its own default state, allowing flexible display configurations.
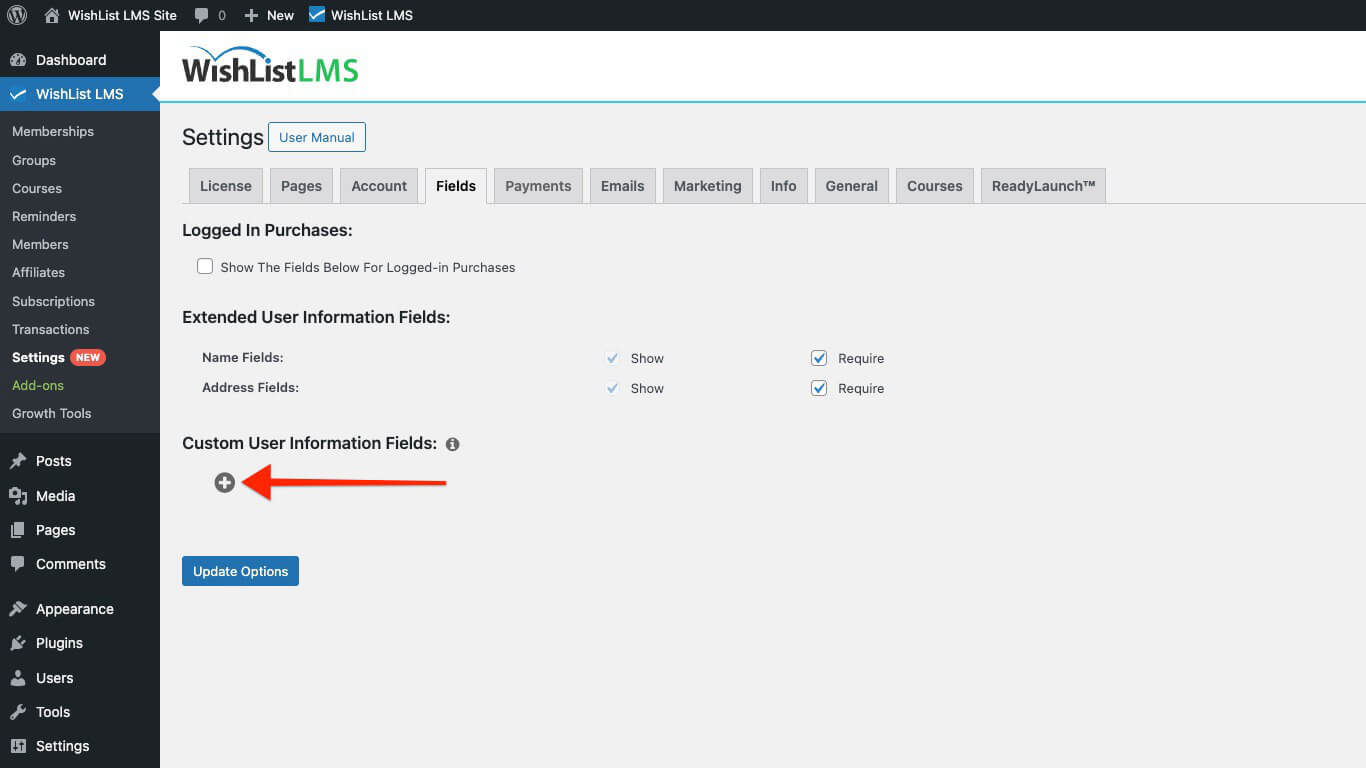
Custom User Information Fields
In this section of the WishList LMS, you can create custom fields by following the steps below:
- Click on the + icon to add a new custom field. This will open the field form.
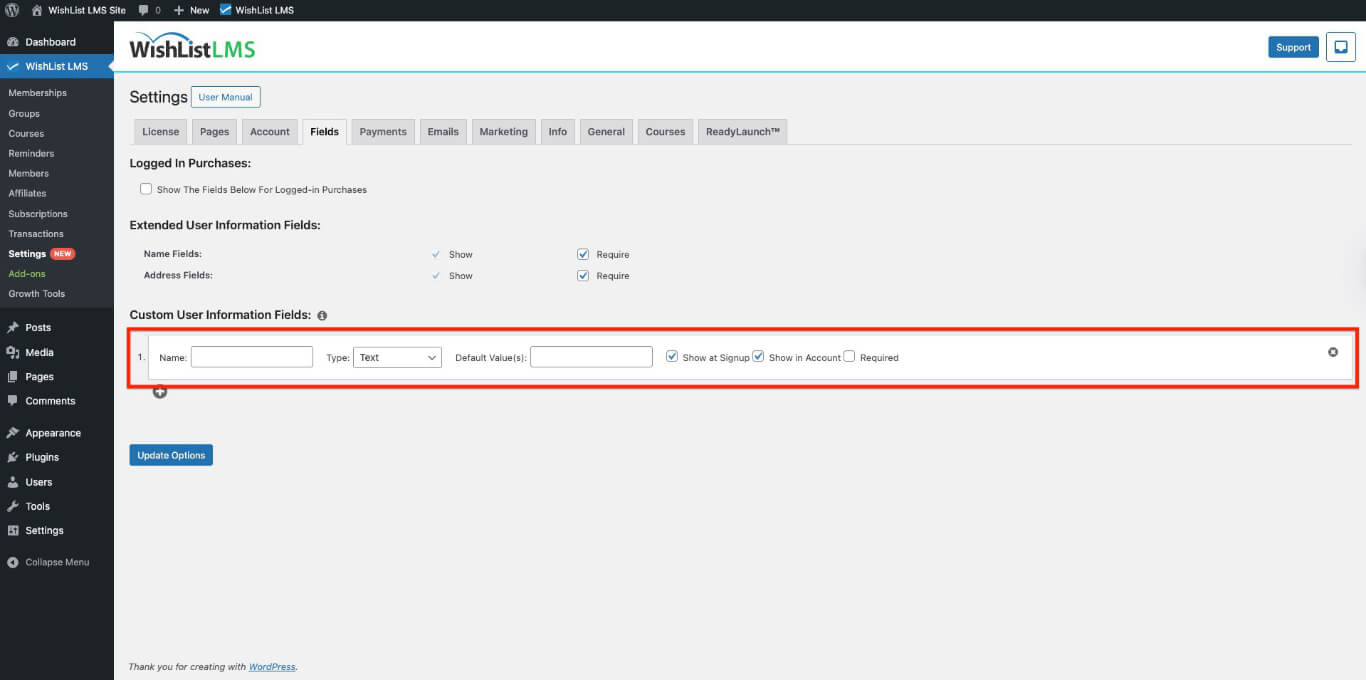
- Start by naming the field. This Name will be used as the label for this field in forms.
- Next, choose the Type of the field. Depending on the type chosen, additional type-specific options will appear.
- The Default Value(s) field should contain the value that should be loaded as default.
- Selecting the Show at Signup option will display the custom field on registration forms.
- If you enable the Show in Account option, the field will appear on the account form.
- By checking the Required option, you ensure that users cannot complete registration without filling in this custom field.
- Click the Update Options button to save the field.
WishList LMS Fields feature allows unlimited custom fields to be created for members to fill out.
Custom fields can also be shown or hidden on a per-membership basis. Each membership includes a Registration tab where administrators can select which custom fields display on that membership’s registration page.
Creating a Clickable Checkbox Option
To make a clickable checkbox, add some basic HTML to the field name when creating it. Here’s an example:
<a href='https://www.yoursite.com/special-policies' target='_blank'>Please agree to our Special Policies</a>
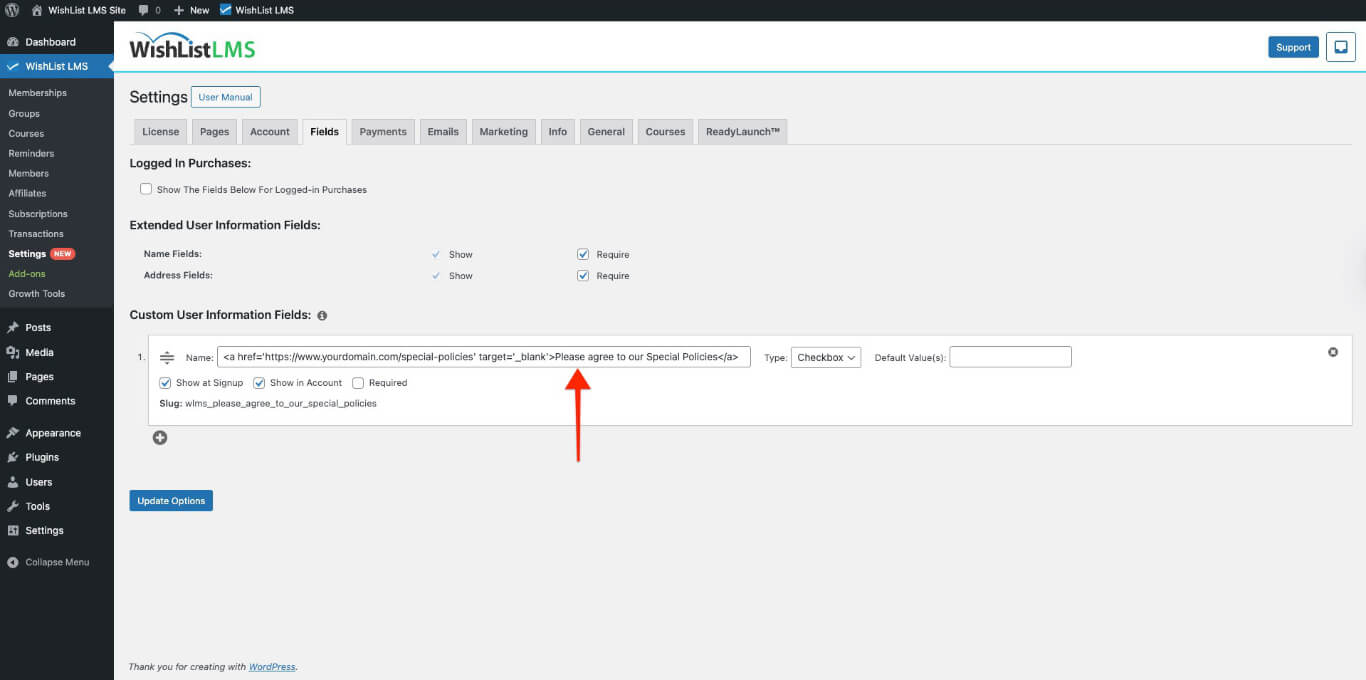
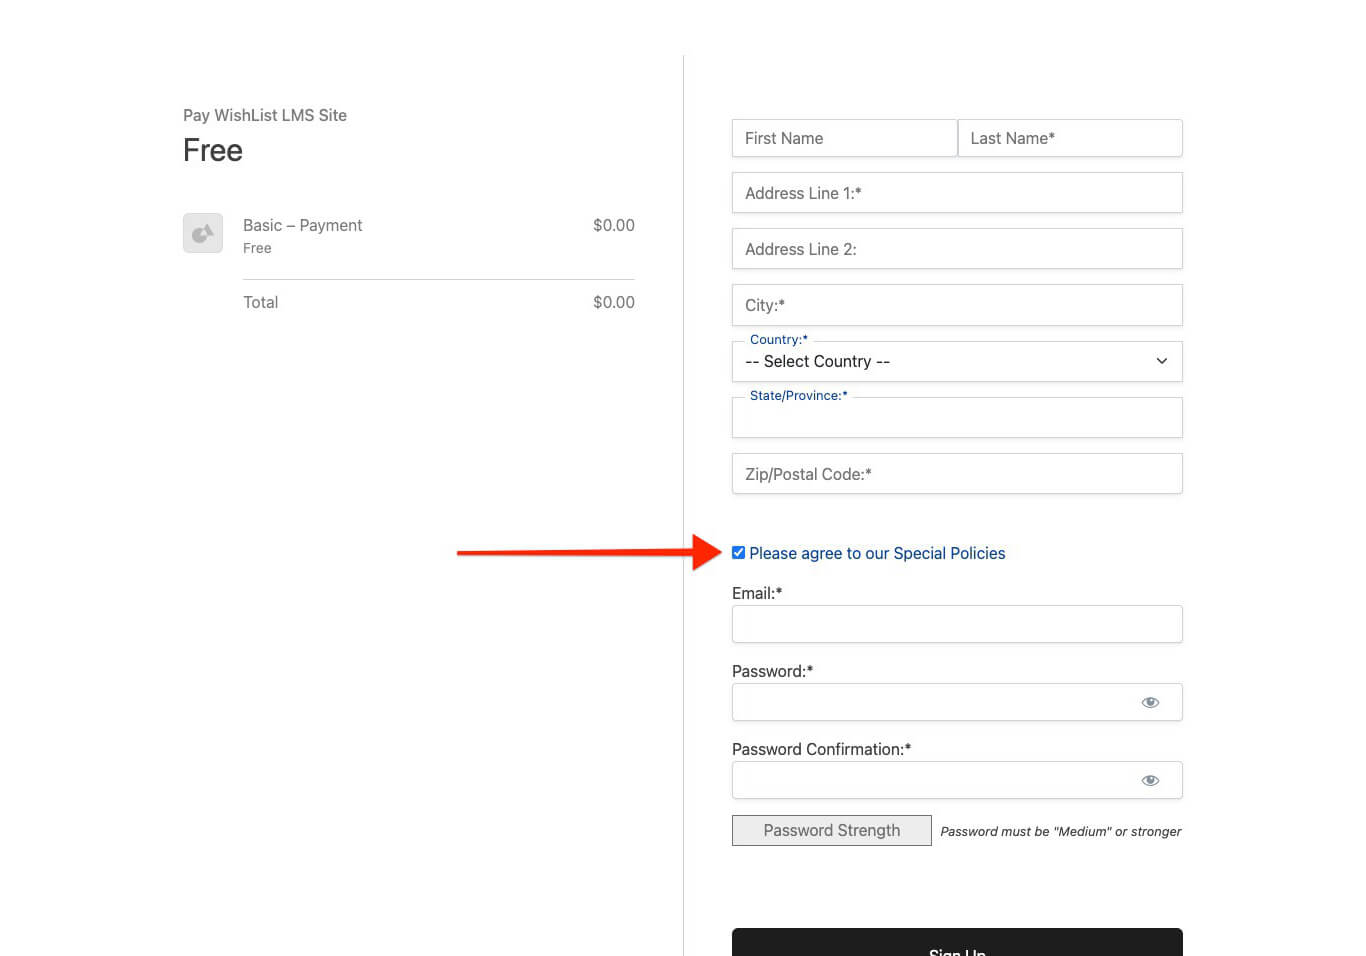
The checkbox will show up on the registration page like this.
Creating a Default Blank Option for Drop-Down Custom Field
Required drop-down custom fields benefit from a blank first option. This approach forces members to actively select a value instead of accepting a pre-filled choice.
Leave the first option in the Dropdown Options field blank to create the default blank option. Members must then choose a real value to satisfy the required field validation.
Enabling Multiple Checked Options for Multi-Select and Checkboxes Custom Fields
Multi-select and checkbox custom fields support multiple default values. Enter several default selections as comma-separated values in the Default Value(s) field.
For example, entering Option 1, Option 3 pre-checks both options when the field loads on the registration form. Members can then adjust selections as needed.