WishList LMS has Gutenberg blocks for the WordPress editor that improve your membership site. You can add these blocks anywhere on your site where you use the WordPress Block Editor.
This document explains the WishList LMS Gutenberg Blocks for WordPress. These blocks help membership sites by making it easy for users to add forms and member info to pages, posts, and widgets. It also gives a quick look at each block and what it does.
WishList LMS Gutenberg Blocks Overview
WishList LMS blocks allow you to add forms and member information to pages, posts, and widgets.
Currently, available WishList LMS blocks include:
LaunchPad™ blocks appear when you turn on LaunchPad™ Vorlagen. These include Login, Account, Registration, and Pricing Table (Groups) forms.
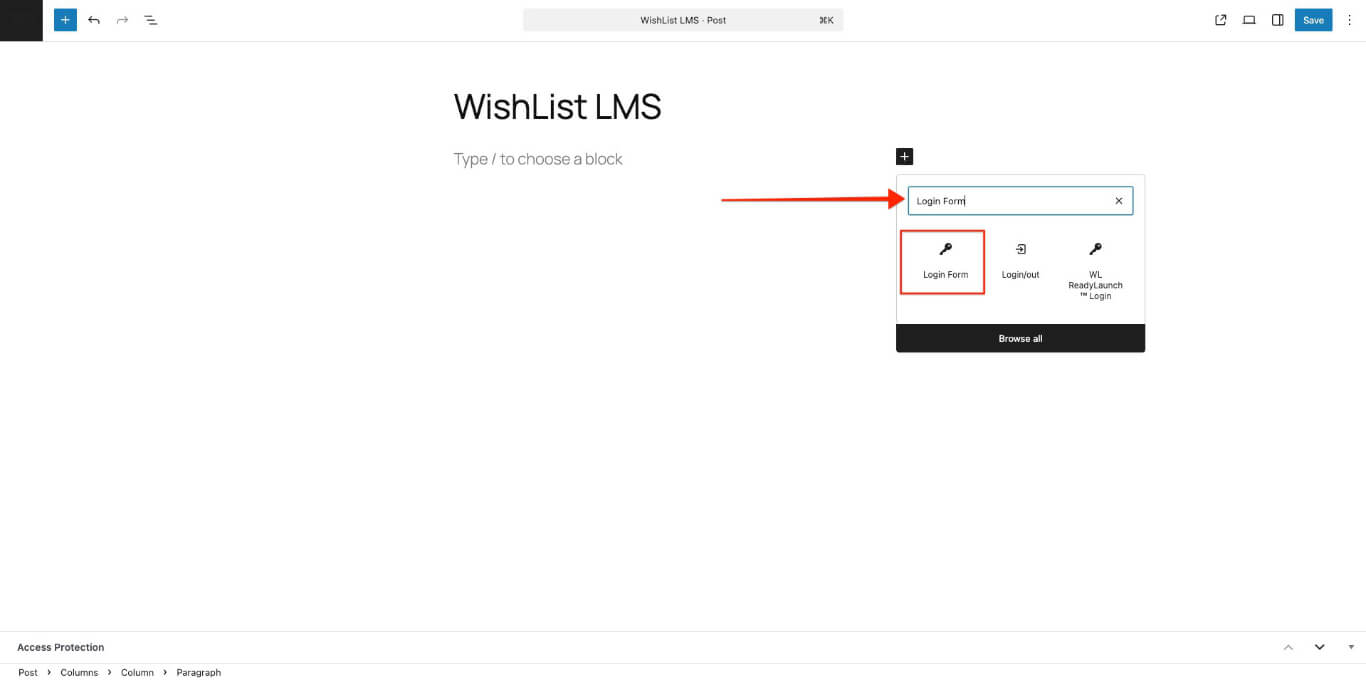
How to Find And Add WishList LMS Gutenberg Blocks
WishList LMS blocks can be added to any post or page with the Block editor. Here’s how to find and add them:
- Start the Block editor on the post or area you wish to edit.
- Klicken Sie auf die “+” icon to open the block inserter.
- Search or browse down the block list to find the block you need.
- Klicken Sie auf den Block, um ihn hinzuzufügen.
Login Form Block
The WishList LMS Login can be added anywhere with the Login Form block.
This block has a “Login Redirect URL” option. Turning it on will send non-logged-in users to the URL you set. If you turn it off, users can log in and stay on the same page.
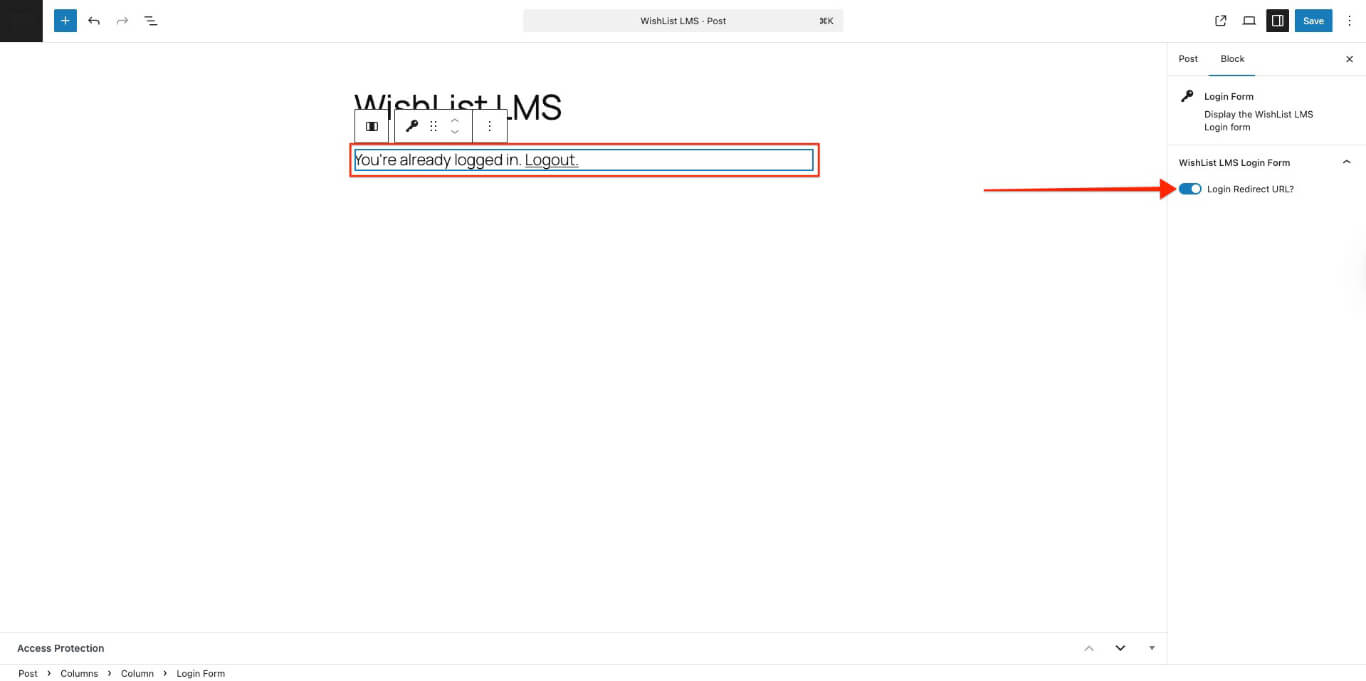
If you’re logged in, it shows a message and a logout link.
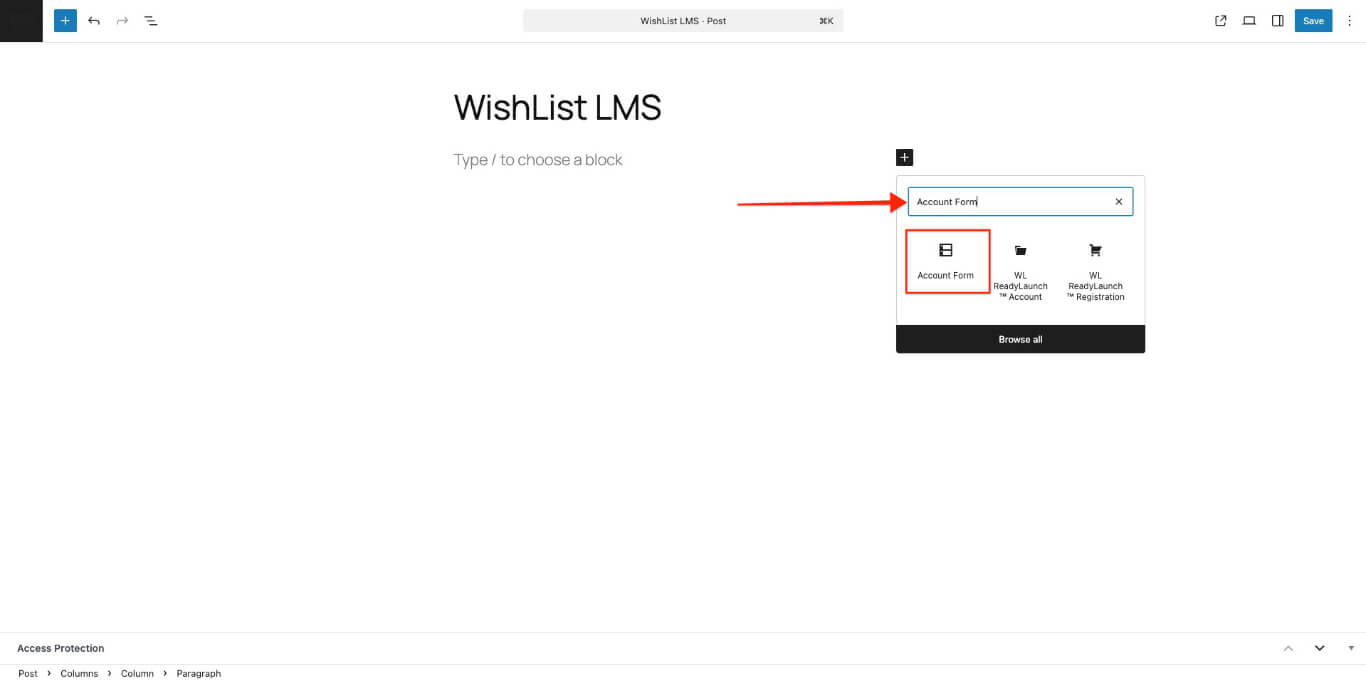
Account Form Block
Place the WishList LMS account form anywhere on your site using the WishList LMS Account block. You can also customize the Account page and add the block to show the form.
Registration Form Block
This block allows you to add a WishList LMS membership form anywhere on your site.
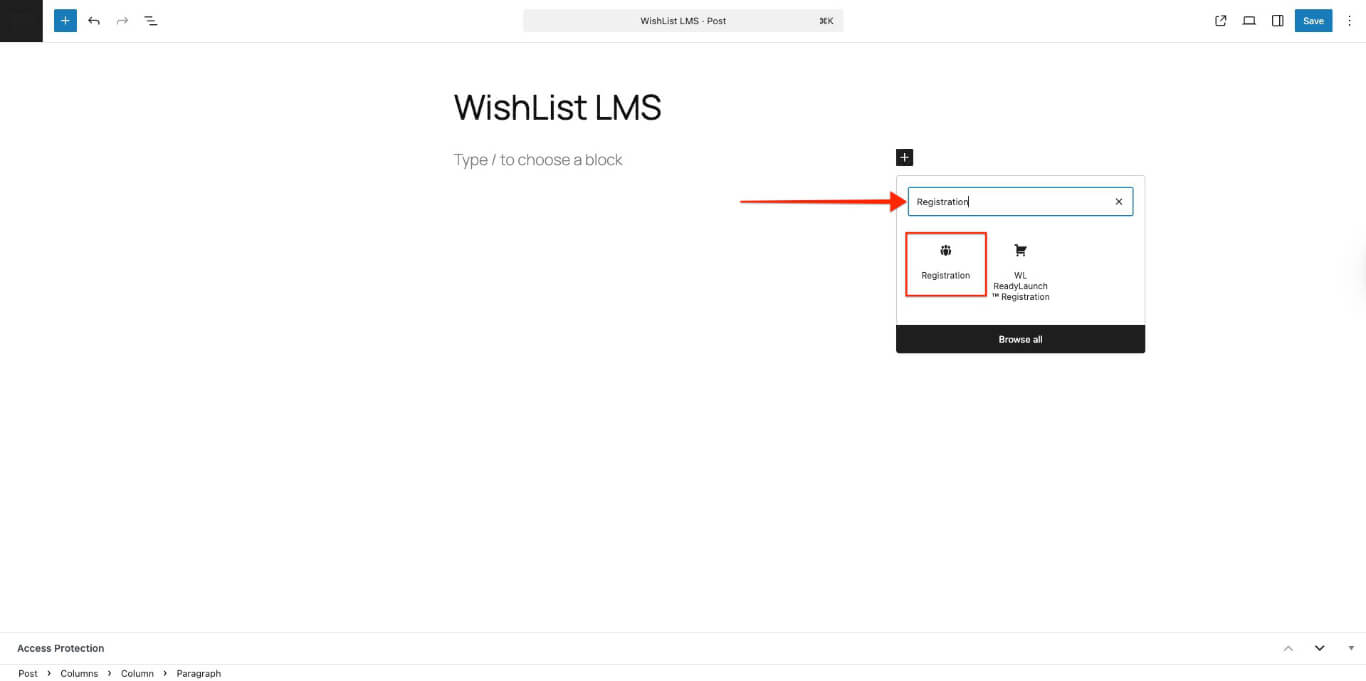
After adding the block, a dropdown menu called “Select a Membership registration form to display” appears in the settings.
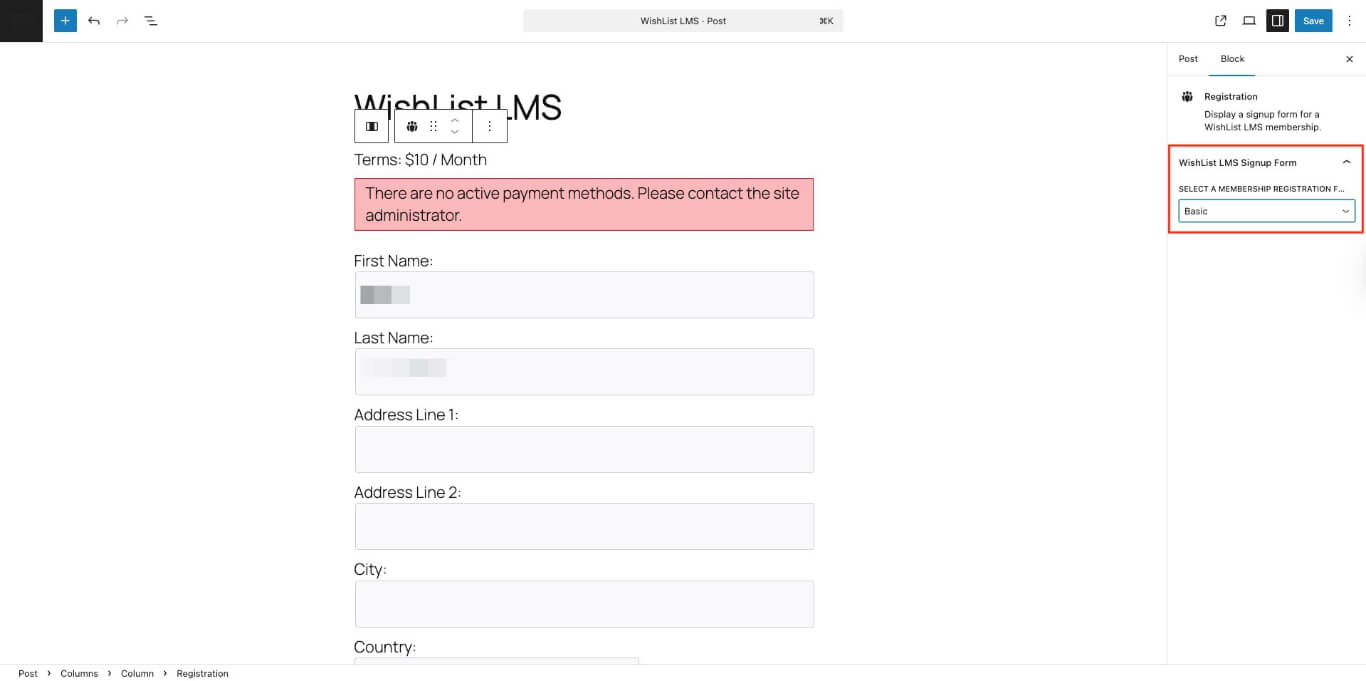
Select the membership to add its registration form using this block.
Like the Account block, this lets you build custom pages such as registration, promotional, or landing pages with forms.
Account Links Block
The Account Links block shows two links when you add it.
- The Account links to the user’s WishList LMS account page (set at Dashboard > WishList LMS > Einstellungen > Registerkarte Seiten);
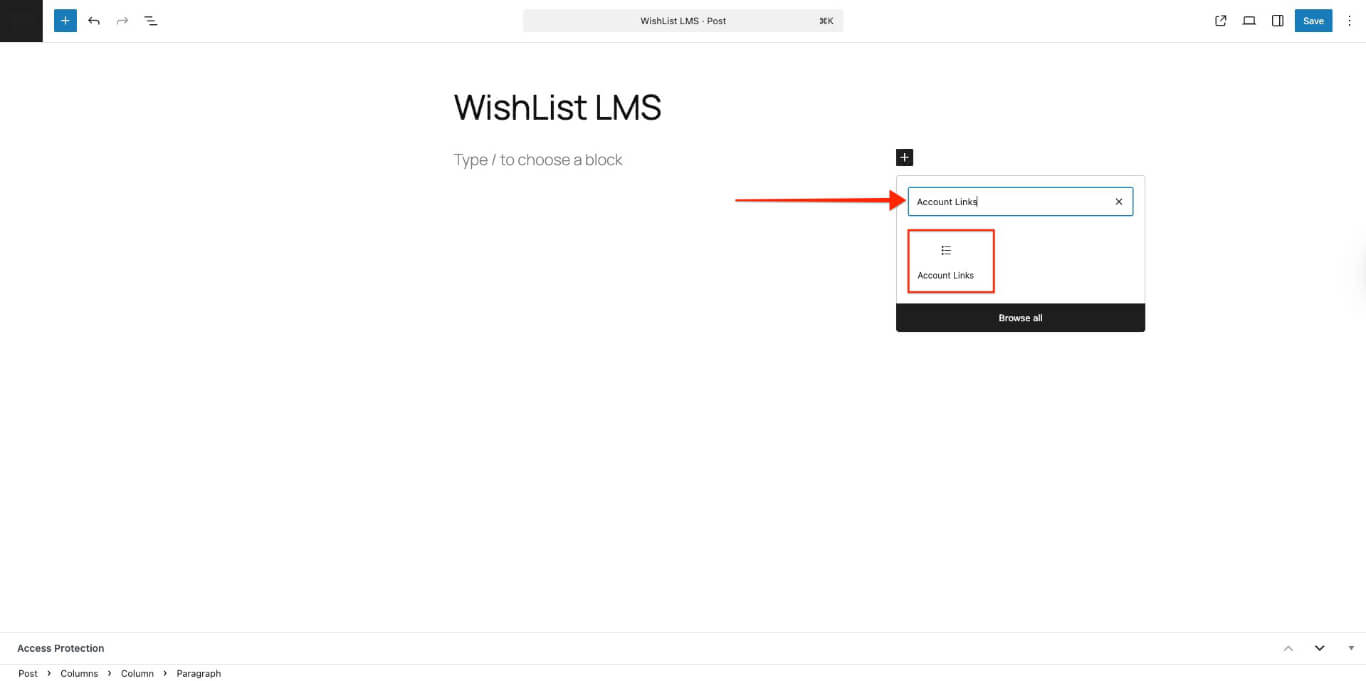
- The Logout link.
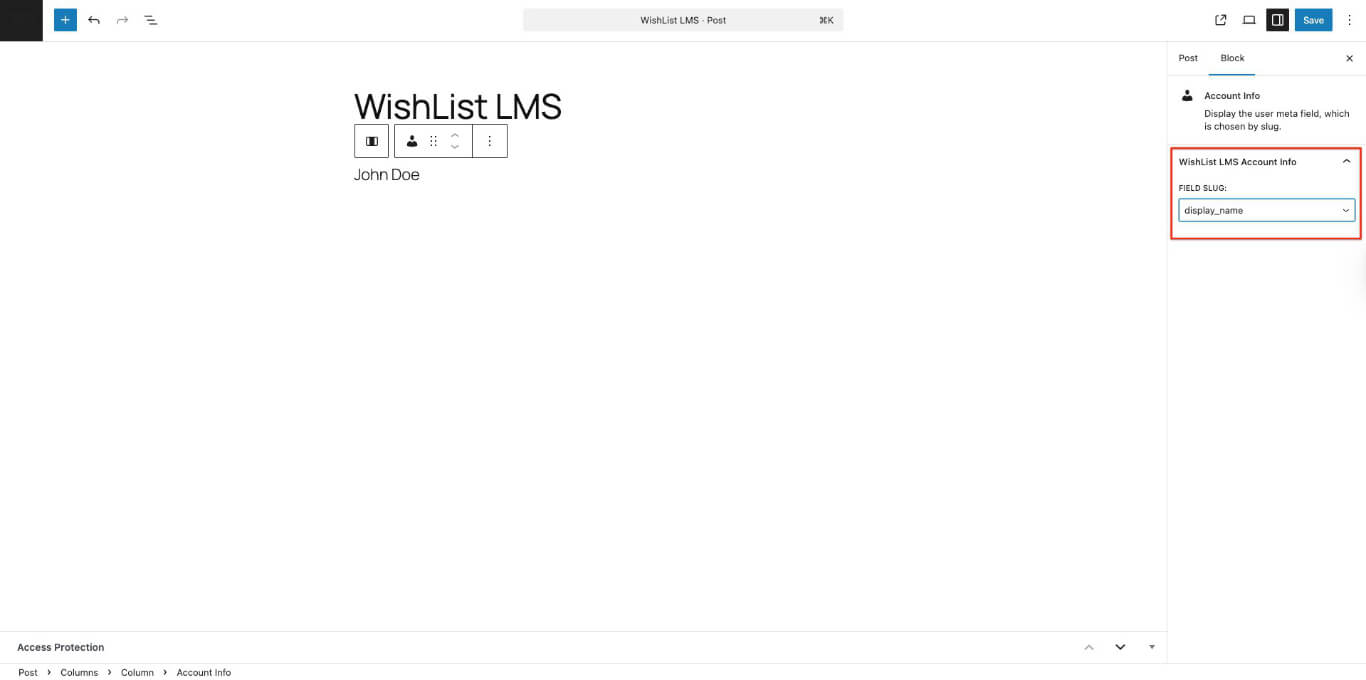
Account Info Gutenberg Block
This shows the user’s account information from the Account > Home tab.
In the block settings, you can select the account field slug von der Feldschnecke Dropdown.

Choose the field slug to show the user data on the front end.
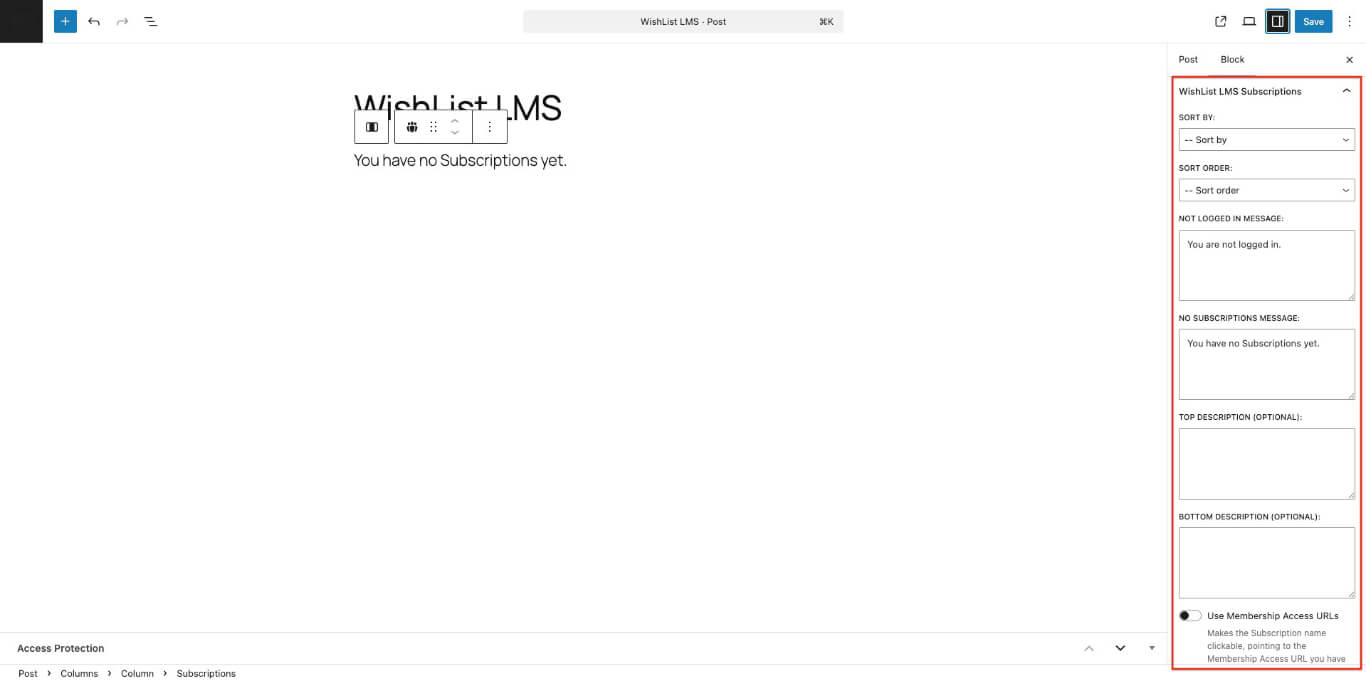
Subscriptions Gutenberg Block
This block shows all the memberships the logged-in user has. You can sort them in different ways and change some of the text.
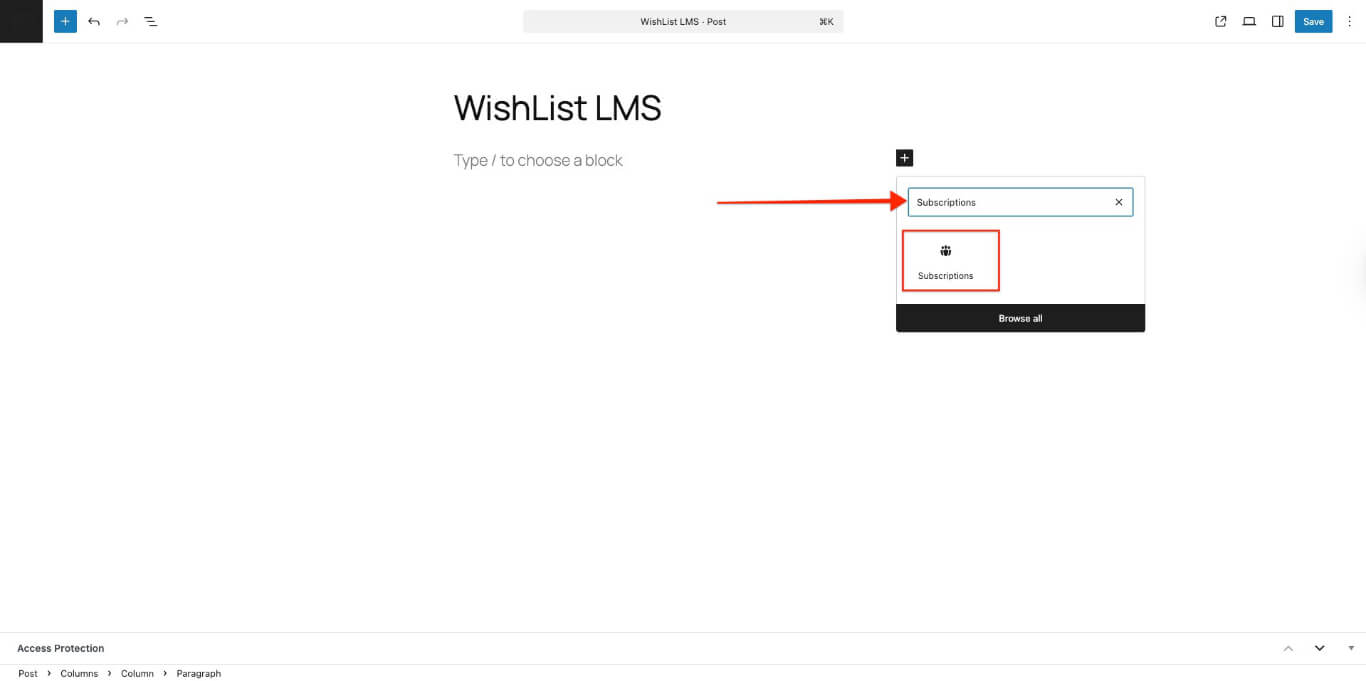
The available options for this block are:
- Sort By: Available sorting options are by “Date” (when the membership was created), or by “Title” (alphabetically);
- Sort Order: Choose Descending oder Ascending order;
- Not Logged In Message: This message displays for this block when logged-out users visit that post or page;
- No Subscriptions Message: This message displays for this block if the logged-in user does not have any active subscriptions;
- Top Description (optional): This description is shown above the subscription details;
- Bottom Description (optional): This description is shown beneath the subscription details;
- Use Membership Access URLs: Enabling this option makes the listed membership subscriptions clickable. These membership names point to the “Membership Access URL” set in your membership settings (Membership Options > Advanced Tab).
Protected Content Gutenberg Block
The Protected Content block restricts inner content to members of selected memberships. Wrap any blocks inside this container to limit visibility based on subscription status.
Block settings include:
- Mitgliedschaften: Select one or more memberships that grant access to the protected blocks;
- Unauthorized Message: Custom text shown to visitors without an active qualifying subscription;
- Show Excerpt: Display a preview of the protected content to non-members.