This guide shows how to install WishList LMS plugin on a WordPress site. The WishList LMS plugin helps you create and manage educational websites on WordPress. You can, for instance, use it to share courses, create member areas, and ultimately, earn money through online courses and memberships.
Covered in This Article
You can install the plugin using either automatic or manual methods.
Install WishList LMS Automatically
To install the WishList LMS plugin automatically, follow these steps:
- Head to Dashboard > Plugins > Add Plugin.
- Search for “Wunschzettel LMS“.
- Next, click Jetzt installieren.
- Finally, click the Activate Plugin um WishList LMS zu aktivieren.
Install WishList LMS Manually
If the automatic installation doesn’t work, you can install WishList LMS manually either through the dashboard oder FTP.
Install WishList LMS Manually From Dashboard
After downloading the WishList LMS plugin from WordPress plugin directory, follow these simple steps to install and activate WishList LMS.
- Log in to your WordPress website as an administrator user.
- Head to Dashboard > Plugins > Add New
- Klicken Sie auf die Upload Plugin Taste.
- Choose to upload the wishlist-lms.zip file you downloaded earlier.
- Next, click Jetzt installieren.
- Finally, click the Activate Plugin um WishList LMS zu aktivieren.
Install WishList LMS Manually Via FTP
Then, follow these steps to install it with FTP manually.
- Extract the wishlist-lms.zip file you downloaded earlier somewhere on your computer.
- Connect to your website server using any FTP Client (e.g. FileZilla). If you are unsure how to do this, contact your web host for instructions.
- Copy the extracted “wishlist-lms” directory from your computer to your server’s
/wp-content/plugins/directory. Keep in mind that this can take some time to complete due to the folder volume. - Once the upload finishes, log in to your WordPress website as an administrator user.
- Navigieren Sie zu Dashboard > Plugins > Installed Plugins.
- Find the WishList LMS plugin in the list, and click Aktivieren Sie below the plugin name.
Hinweis: Your plugin files should go in the folder /wp-content/plugins/wishlist-lms/. Make sure you don’t have multiple wishlist-lms folders inside each other, like /wp-content/plugins/wishlist-lms/wishlist-lms/. Having extra folders can cause problems with the plugin.
Setting Up WishList LMS After Installation
After installing and activating the WishList LMS plugin, you will subsequently find the Wunschzettel LMS menu in the dashboard. Once you click on it, you can easily see all the available options.

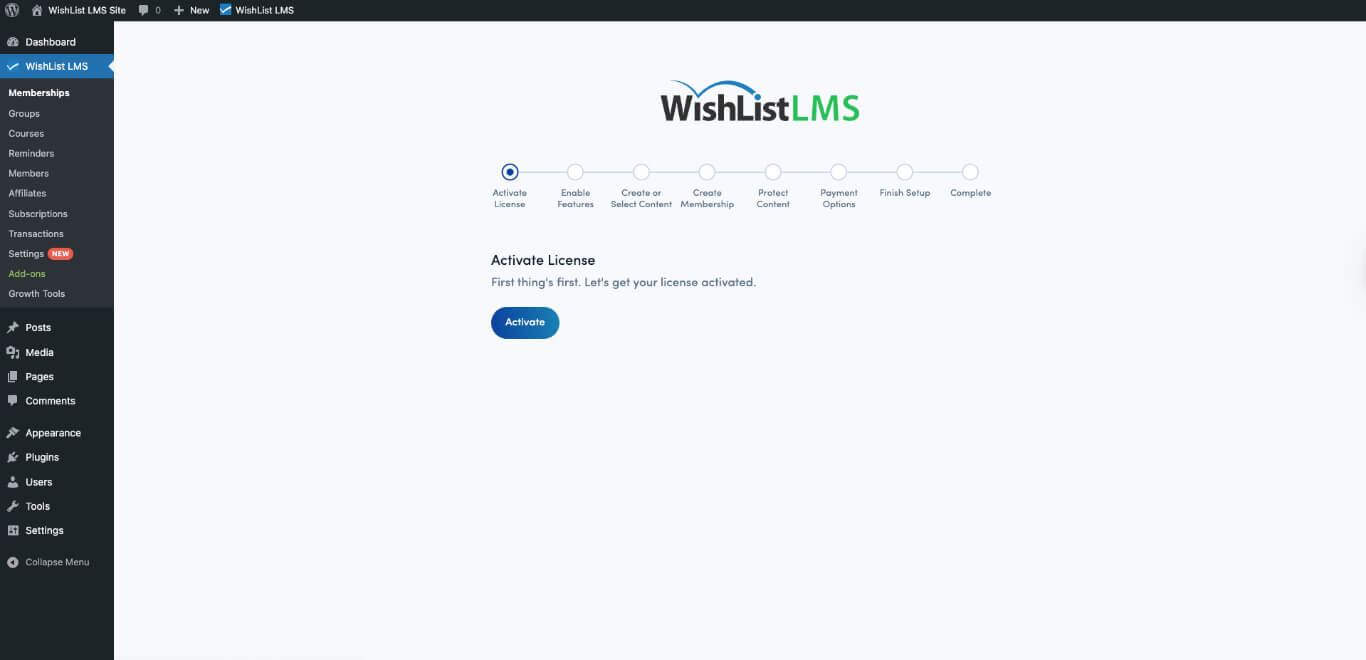
Now, you can configure your membership site using WishList LMS wizard.
- When you activate WishList LMS for the first time.
- Gehe zu Dashboard > Wunschzettel LMS.
- Die wizard will guide you through the license activation and setup.
Hinweis: If the Onboarding Wizard is stopped, you can finish setting it up by going to any page under Dashboard > Wunschzettel LMS. A notification will appear at the top of WishList LMS pages, giving you the option to continue setup.