You can use WishList LMS blocks in your WordPress posts, pages, sidebars, and widgets.
This document explains the WishList LMS block widgets and how to use them.
Widget Areas
Usually, widget areas are found in the footer and sidebar. Depending on your theme and plugins, there might be more widget areas. For example, the WishList LMS Courses add-on adds special areas on pages, like the sidebar, the header for lessons, and the footer for lessons.
These areas allow you to add extra content to your pages or courses. For example, you can add a greeting and a login form in the sidebar. Logged-in users see their greeting, while logged-out users see the login form.
You can set this up on posts, pages, headers, footers, or other widget areas that support blocks.
To edit any of your widget areas and add a block to it, follow these steps:
- Navegue até Dashboard > Appearance > Widgets.
- Click on any widget area to expand it, and click on the + icon to add block widgets.
- Search or browse down the block list, and click on the block you need to add it to the widget area.
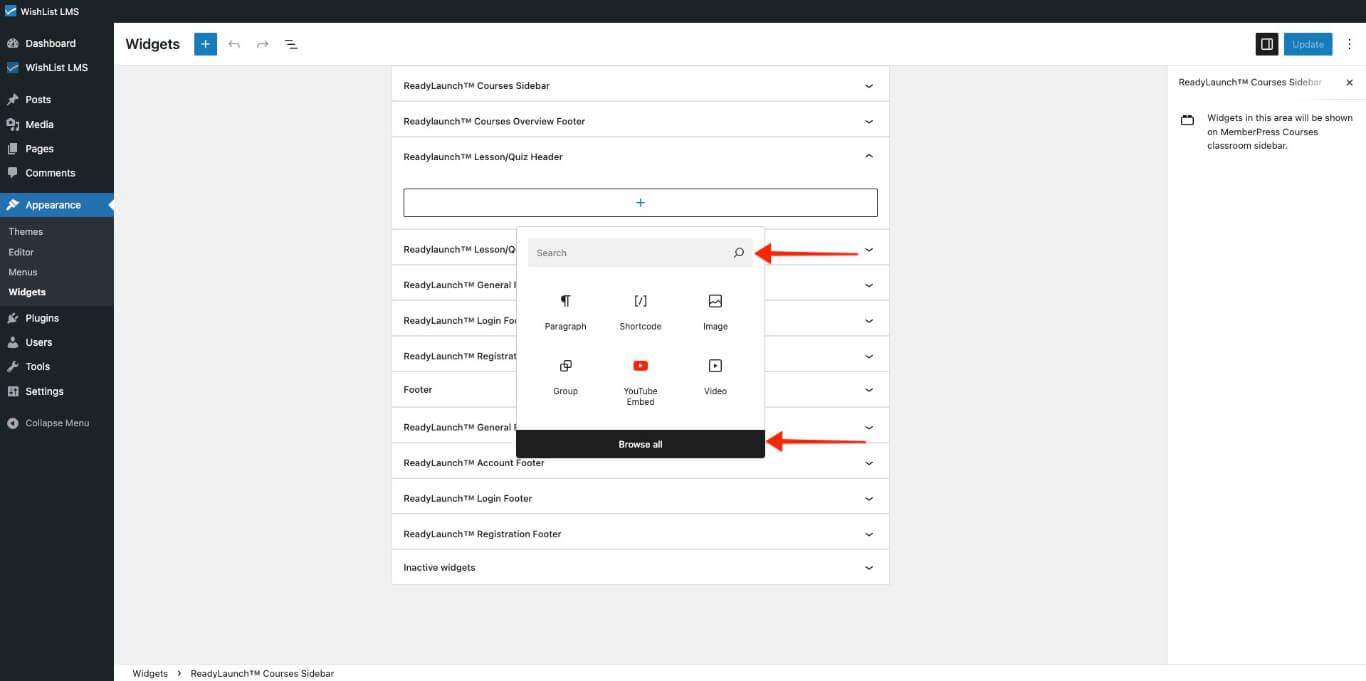
- Click on the Atualização button to save changes.
Observação: If you don’t see the Widgets option under Painel de controle > Appearance, it may be because your theme supports the Site Editor instead of widgets. In that case, go to Dashboard > Appearance > Editor to edit your site and add WishList LMS blocks to your templates and patterns.
Available WishList LMS Blocks for Widgets
You can add WishList LMS Classic e LaunchPad™ forms to your widgets.
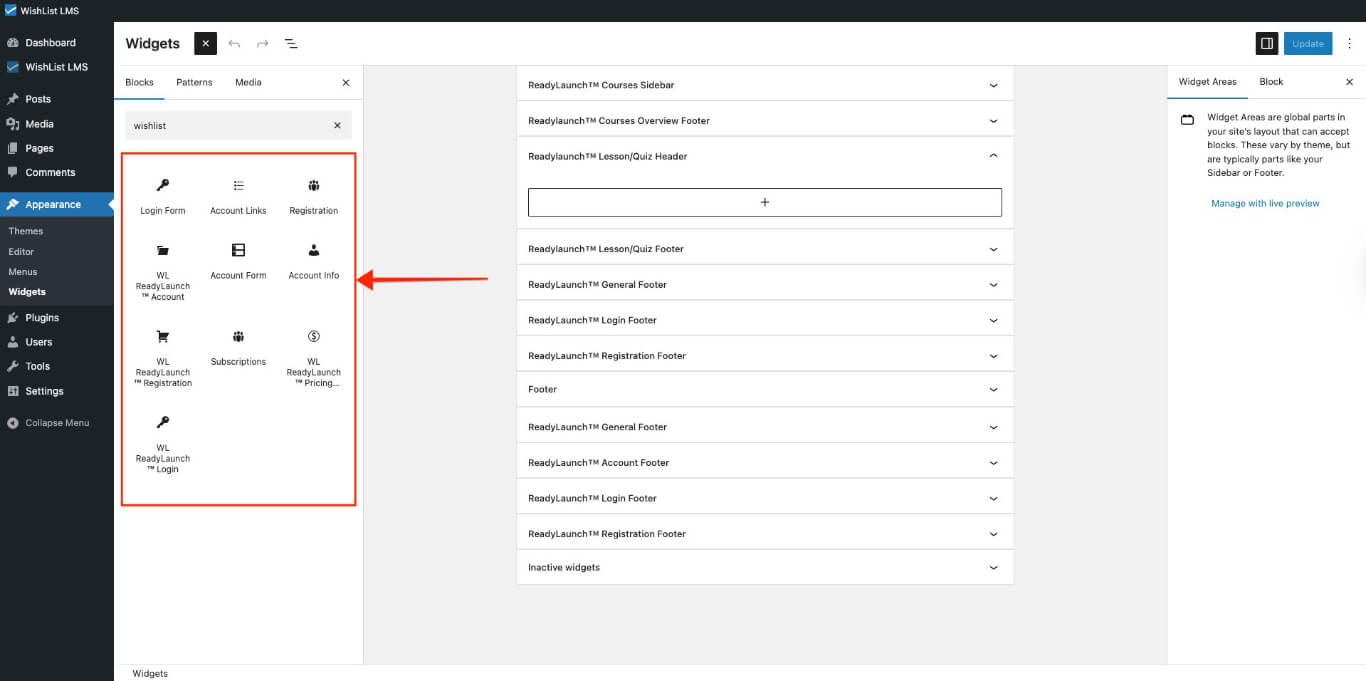
Use these blocks to add WishList LMS forms and more:
You can find more information about each WishList LMS block in the “Available Gutenberg Blocks” document.
You can also use LaunchPad™ blocks for Login, Conta, Registro, e Preços Table forms. Additional information can be found in the related resources on how to customize the: