The LaunchPad™ Account page template has a clean, modern look and customizable options to improve the user experience. It is enabled by default for new installations.
This guide explains how to customize the template, add welcome images, change display settings, switch back to the classic template, and use shortcodes for custom features.
Customize the LaunchPad™ Account Page Template
The LaunchPad™ Account template integrates seamlessly with your site’s branding. The template sidebar et header follow the LaunchPad™ Global Design Settings and use your brand color as the background. The header displays the logo configured for your LaunchPad™ templates.
Adding a Welcome Image
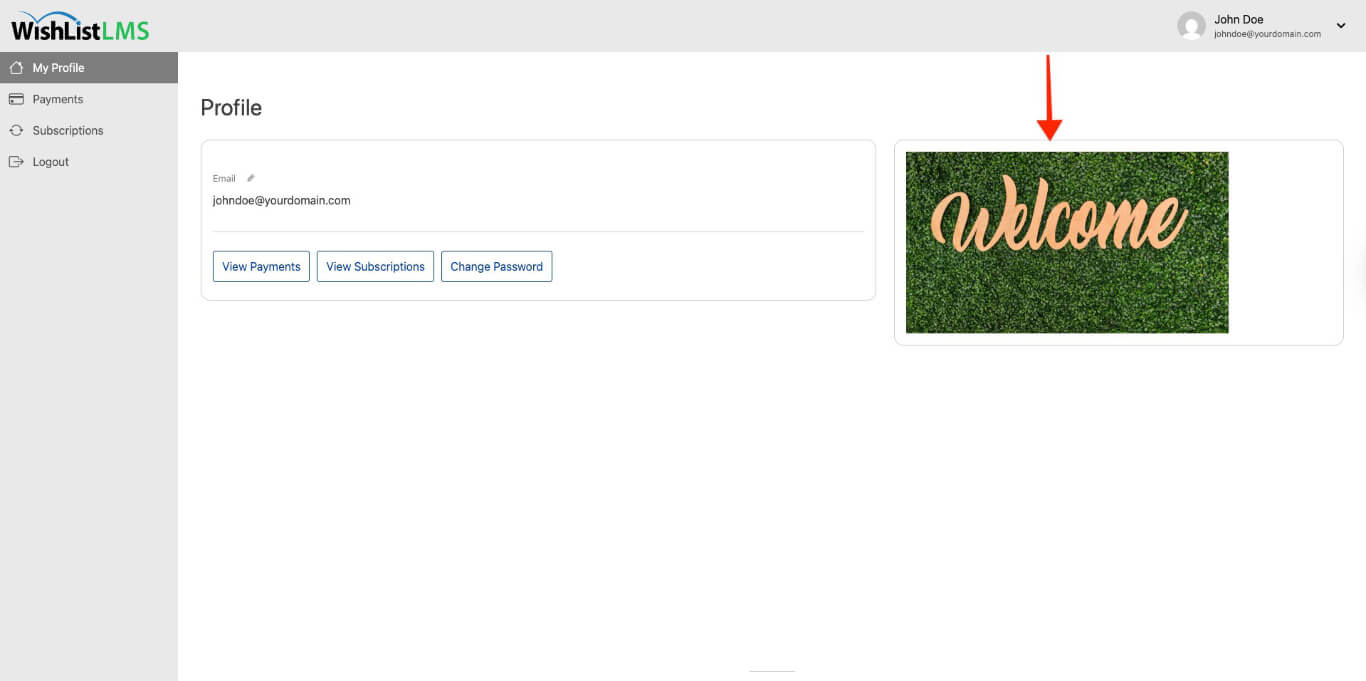
The Account template has a welcome image that shows on the user’s profile. It can be a logo, photo, illustration, or any other picture that improves the user experience.
Follow these steps to add a welcome image:
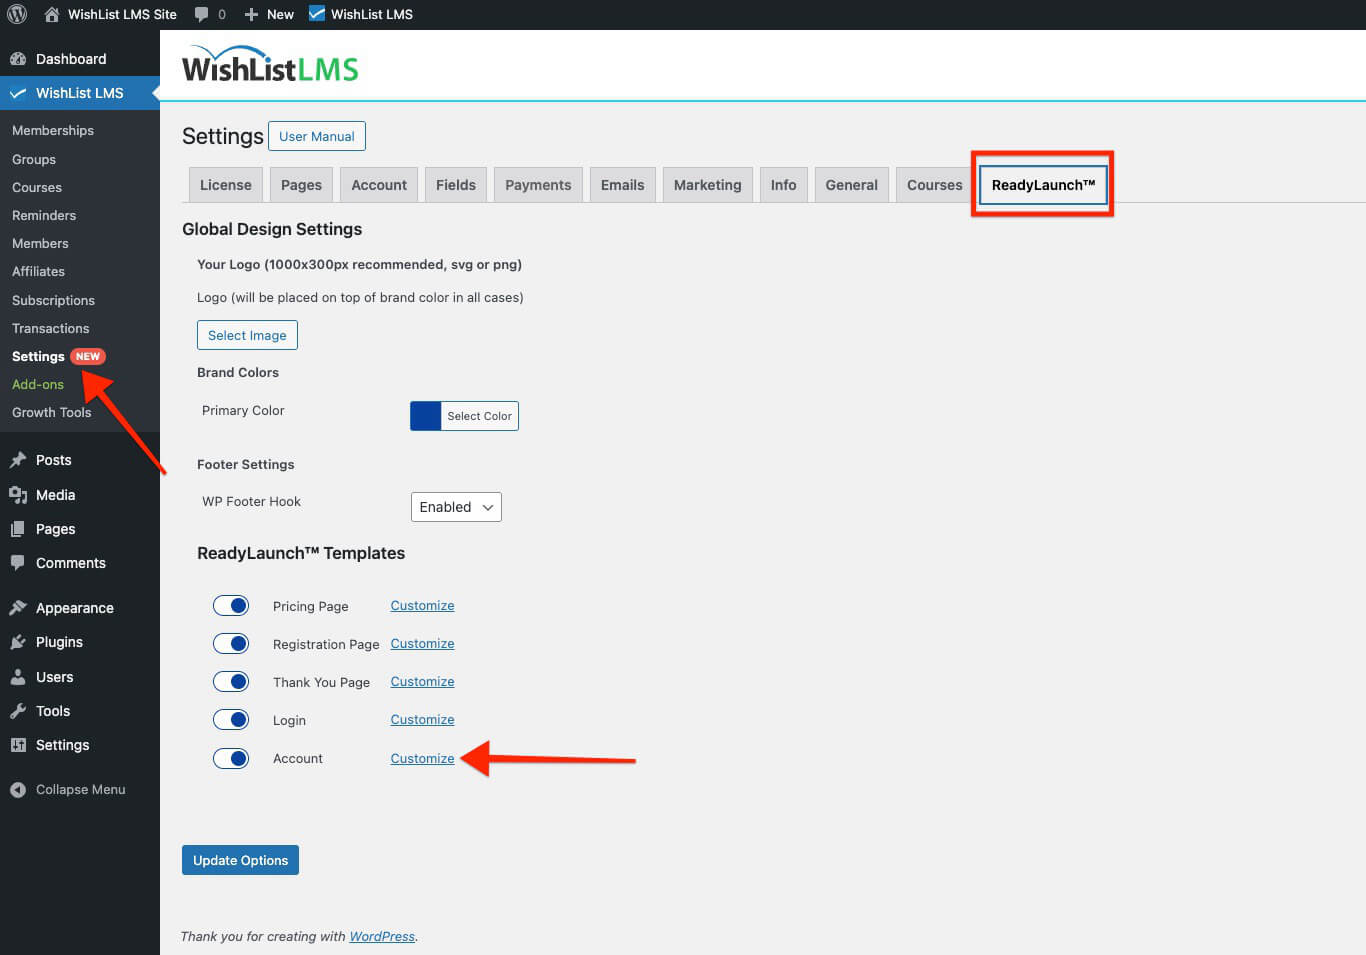
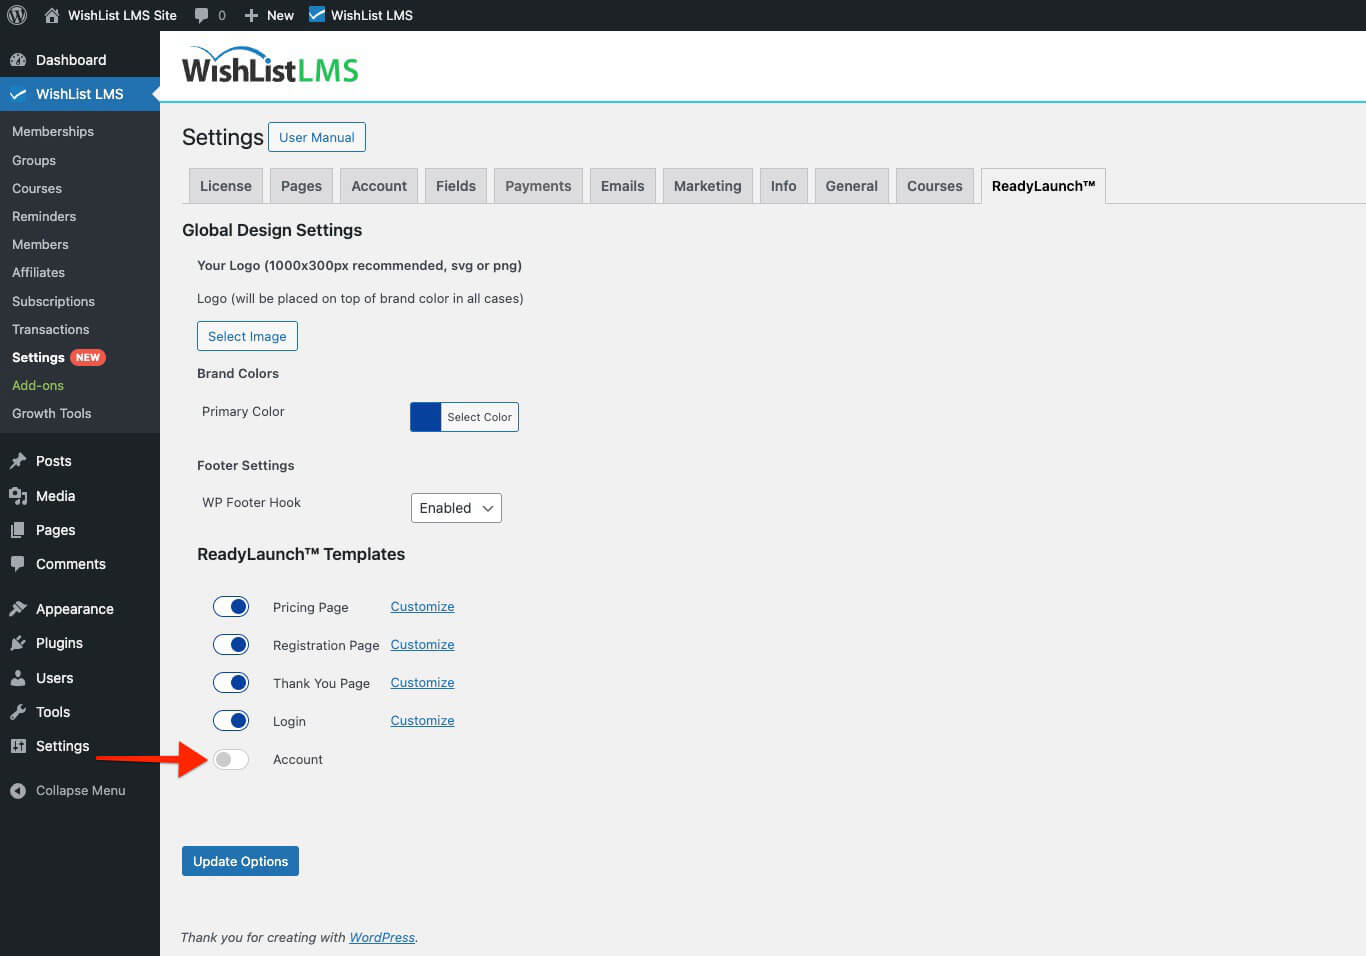
- Naviguez jusqu'à Dashboard > WishList LMS > Settings.
- Cliquez sur le bouton LaunchPad™ tab.
- Localiser le Account option and click the Customize lien.
- Toggle on the Show Welcome Image option in the pop-up window.
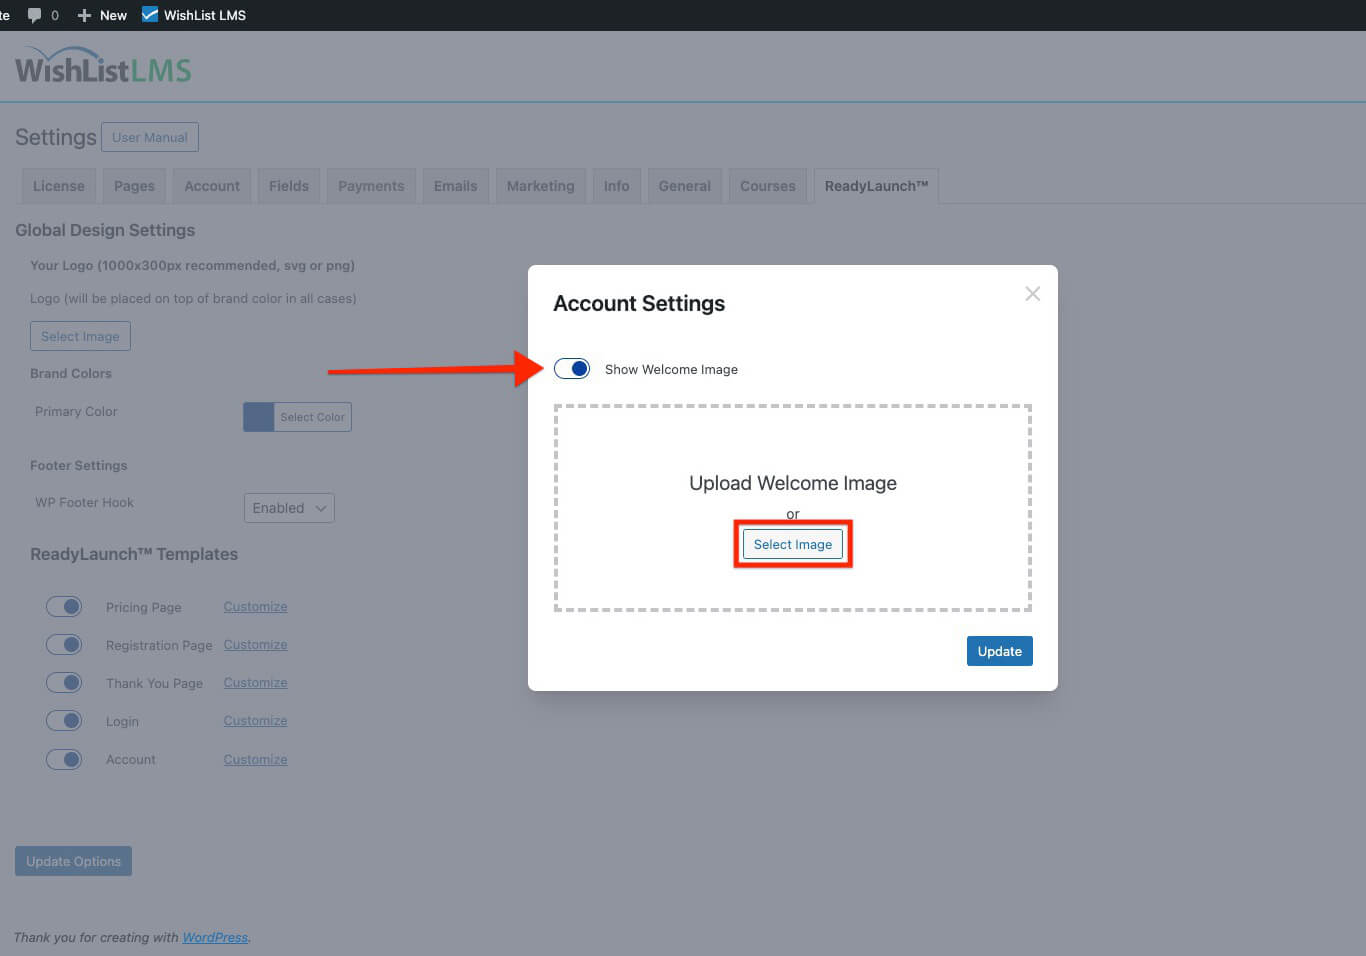
- Cliquez sur le bouton Select Image button to choose your welcome image.
- Select your preferred image from the media library.
- Cliquez sur Update to apply the image to your account page.
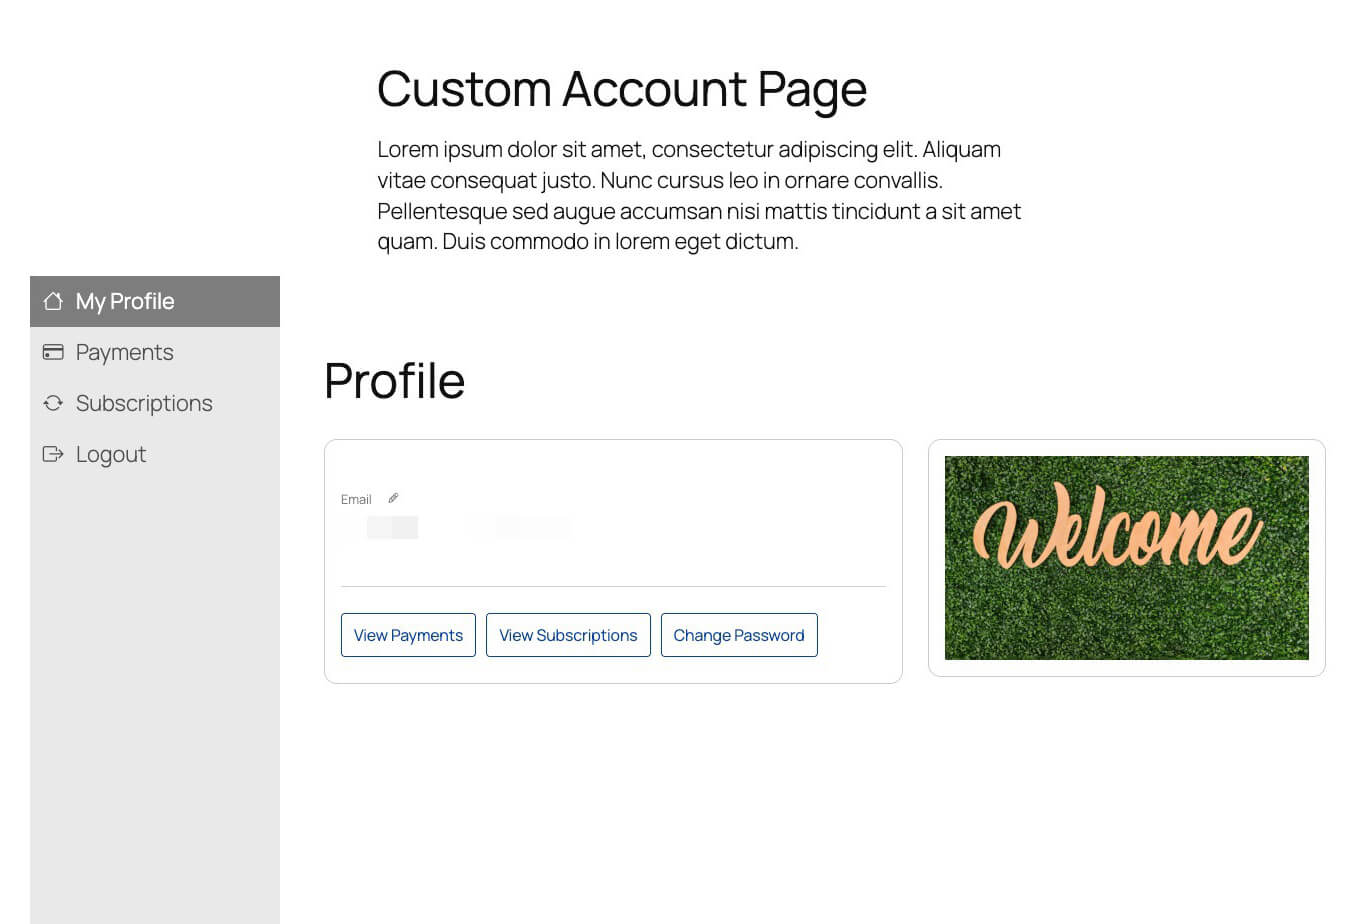
After completing these steps, users will see a welcome image on their My Profile page when they open their account.
Deactivate LaunchPad™ Account Page Template
Users who want the classic WishList LMS Account page can turn off the LaunchPad™ Account template. This will bring back the usual layout and features.
To switch to the classic account template:
- Naviguez jusqu'à Dashboard > WishList LMS > Settings.
- Cliquez sur le bouton LaunchPad™ tab.
- Toggle the Account option off.
The account page will immediately switch to the classic template design.
Adding the Account Template to Custom Pages
The LaunchPad™ Account can be added to any page or post in WordPress. This lets you create custom pages while keeping the account features.
Using the LaunchPad™ Account Block
To add the account template to a custom page:
- Open the page or post in the WordPress Block editor.
- Cliquez sur le bouton “+” icon to access the block inserter.
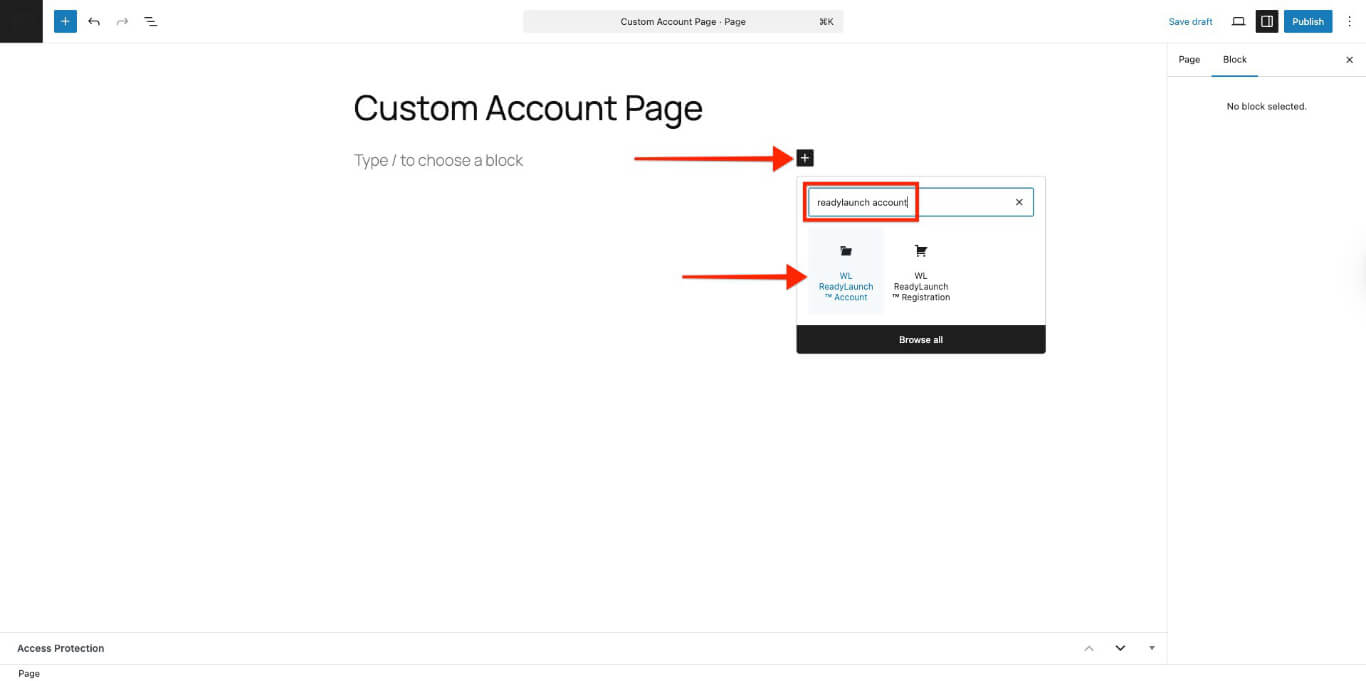
- Search for LaunchPad™ Account in the block list.
- Click the block to add it to your page.
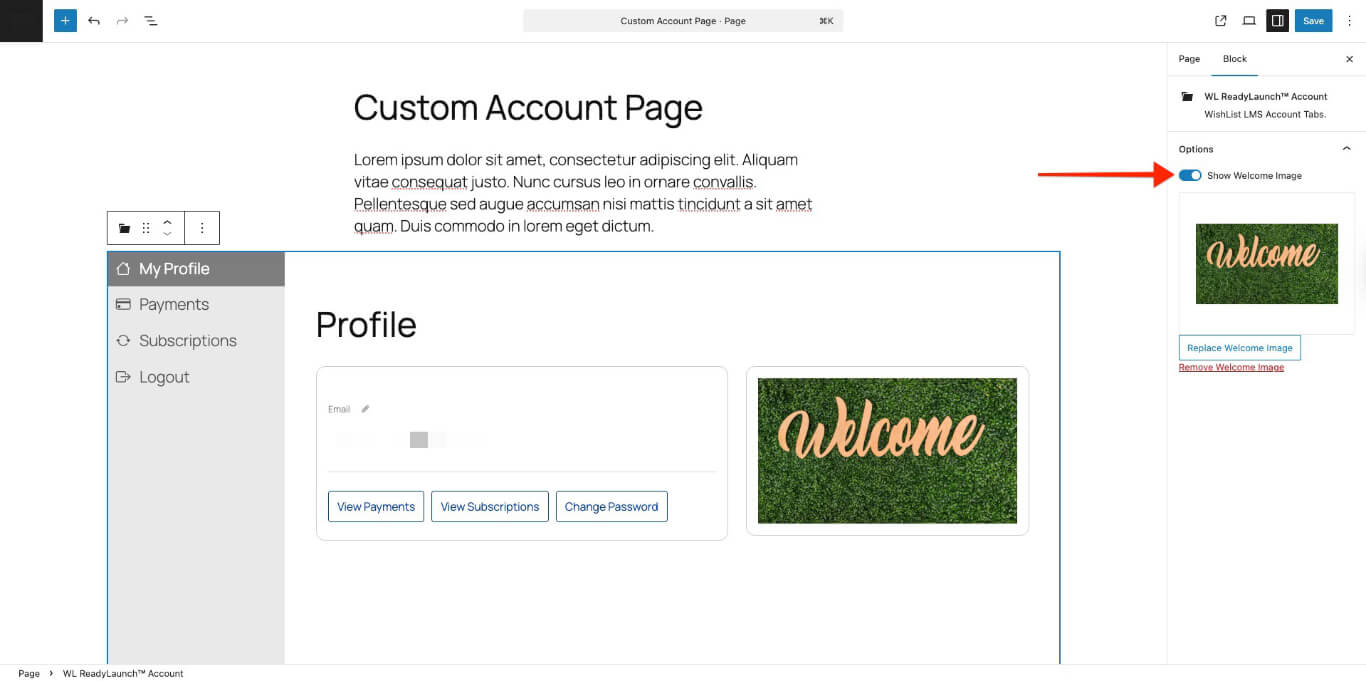
Block Options
The LaunchPad™ Account block includes customization options:
- Show Welcome Image: This option displays the welcome image configured in Dashboard > WishList LMS > Settings > LaunchPad™ tab.
This method lets you customize your account page with extra content while keeping your site’s header and footer. The LaunchPad™ template fits in smoothly.
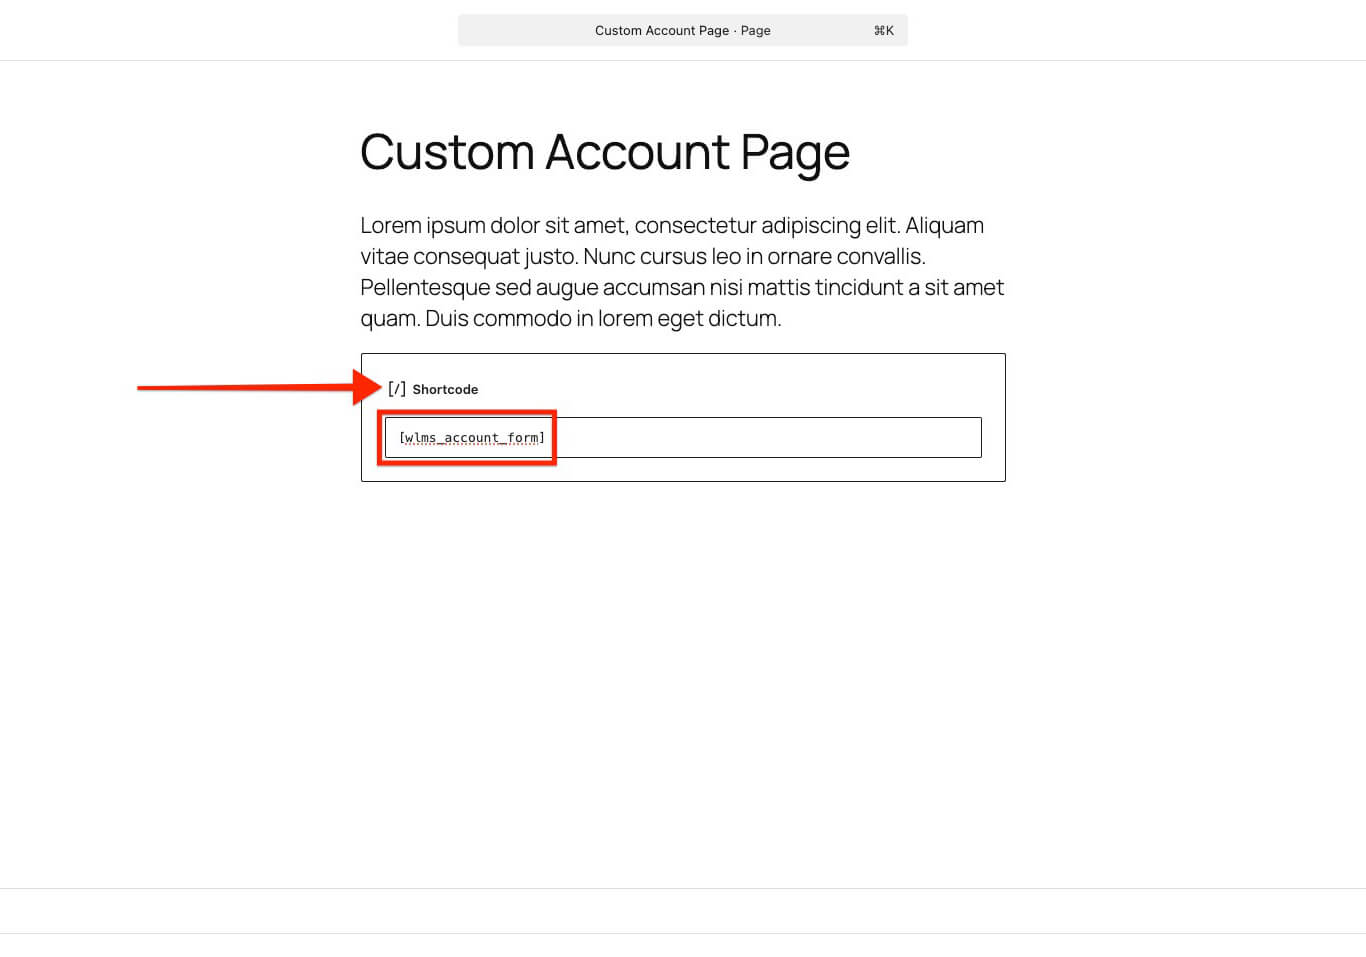
Using Shortcodes
The LaunchPad™ Account template can’t be embedded with shortcodes. If you need shortcodes, use the classic WishList LMS account template.
Use this shortcode for the classic account page.
This shortcode displays the standard account form with classic styling and functionality.