Le LaunchPad™ template lets you customize the Thank You Page, which is already turned on by default. It has a better design and more features than the classic template.
LaunchPad™ in WishList LMS helps improve your membership site by making it look nicer and easier to personalize. You can add your logo, pick a background color, and display a summary of the user’s purchase and profile options.
This guide explains how to set up and customize the Thank You Page in WishList LMS.
Understanding the LaunchPad™ Thank You Page Template
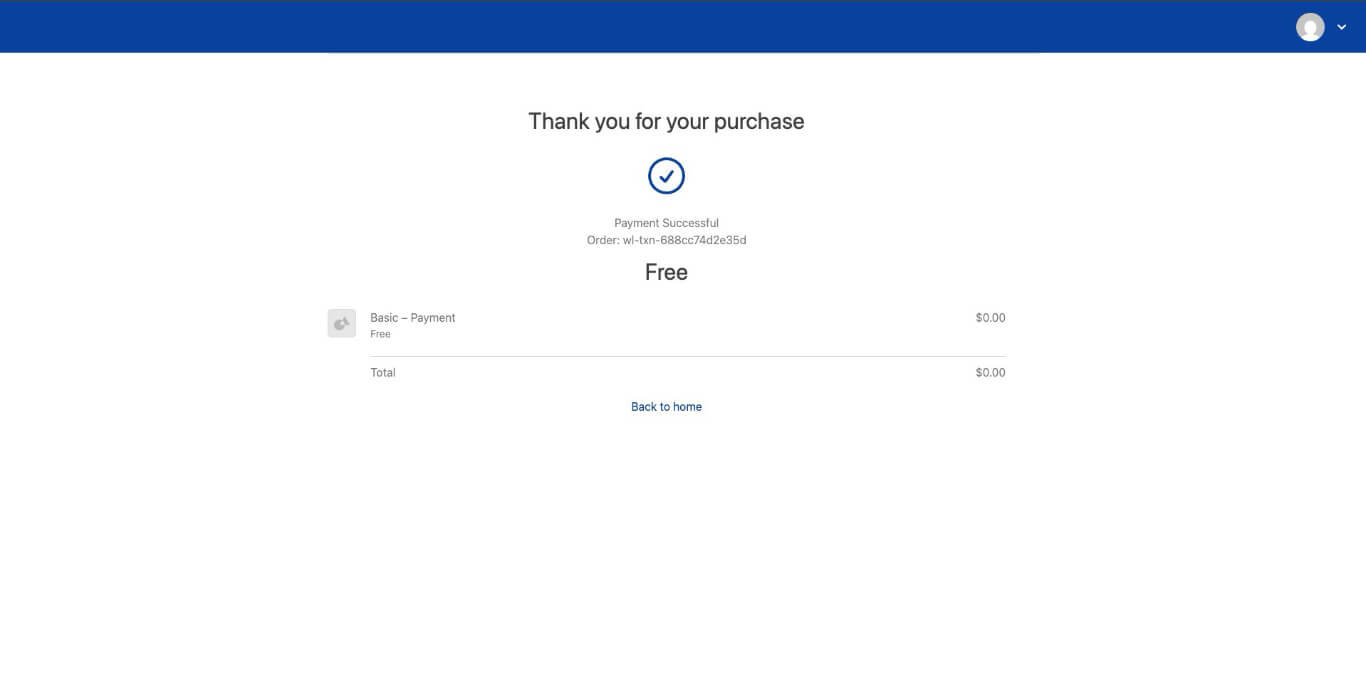
The LaunchPad™ Thank You Page has useful features that make it better for users after they sign up. The header uses the brand color and logo from the LaunchPad™ settings. Unlike the classic thank-you pages, this one looks better and summarizes the purchase. It also has a profile menu at the top right for easy access.
Customizing the LaunchPad™ Thank You Page Template
The LaunchPad™ Thank You Page can be customized. To do this:
- Log in to the admin area.
- Go to Dashboard > WishList LMS > Settings.
- Click on the LaunchPad™ tab.
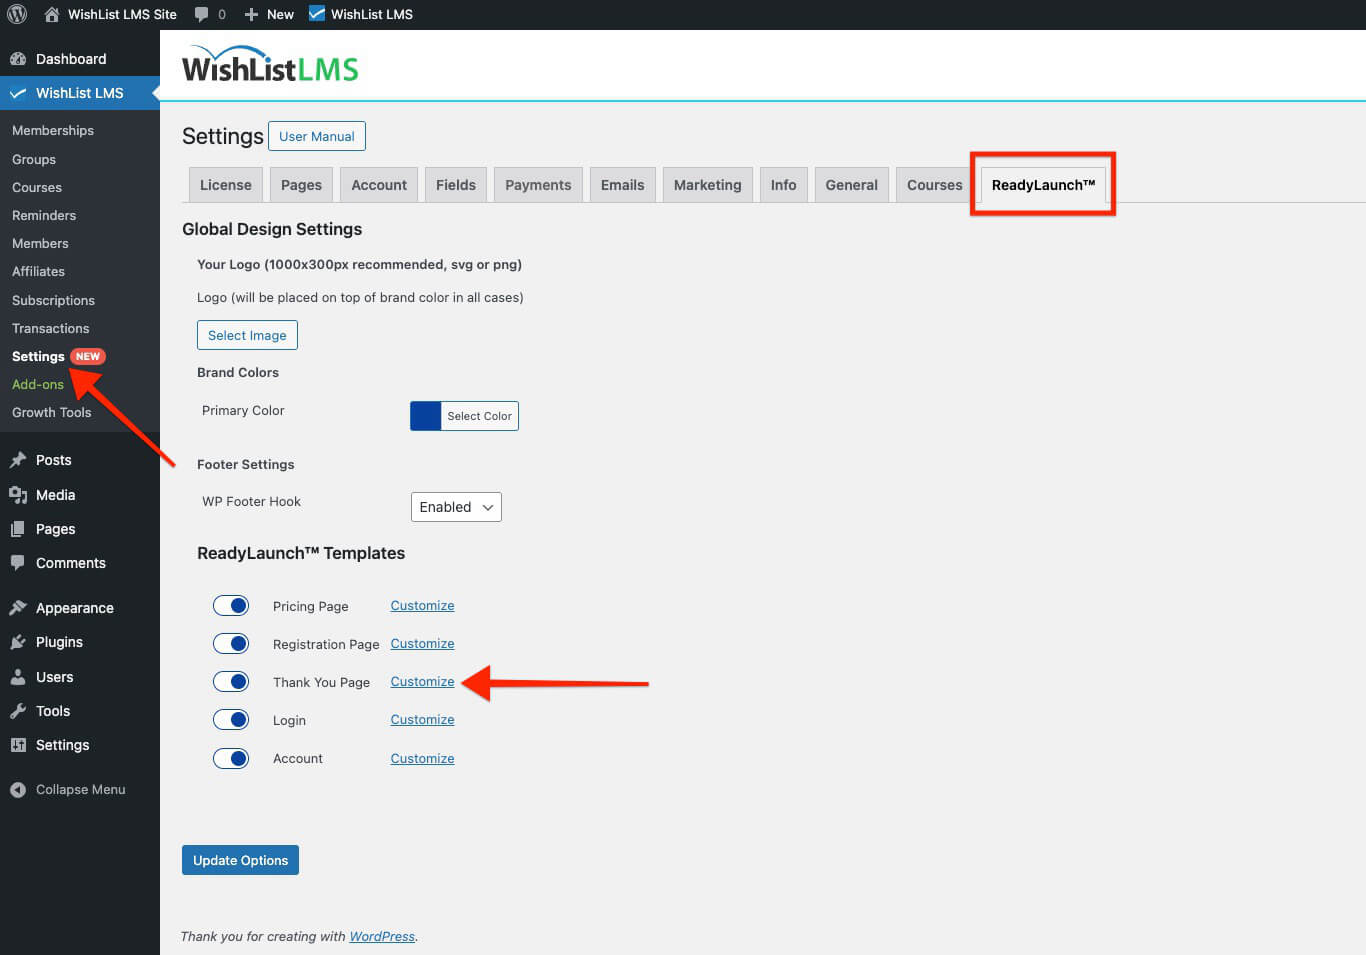
- Next to the Thank You Page, click Customize.
A pop-up will appear with customization options.
Available Customization Options
The LaunchPad™ Thank You Page template includes two main customization options:
Show Welcome Image
The welcome image feature lets admins add pictures to the thank you page.
To add a welcome image to the thank you page:
- Access the Thank You Settings pop-up.
- Toggle on the Show Welcome Image option.
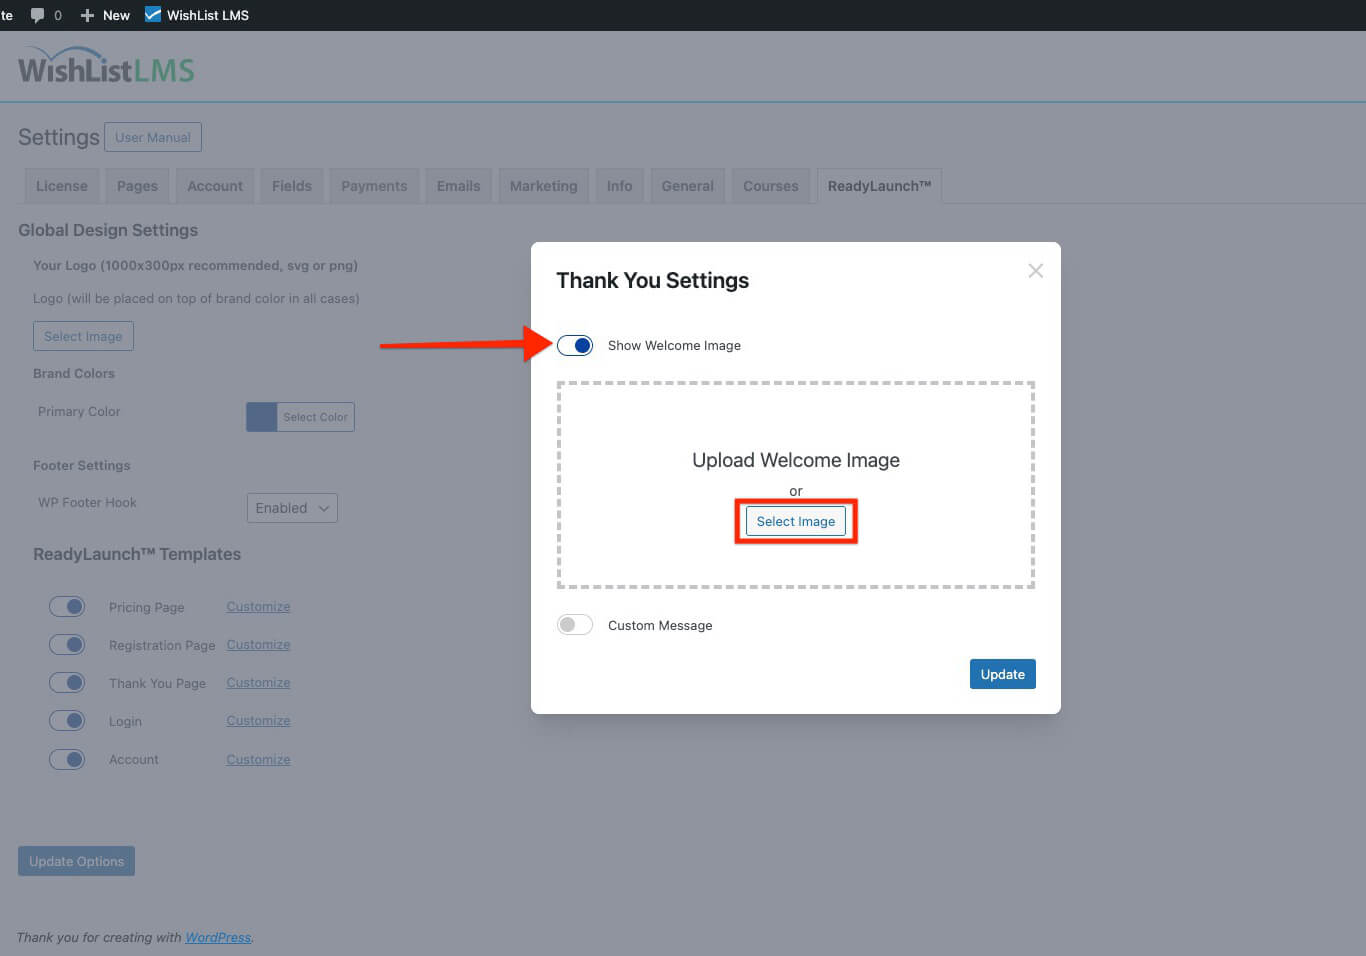
- Click on the Select Image bouton.
- Choose the welcome image from the media library.
- Cliquez sur Update to apply the changes.
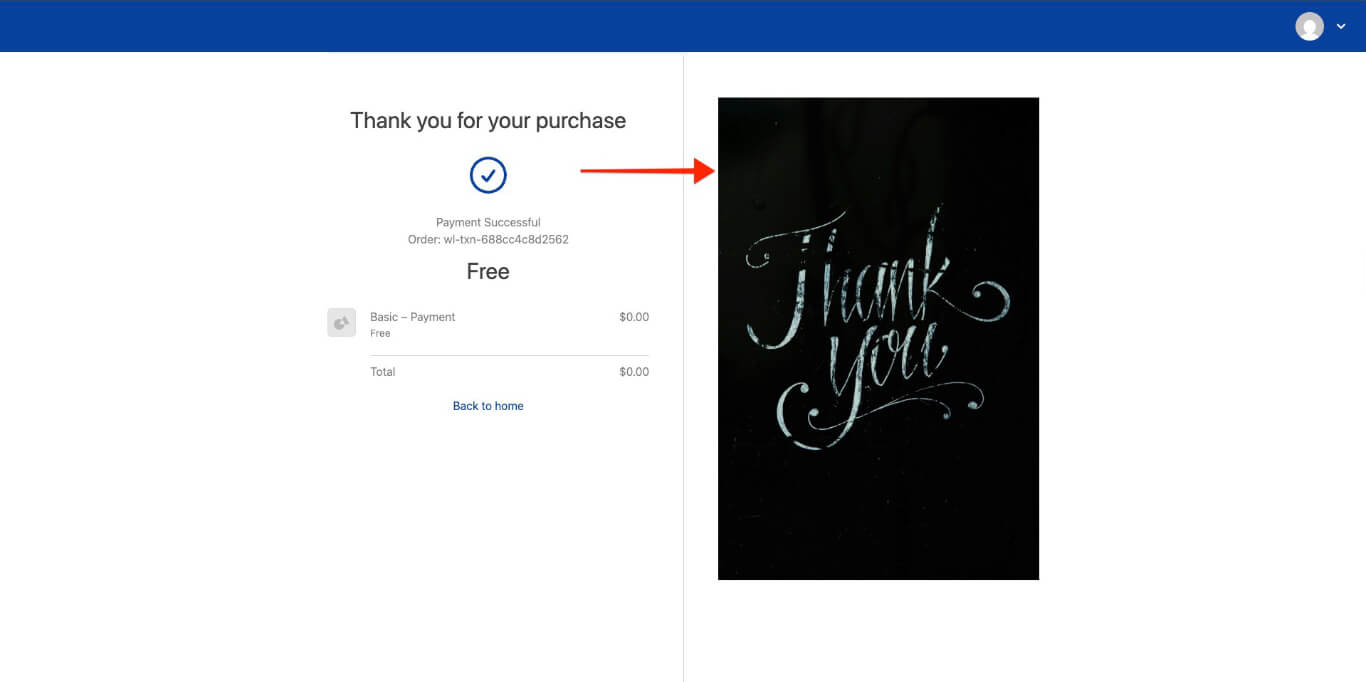
The welcome image can be a logo, photo, illustration, or other graphic that fits the website’s style and makes visitors feel welcome.
Add Custom Message
The custom message feature is an alternative to the usual purchase summary.
To configure a custom message:
- Access the Thank You Settings pop-up.
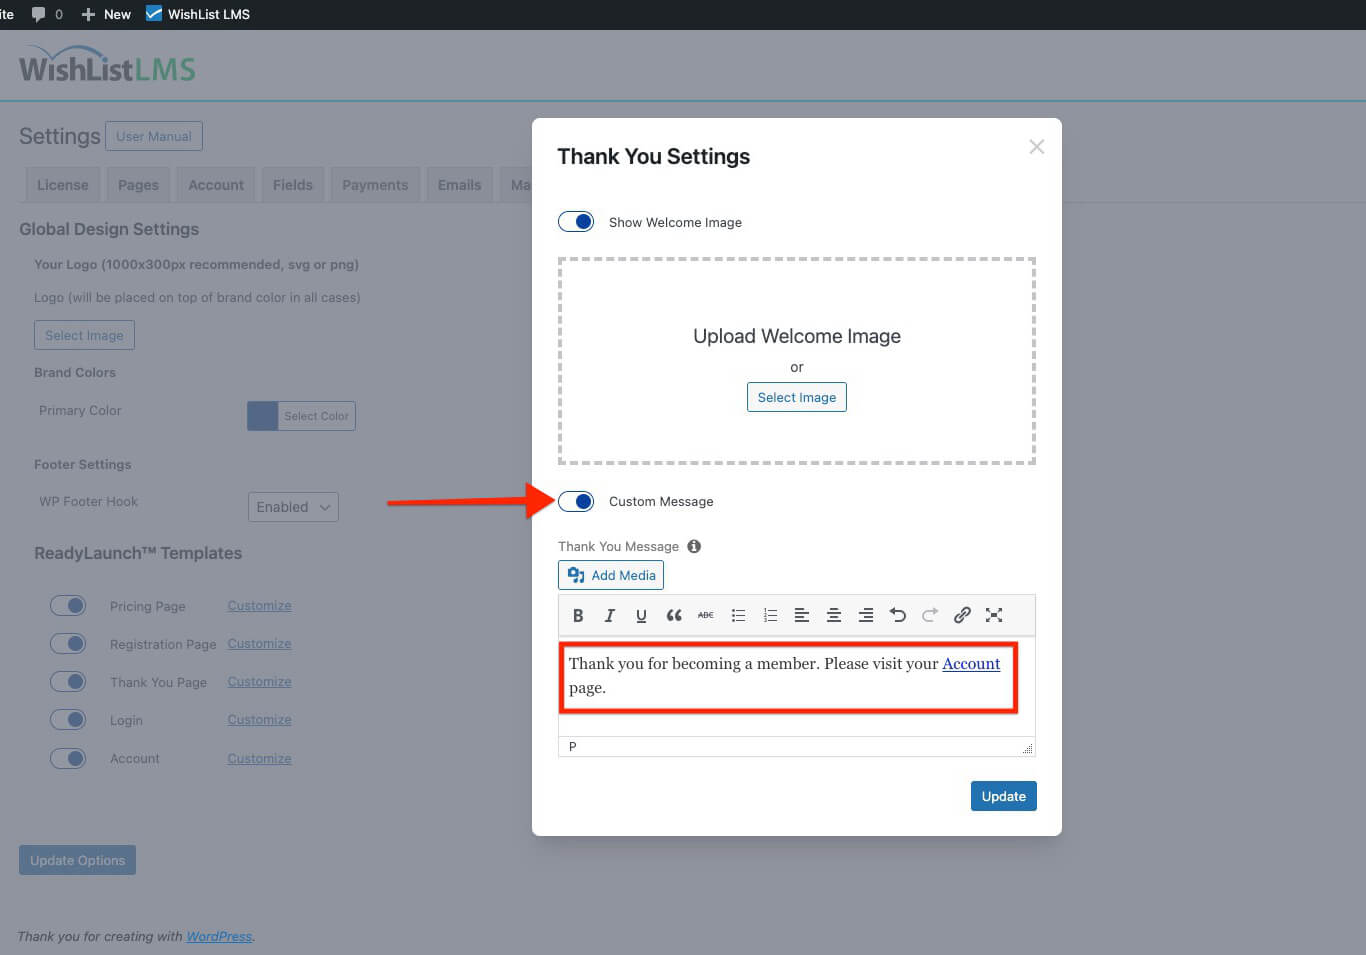
- Toggle on the Custom Message option.
- Add the desired content in the text editor.

- Cliquez sur Update to apply the changes.
When turned on, it shows a personalized message instead of the purchase summary.
Deactivating the LaunchPad™ Thank You Page Template
Site admins can return to the classic WishList LMS Thank You Page if needed.
To deactivate the LaunchPad™ Thank You Page template:
- Naviguez jusqu'à Dashboard > WishList LMS > Settings.
- Click on the LaunchPad™ tab.
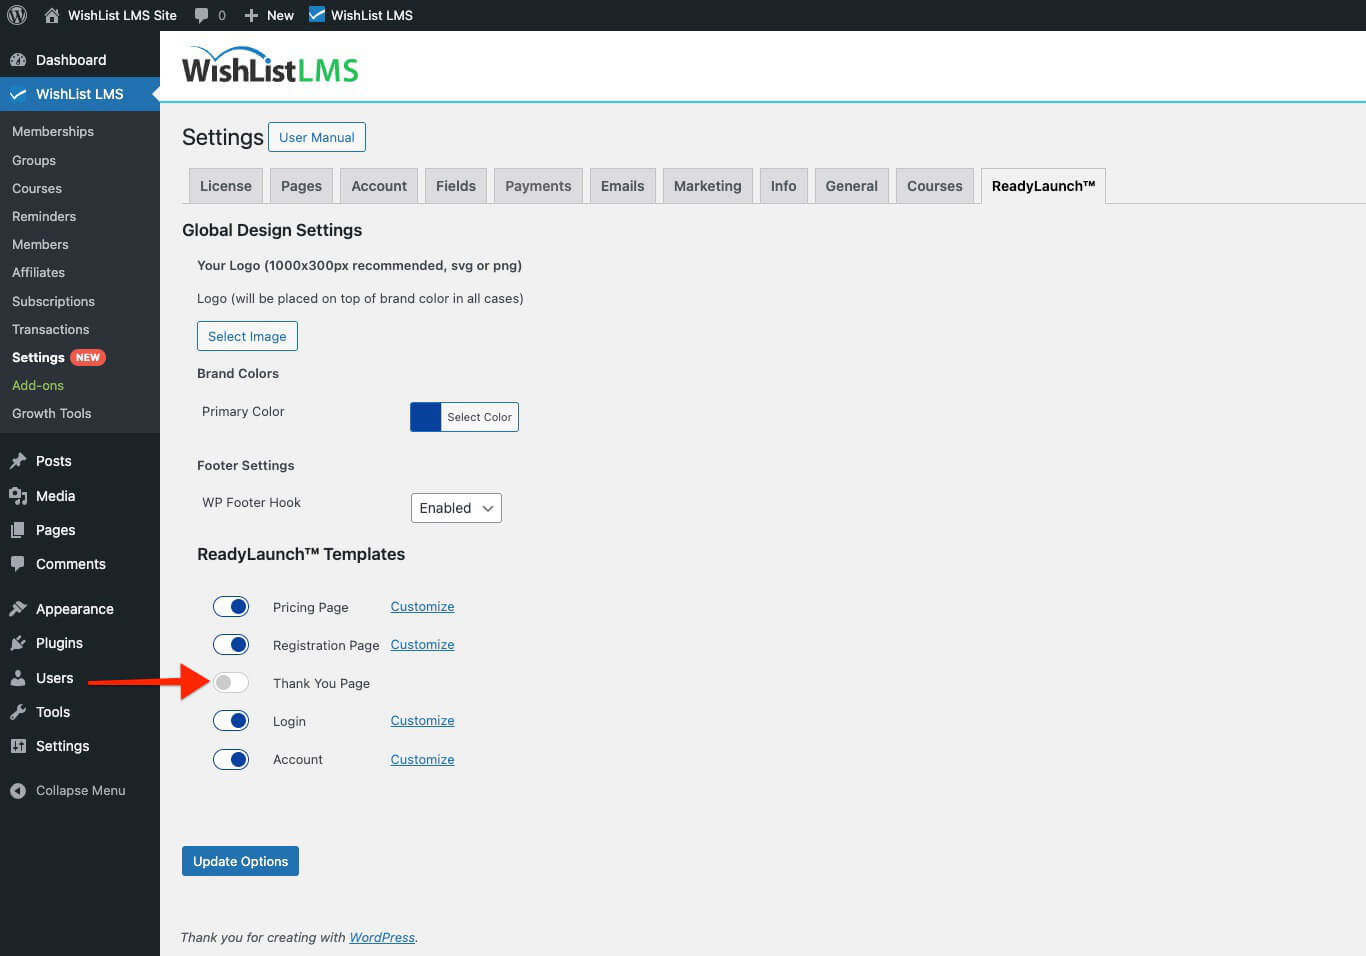
- Toggle the Thank You option off.
- Cliquez sur Update to apply the changes.
This change restores the classic thank you page design and features.
Shortcode Limitations
The LaunchPad™ Thank You Page can’t be added to custom pages using shortcodes. This can be a problem for sites that want very special thank-you pages.
Site admins need to design a custom thank-you page themselves. You can’t import elements from the LaunchPad™ Thank You Page template into a custom page.