Connecting users to registration pages not only helps grow your membership site but also enhances user engagement. Moreover, WishList LMS makes it easy to add registration links to your website. For instance, you can include links in menus, group pages, or as direct links and shortcodes. Ultimately, this streamlined process can significantly boost your membership numbers.
This guide will show you how to add registration links using these methods.
Adding Registration Pages to Your Menu
Menu links make it easy for users to register. They can go straight to registration pages or to custom pages with registration options. These links can also direct users to group pricing pages, improving the overall experience.
Enable Memberships and Groups in Menu Options
Before adding registration links to your menu, enable the required screen options:
- Navigate to Dashboard > Appearance > Menus.
- Click Screen Options at the top of the page.
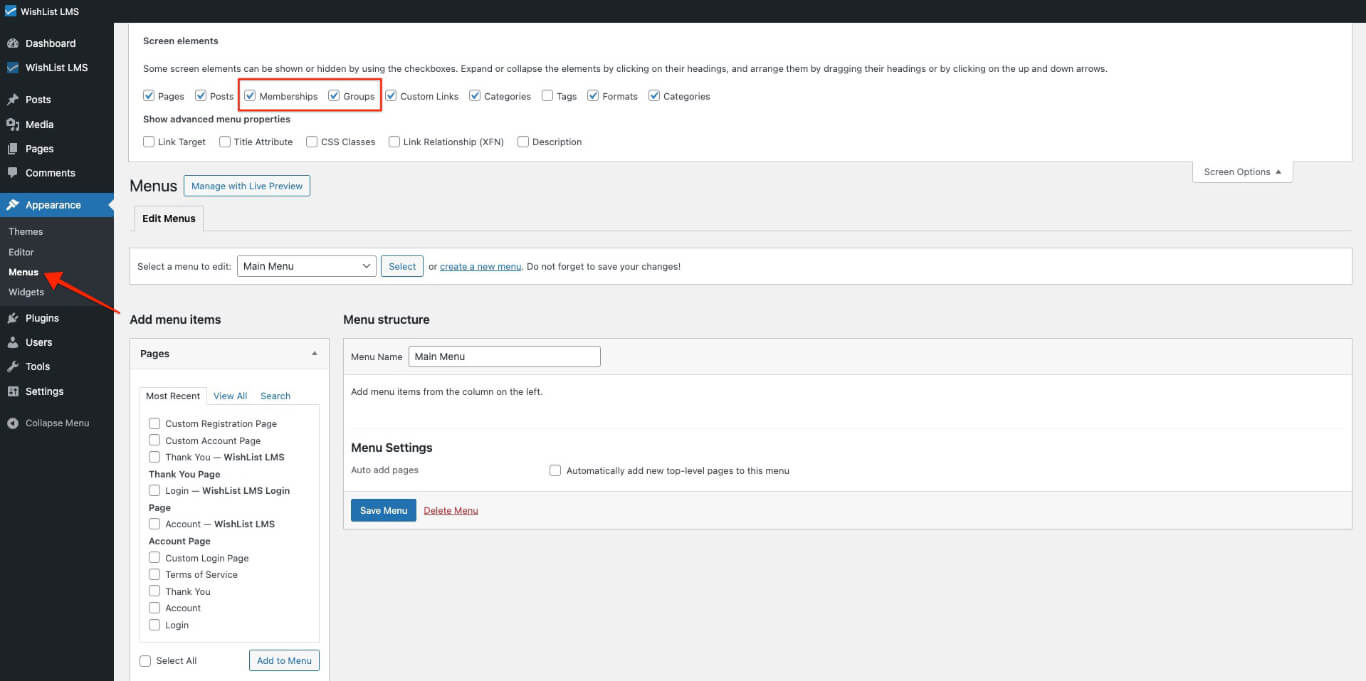
- Check the boxes for Memberships and Groups.
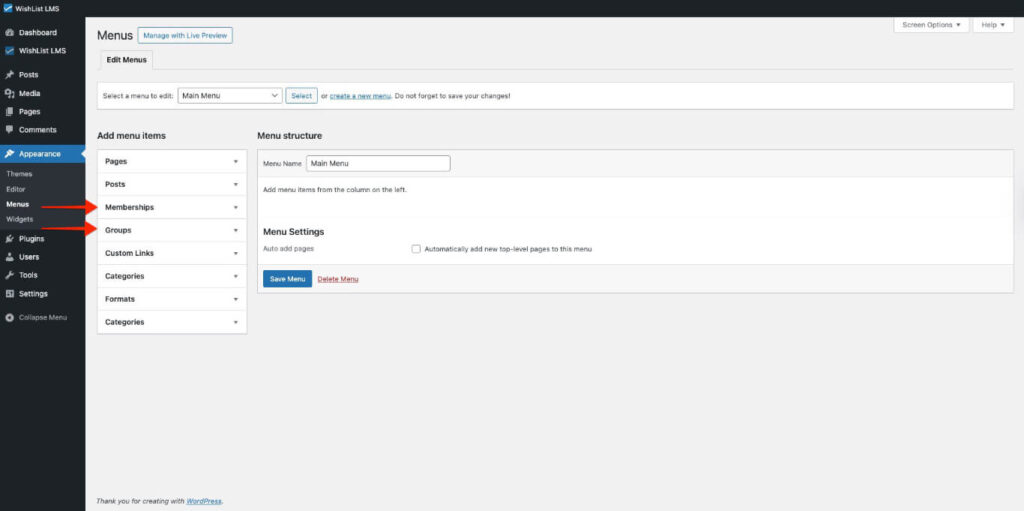
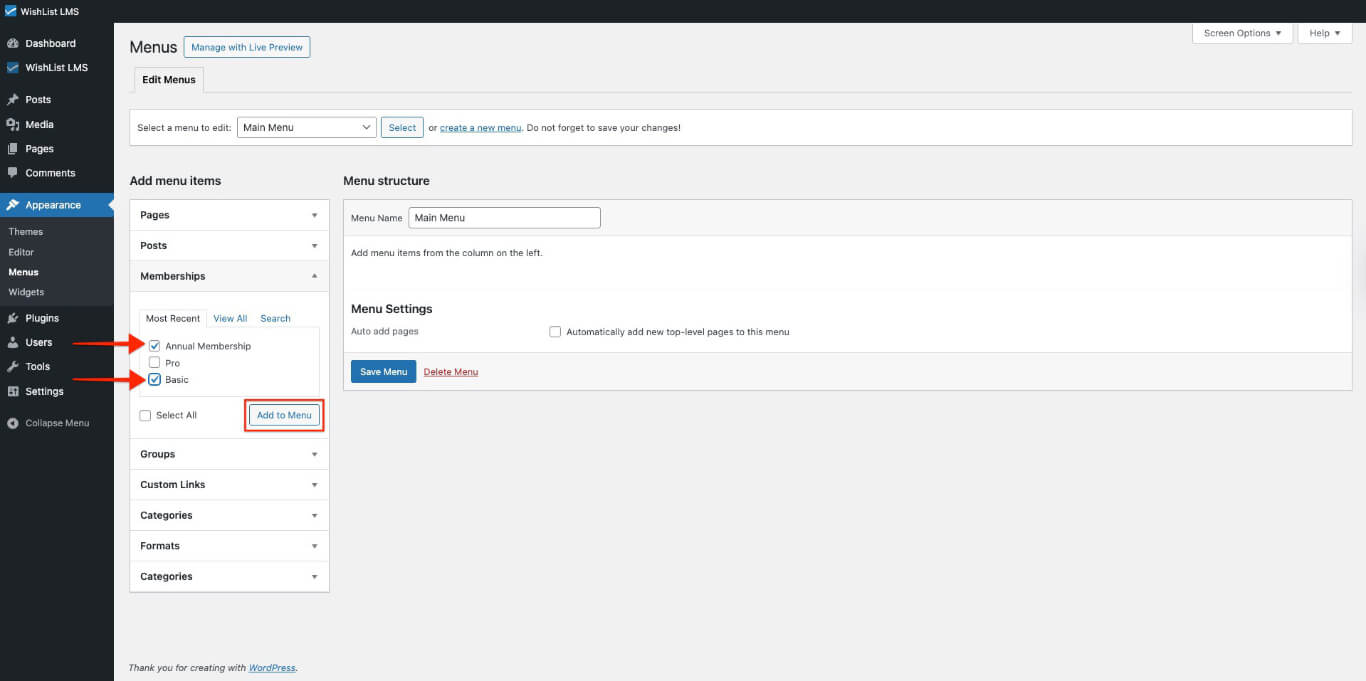
Add Registration Pages Links to Your Menu
After enabling the screen options, you can then proceed to add registration links to your menu:
- Select Memberships or Groups tab from the left panel.
- Click on the membership for its registration page or the group for its pricing page.
- Click the Add to Menu button.
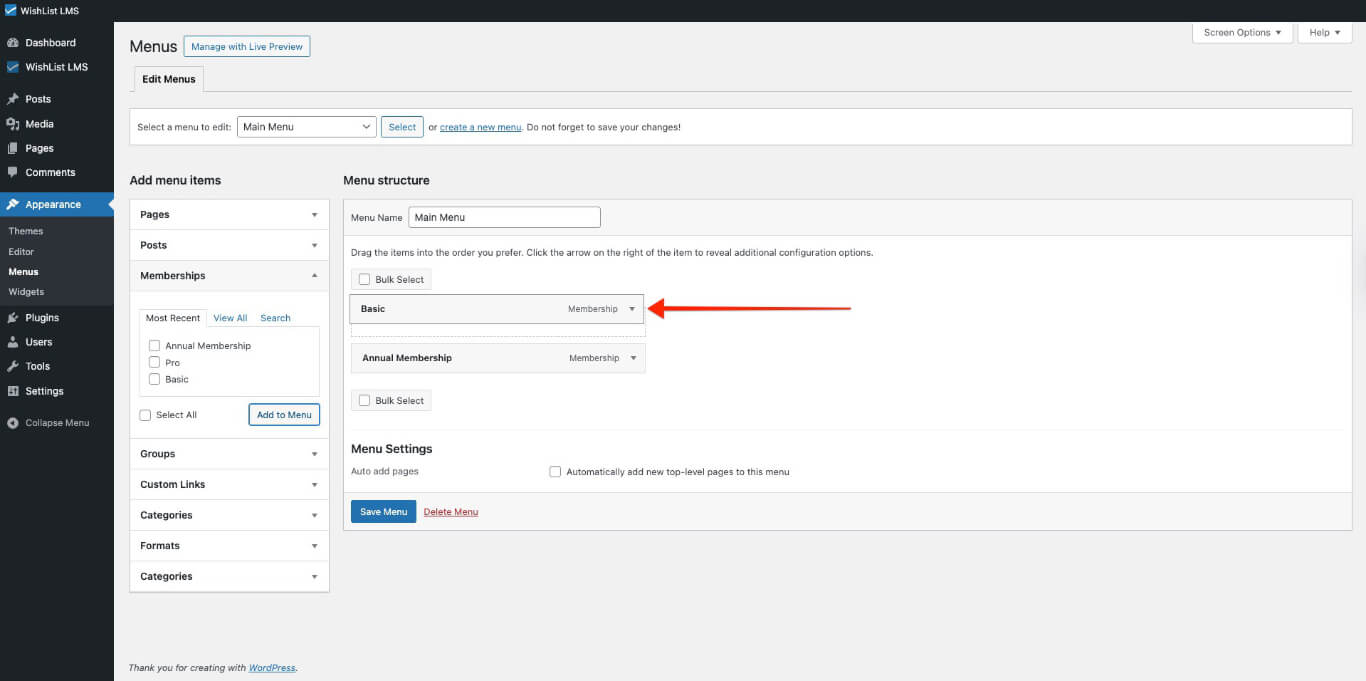
- Drag and drop the menu item to position it where needed in your menu structure.
Using Group Pricing Pages
Group pricing pages, for instance, show many memberships in one place. As a result, this makes it easy for users to compare options and ultimately pick the best one.
When you create a group, WishList LMS makes a pricing page with buttons for each membership that link to registration pages.
The group pricing page, therefore, shows all memberships and, in addition, lets users sign up.
Direct Links and Registration URLs
Each membership has a special link you can use on your website. Find this link on the membership edit page in your dashboard.
Finding the Direct Registration Page Link
Locate direct registration links for any membership:
- Navigate to Dashboard > WishList LMS > Memberships.
- Click the desired membership to edit.
- Find the registration URL in the membership settings.
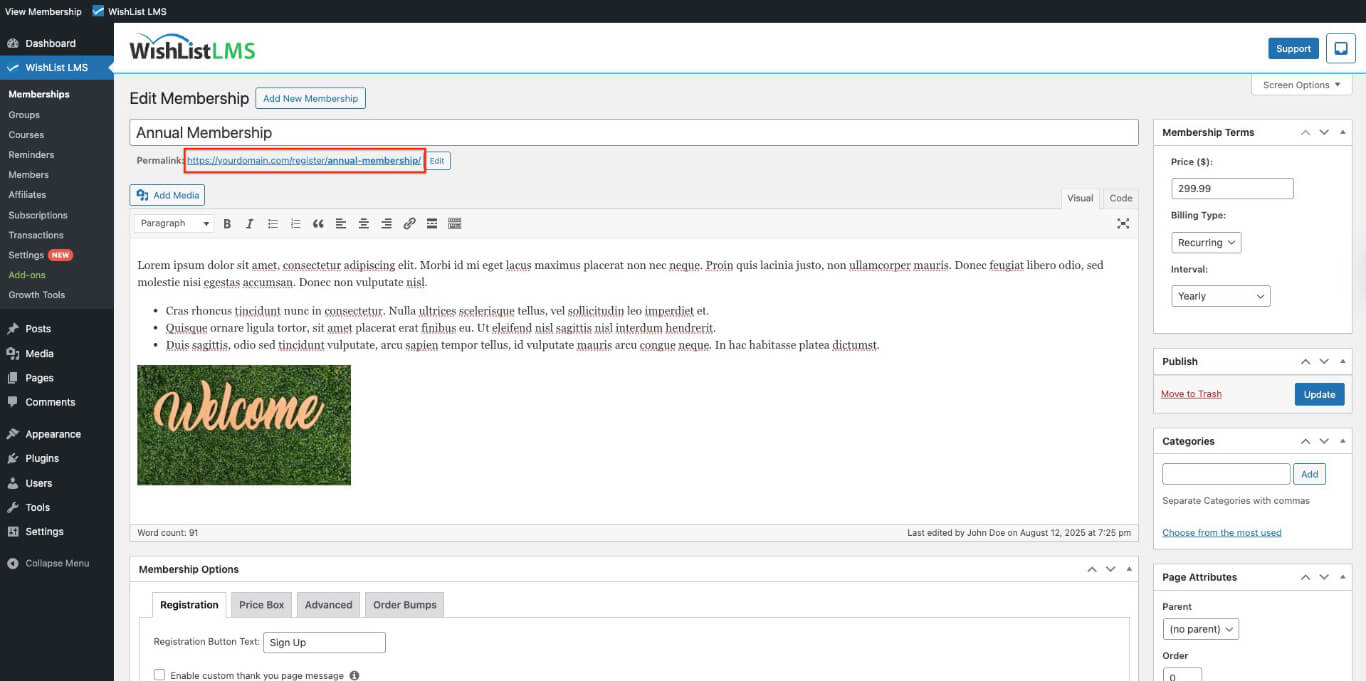
Use this URL on buttons, links, or any website part where users need to register.
WishList LMS Registration Shortcodes
WishList LMS has shortcodes that allow you to display registration links and forms on any page or post. These shortcodes enable you to choose how registration options appear on your website, providing greater flexibility and customization.
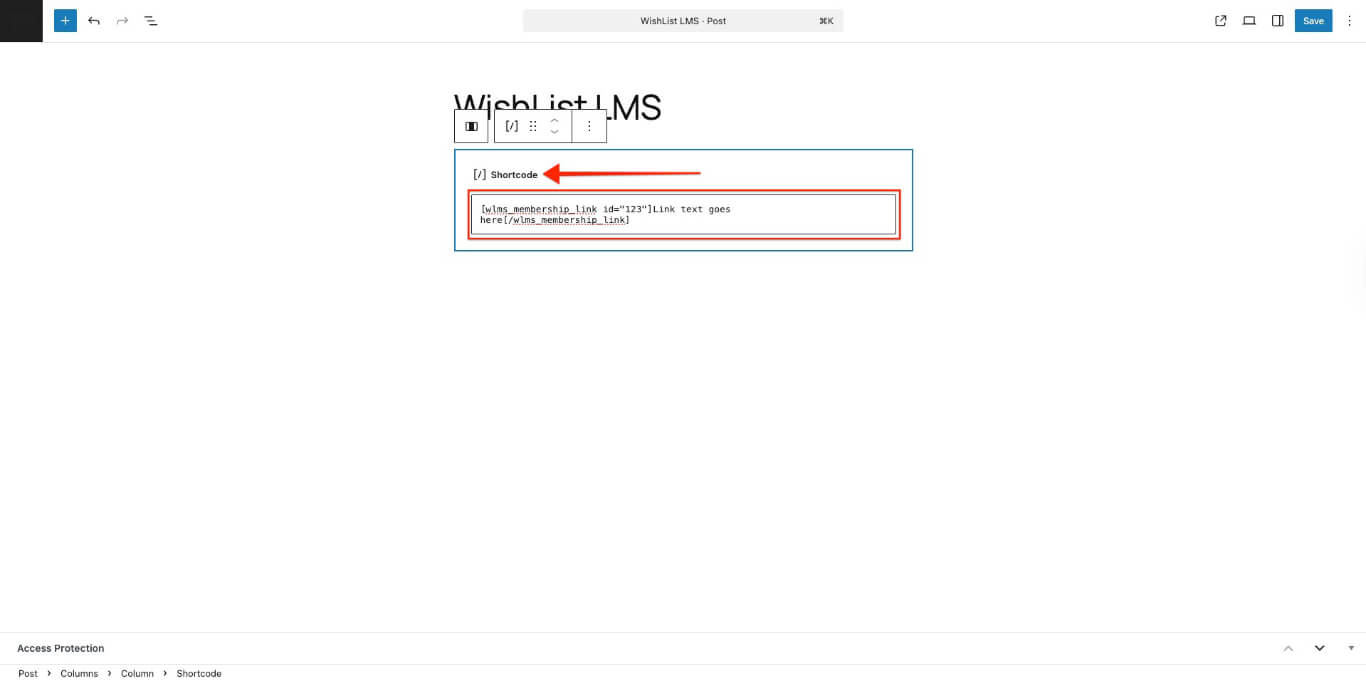
Membership Link Shortcode
Create a clickable link to the registration page.
Link text goes here
Replace 123 with your ID. Put your link text between the tags.
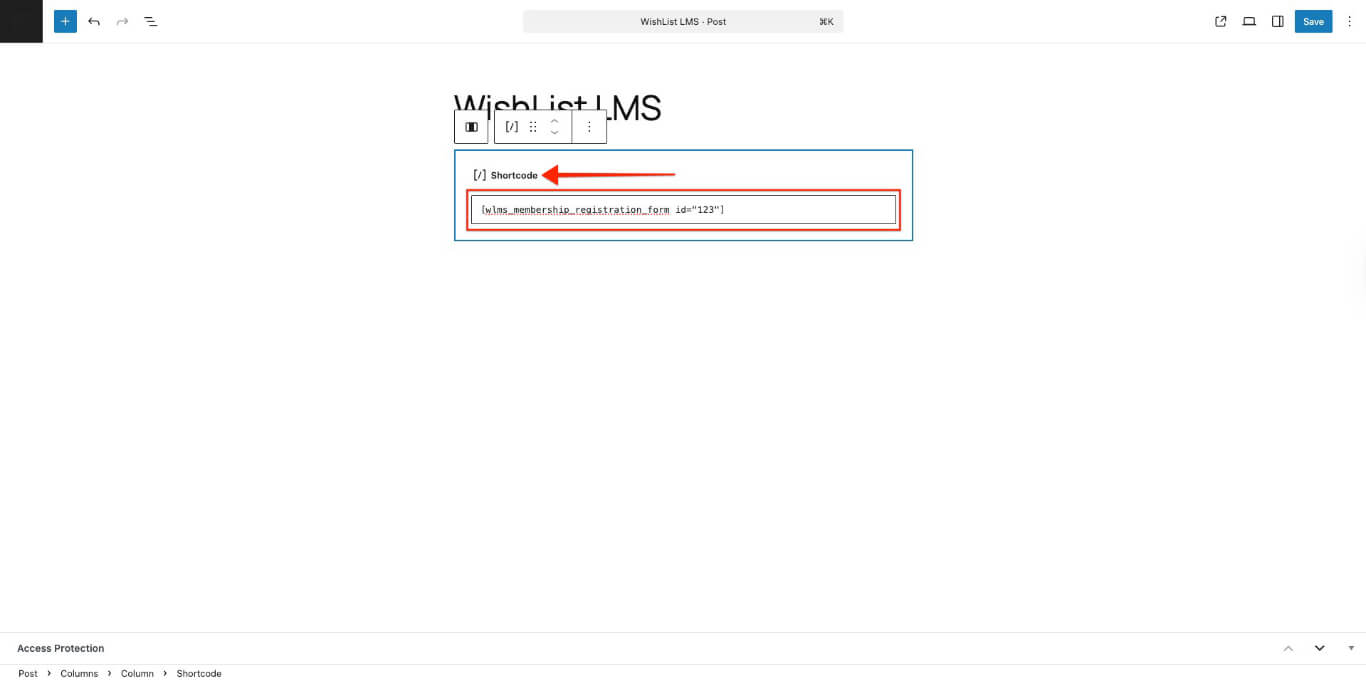
Registration Form Shortcode
Add a registration form to any page or post.
Replace 123 with your membership ID. This code shows the registration form directly.
Best Practices for Registration Links
Think about these ways to share registration links:
- Put registration links in your main menu.
- Use group pages for different membership options.
- Add registration forms with shortcodes to relevant pages.
- Registration links should be put in the footer for easy access.
Using different links helps visitors find your registration page from anywhere on your website.